I picked up a nail gun for the first time on a Saturday morning. By Sunday evening, my living room looked like something out of an interior design magazine.
I did not repaint. I did not buy new furniture. I just put up a shiplap accent wall on one wall and the entire room shifted.
What surprised me most was how simple the process actually was. A shiplap accent wall bedroom or a living room shiplap accent wall sounds like a big project. It really is not.
This guide covers everything I learned, and a few things I wish I had known before I started.
What Is a Shiplap Accent Wall?
Shiplap is a style of wooden board where each plank overlaps the one below it slightly, creating a clean groove line between rows. That gap is what gives shiplap its signature look.
Homeowners choose it over wallpaper, tile, or plain paint because it adds physical texture to a wall, not just visual pattern. It feels substantial and built-in rather than applied.
The two main installation styles are horizontal and vertical.
Horizontal shiplap makes a room feel wider and is the more classic farmhouse look. A vertical shiplap accent wall draws the eye upward, making ceilings feel taller and the room feel more proportional.
Shiplap works in almost any room. Bedrooms, living rooms, entryways, home offices, and even bathrooms all suit it well depending on the finish and color chosen.
33 Shiplap Accent Wall Ideas to Inspire Your DIY Project
Whether you want something classic and simple or bold and unexpected, this list covers the full range. Use it to find the direction that fits your space before you pick up a single board.
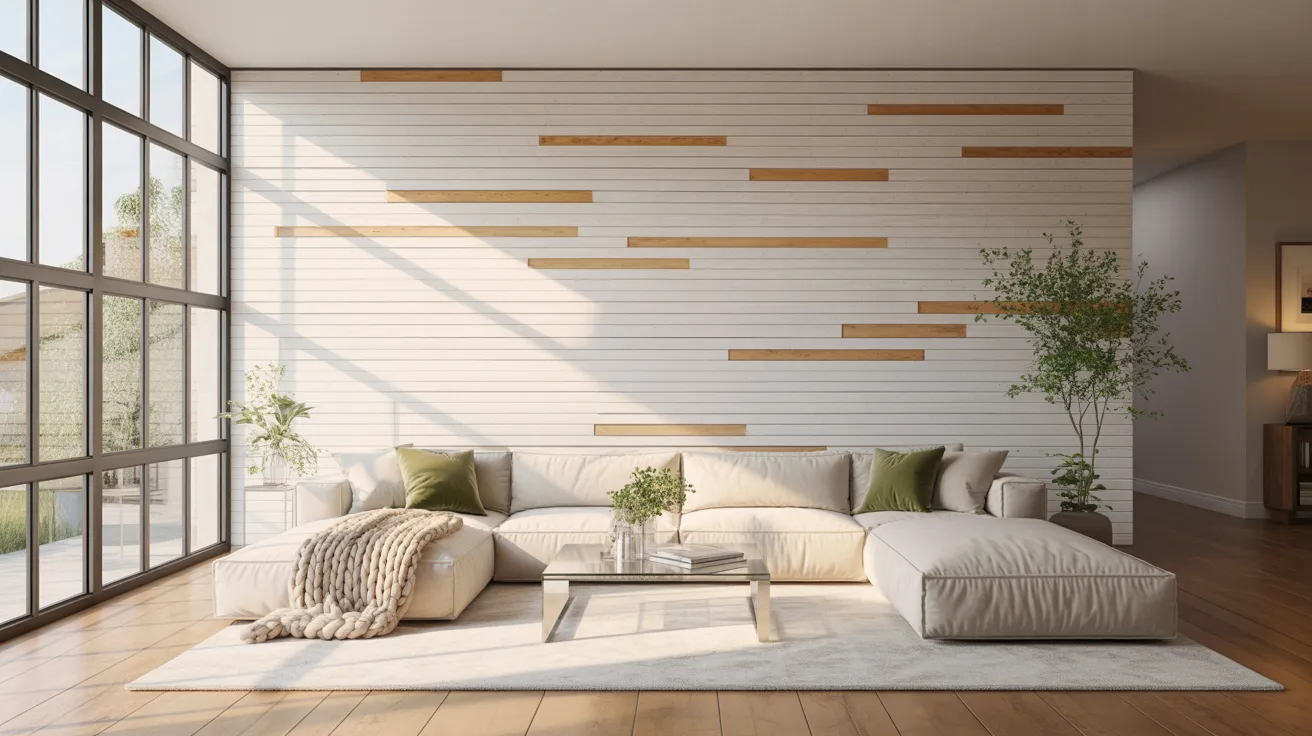
1. Classic Horizontal White Shiplap Wall
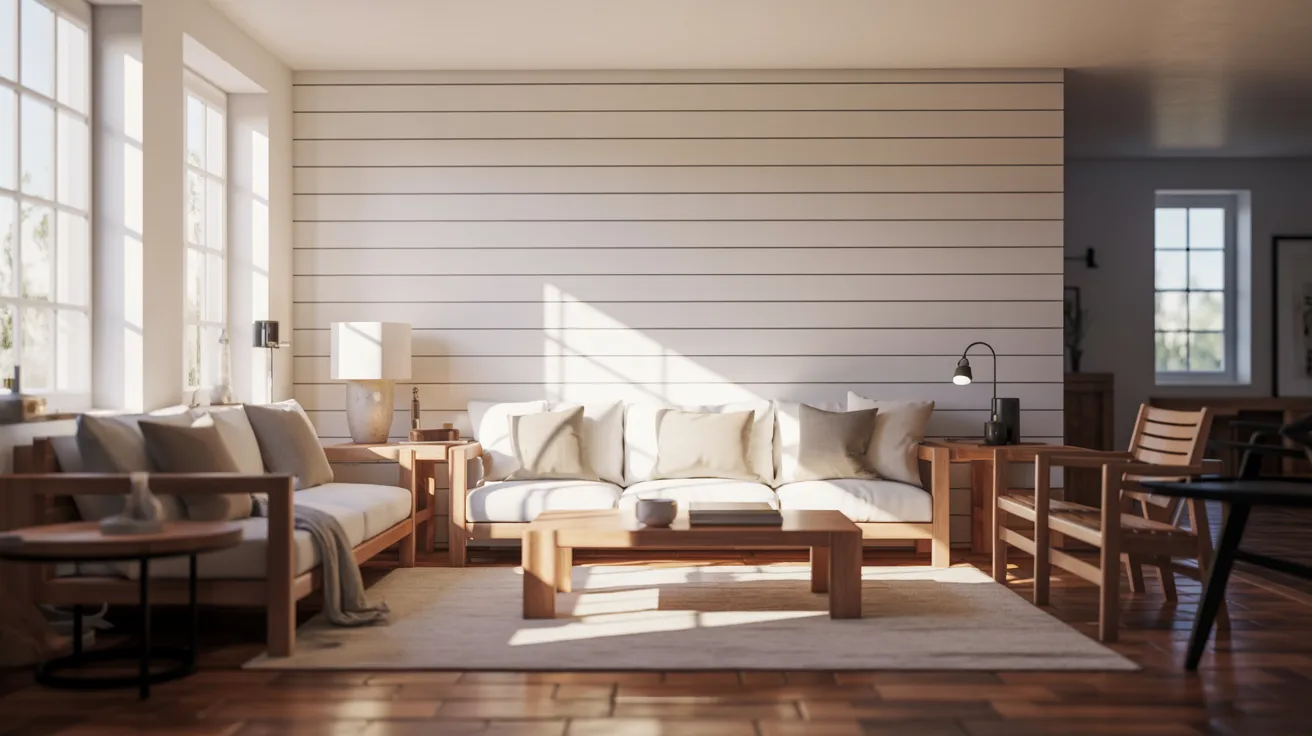
White horizontal shiplap is the look most people picture when they think of a shiplap accent wall. It is clean, bright, and works in virtually any room.
The white finish reflects light and makes smaller spaces feel more open without any structural changes.
It pairs well with warm wood tones, black metal fixtures, and natural textiles for a classic farmhouse result.
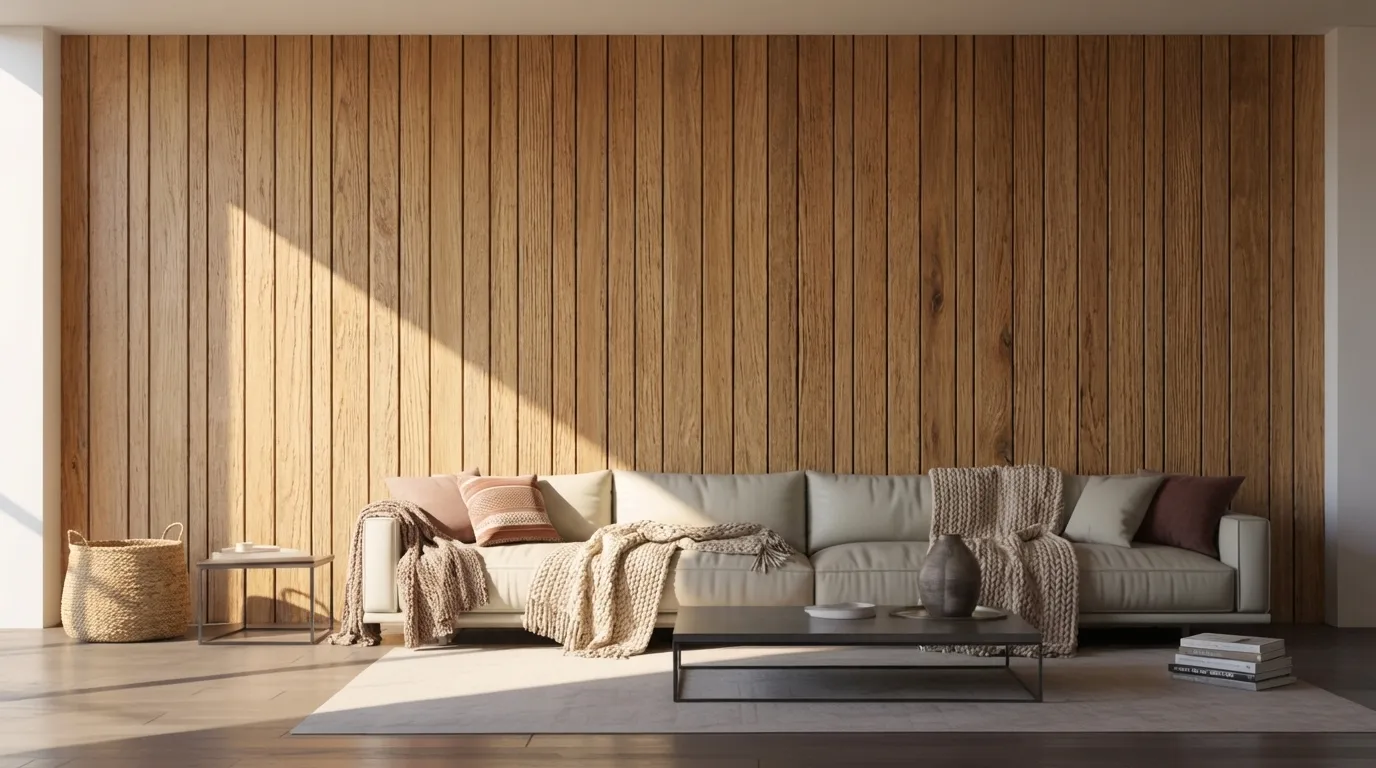
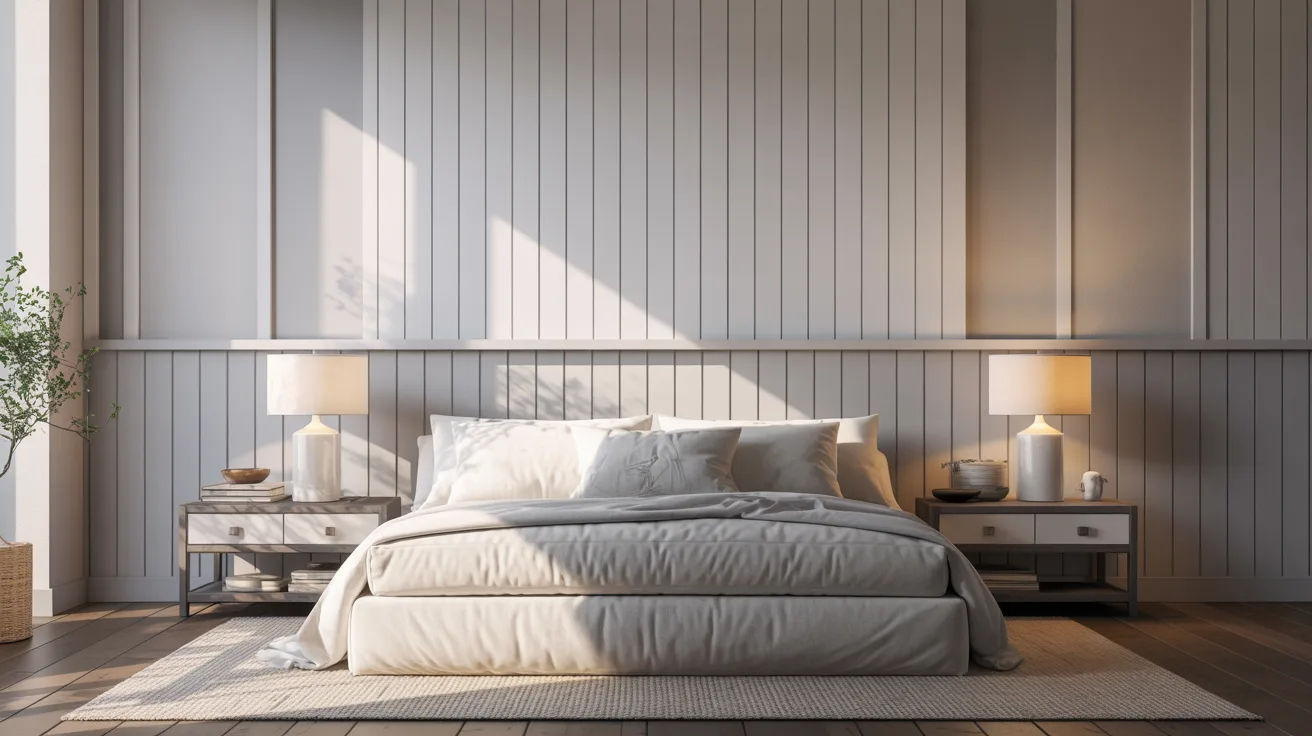
2. Modern Vertical Shiplap Accent Wall
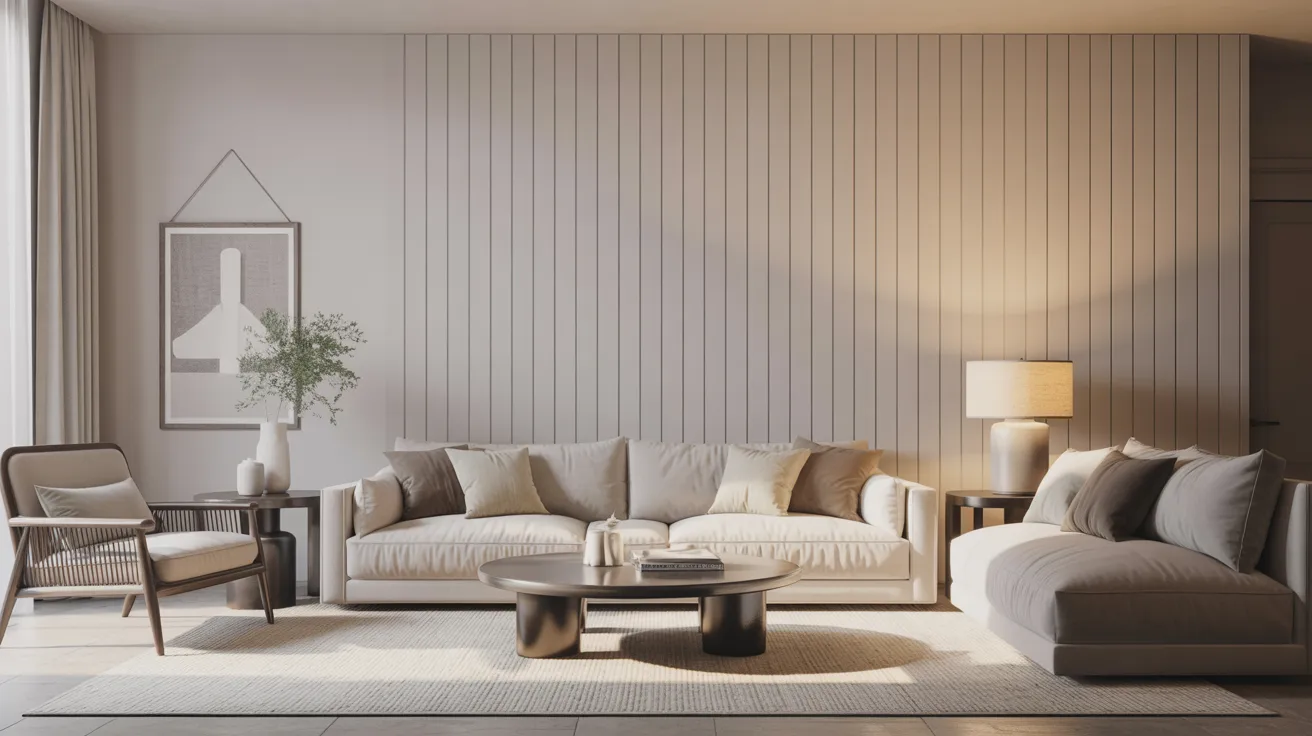
A vertical shiplap accent wall feels more contemporary than the traditional horizontal layout. The upward lines create a sense of height that works especially well in rooms with standard or low ceilings.
It also gives the wall a slightly more architectural, less rustic quality. A good fit for modern or transitional interiors.
Paint it in a muted tone like warm white or soft greige for the cleanest result.
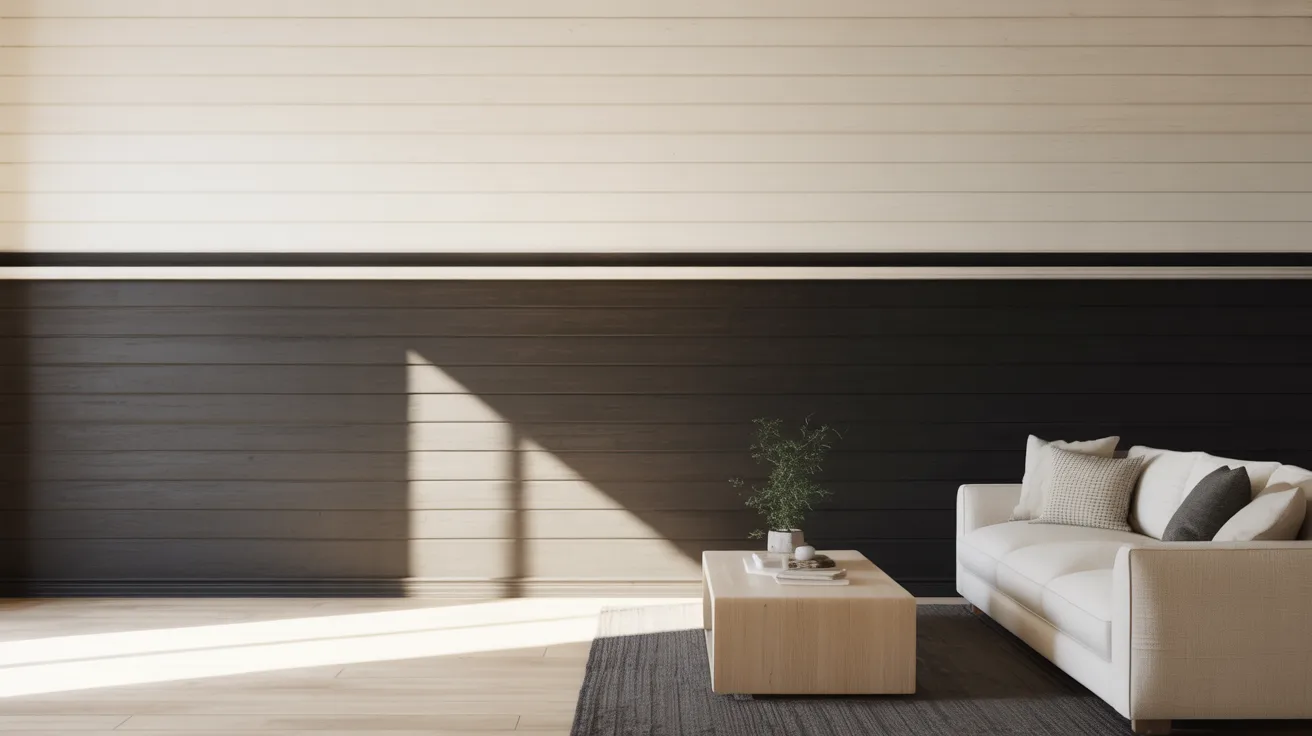
3. Dark Painted Shiplap Feature Wall
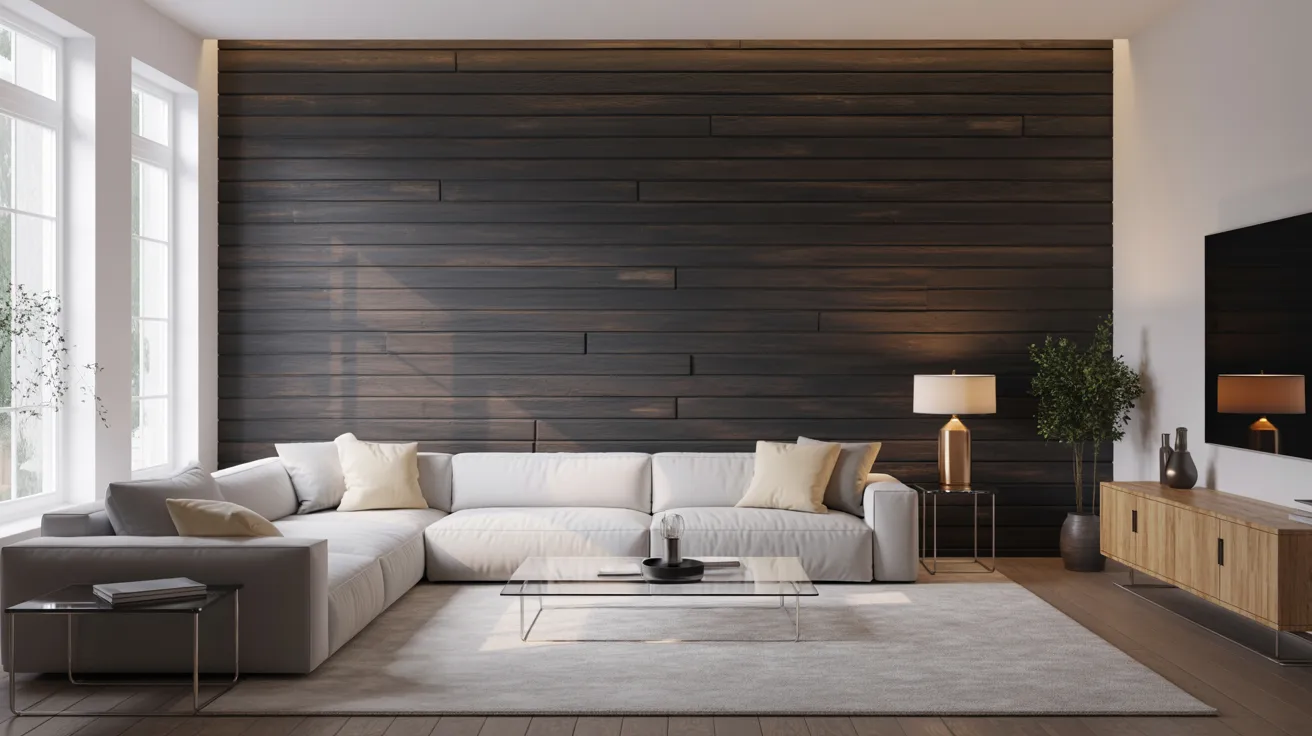
Deep navy, forest green, or charcoal shiplap makes a bold statement that works well as a single feature wall. The dark tone adds drama without making the whole room feel heavy.
It works especially well in living rooms and home offices where a strong focal point adds to the atmosphere.
Keep the surrounding walls light to let the dark shiplap panel do its job.
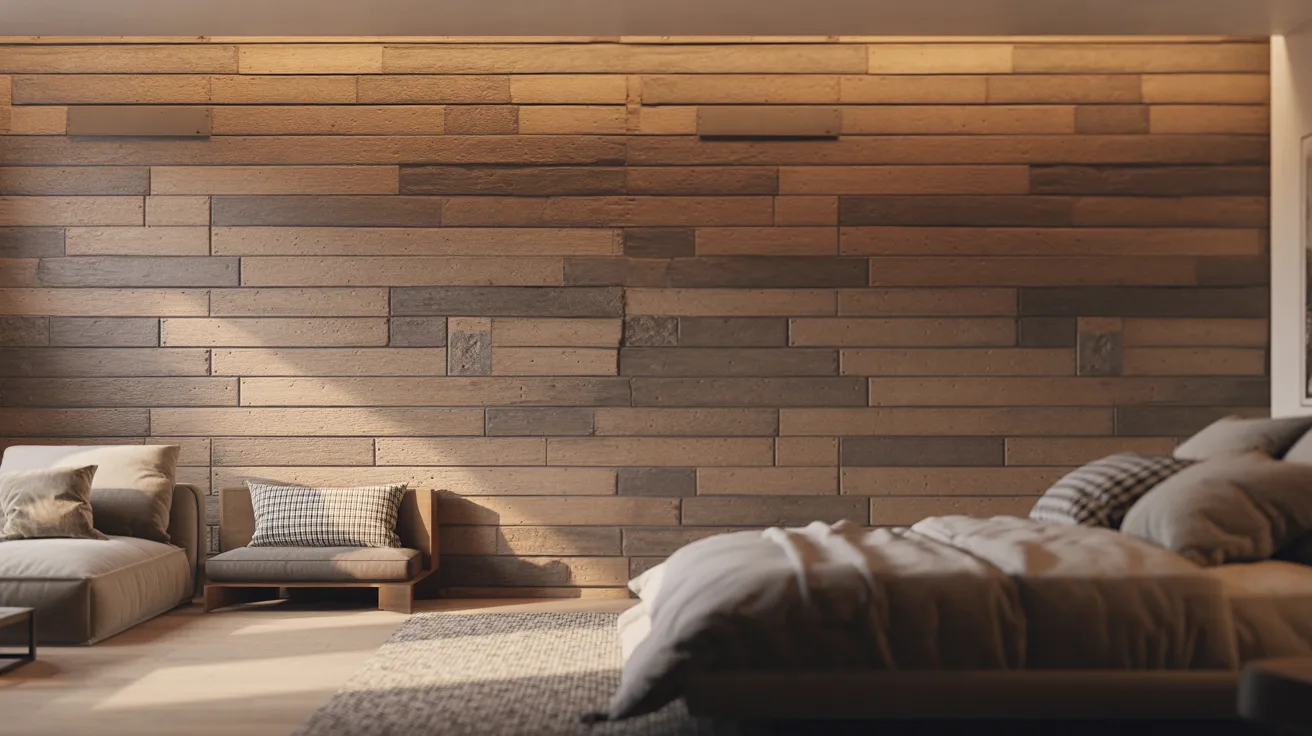
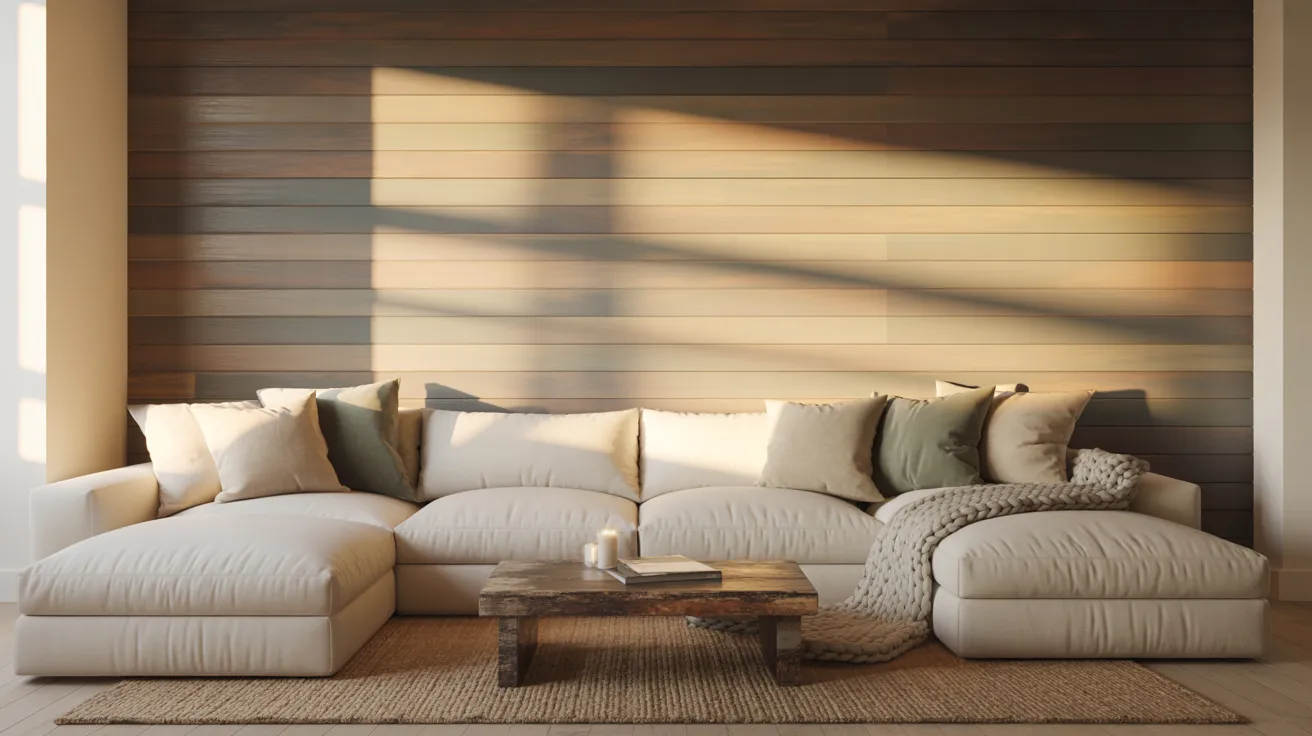
4. Natural Wood Shiplap Statement Wall

Unfinished or lightly sealed wood shiplap brings warmth and organic texture to a room without any paint at all. The grain variation between boards adds natural interest that a solid finish cannot replicate.
This works beautifully in bedrooms and living spaces where a cozy, grounded feel is the goal.
Seal the wood with a matte clear coat to protect it and keep the natural tone looking fresh over time.
5. Two-Tone Shiplap Design
Painting the lower half of a shiplap wall one color and the upper half another creates a layered, intentional look. It works particularly well when the lower tone is darker and the upper is lighter.
A thin trim piece or a simple painted line at the transition point keeps the division sharp and clean.
This approach adds visual structure to a plain wall without requiring any additional materials.
6. Shiplap With Floating Shelves
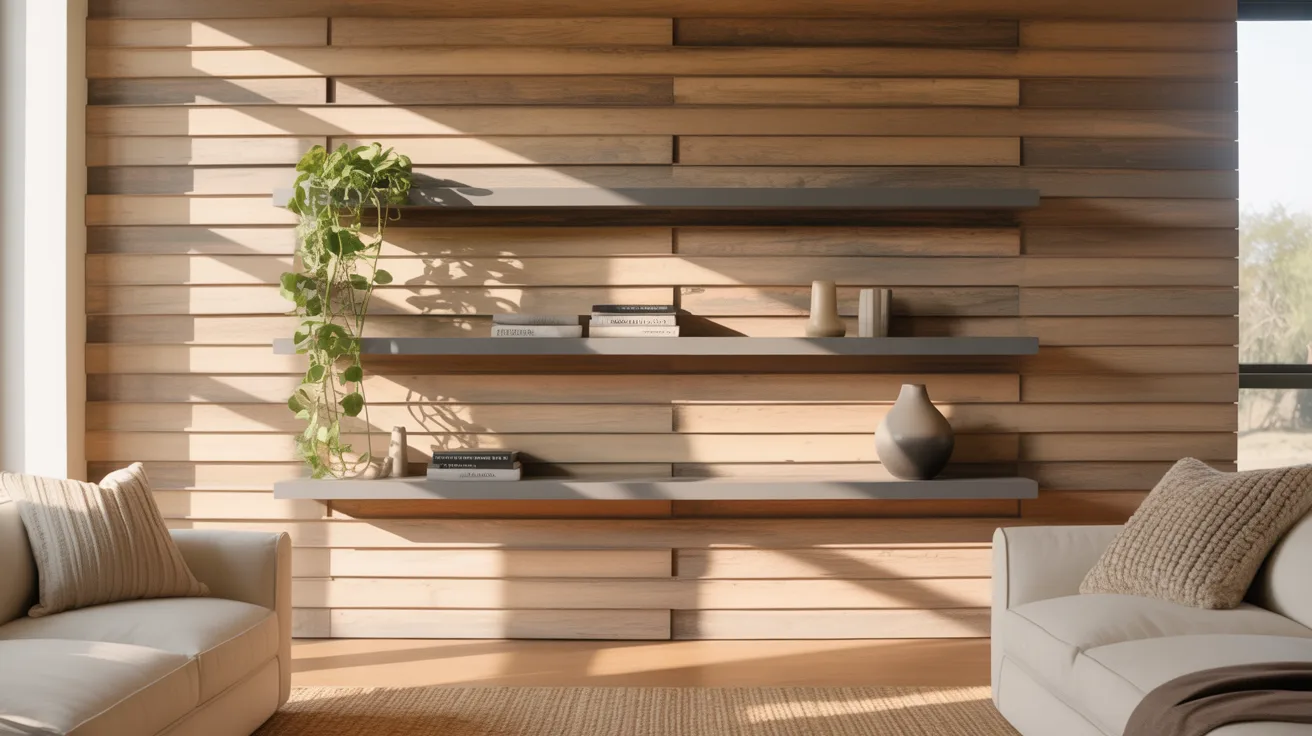
Installing floating shelves directly into a shiplap accent wall turns a decorative feature into a functional one. The shelves sit flush against the boards and look like they were always meant to be there.
This combination works well in living rooms, kitchens, and home offices where storage and display space are both needed.
Keep shelf styling simple so the shiplap texture remains the main visual element.
7. Rustic Farmhouse Shiplap Accent Wall
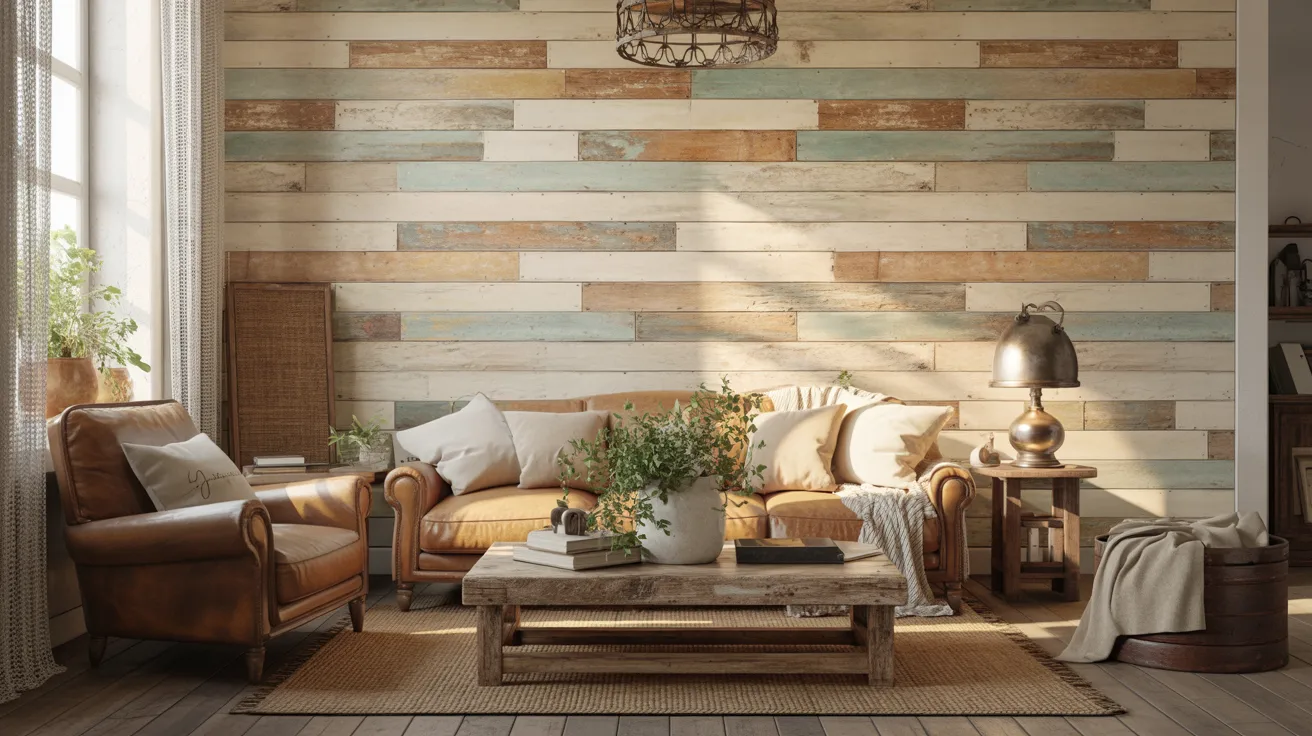
Slightly weathered or hand-distressed shiplap boards create a farmhouse look that feels warm and well-worn rather than brand new. The imperfections are part of the appeal.
This style suits neutral color palettes best. Cream, oat, and warm white all complement the distressed wood tone well.
Pair it with vintage-style lighting and natural fiber textiles to complete the farmhouse aesthetic.
8. Minimalist Scandinavian Shiplap Wall
For a Scandinavian approach, keep the shiplap boards thin, the color pale, and the styling around the wall extremely simple. No clutter, no heavy frames, just clean lines and breathing room.
Soft white or very light gray works best for this style. The texture provides all the visual interest the wall needs.
This is one of the more understated takes on a shiplap accent wall and one of the most timeless.
9. Coastal Inspired Shiplap Wall
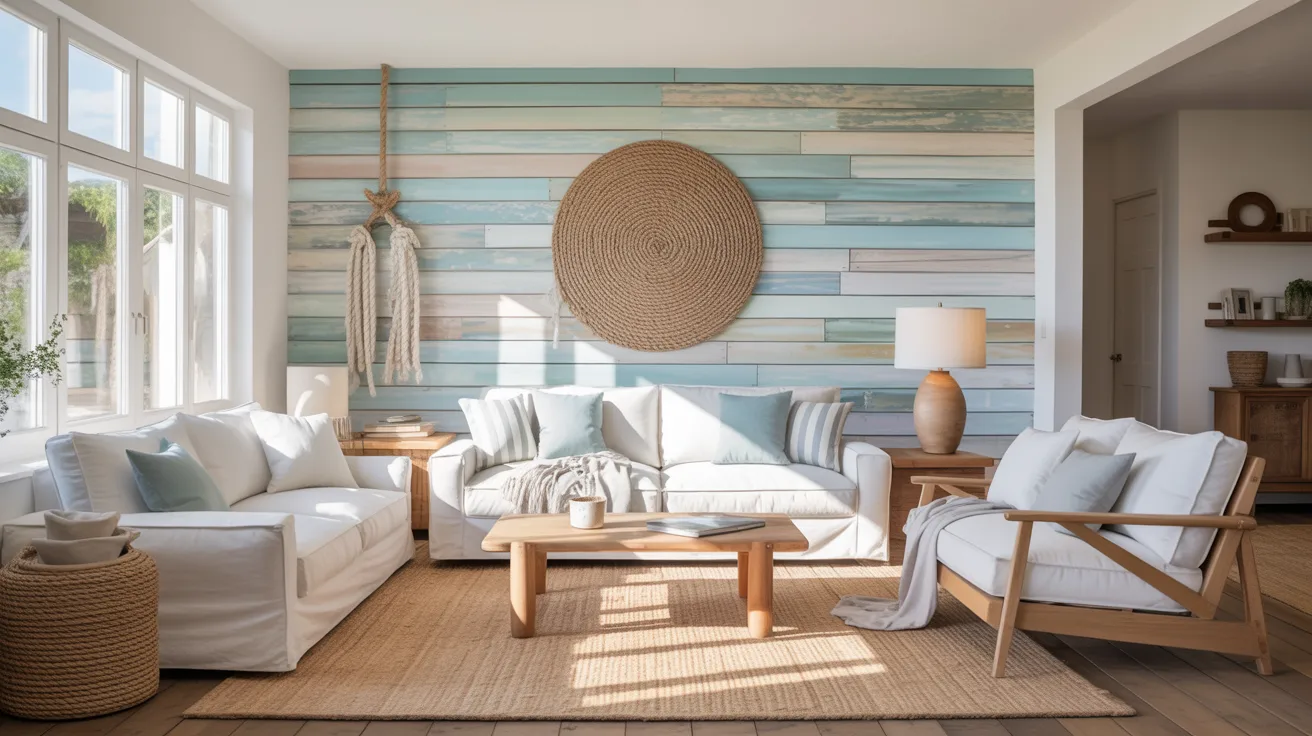
Light blue, sea salt, or driftwood-toned shiplap immediately brings a coastal quality to any room. Combine it with natural rope textures, white furniture, and warm wood accents.
Horizontal boards suit the coastal look better than vertical ones. They echo the horizon line in a way that feels natural to the style.
It works particularly well in beach homes, sunrooms, and casual living spaces.
10. Shiplap Accent Wall With LED Lighting
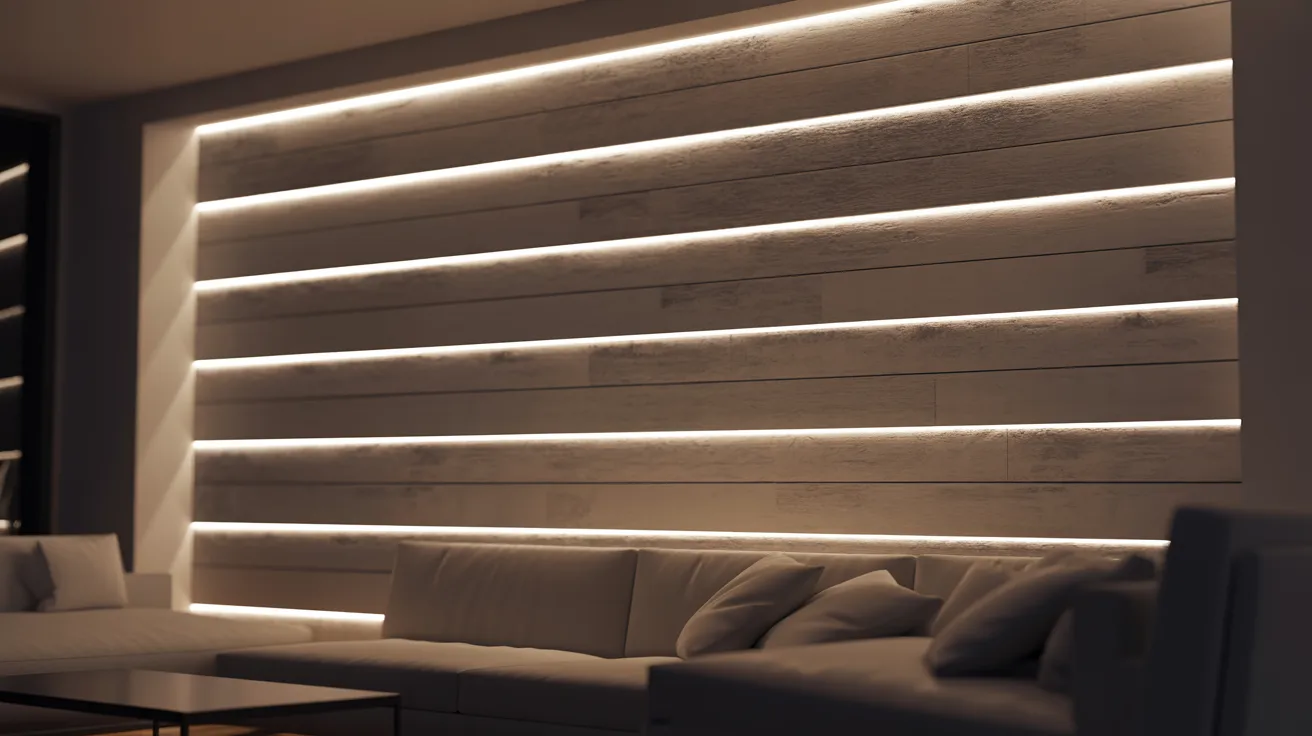
Running LED strip lights along the groove lines of a shiplap wall creates a dramatic, layered effect after dark. Each gap catches the light and casts a soft glow across the board surface.
This works especially well on a living room shiplap accent wall behind the sofa or around a TV setup.
Use warm white LEDs for a cozy atmosphere or cool white for a more modern, high-contrast result.
11. Chevron Pattern Shiplap Wall
![]()
Cutting shiplap boards at 45-degree angles and alternating direction creates a chevron pattern that is far more eye-catching than a standard horizontal layout.
It takes more precise measuring and cutting, but the finished result reads as genuinely custom and designer.
Best suited to smaller accent walls where the pattern can be appreciated up close.
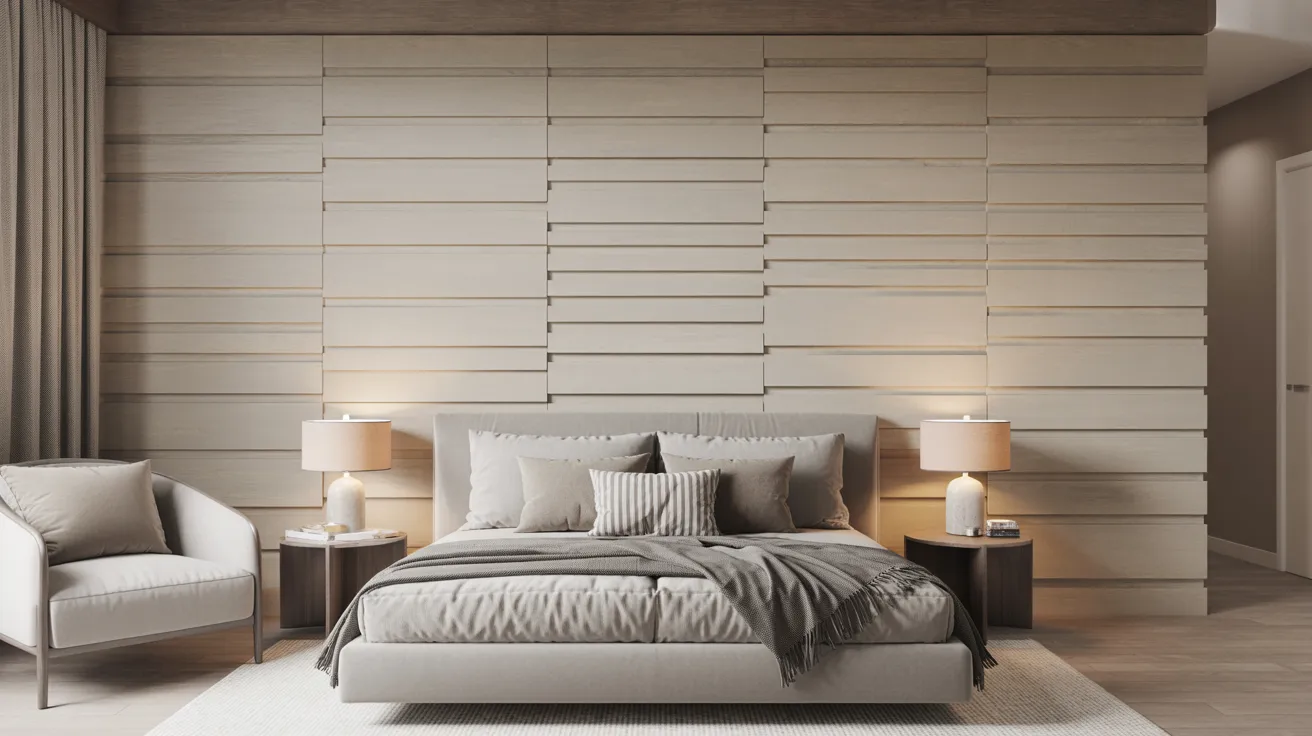
12. Wide Plank Shiplap Feature Wall
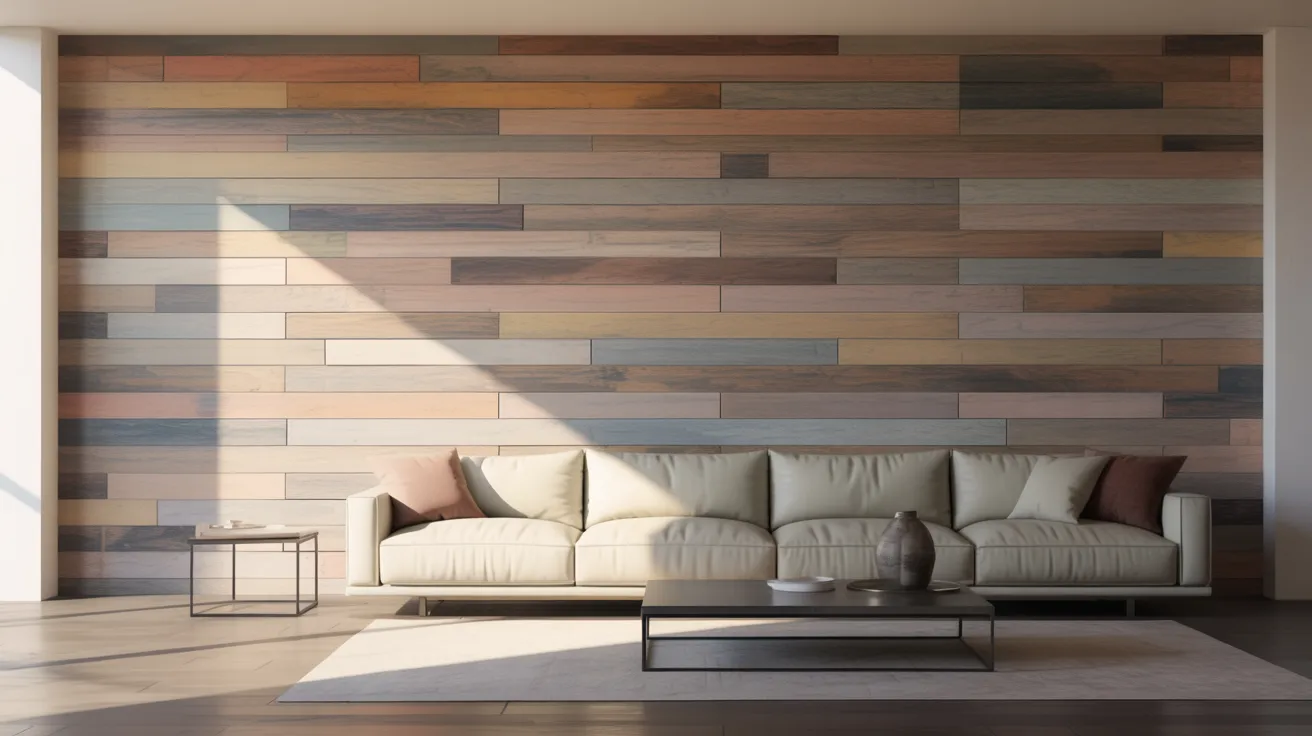
Wider shiplap boards, around six to eight inches, give a wall a bolder, more modern look than standard narrow panels. Fewer seams means the wall feels more open and less busy.
This works well in contemporary homes where the goal is texture without too much visual noise.
A single wide-plank shiplap wall in a living room reads as a deliberate architectural choice.
13. Narrow Panel Shiplap Accent Wall
On the opposite end, very narrow shiplap strips, around two to three inches wide, create a dense, textural surface with lots of fine detail.
The tighter pattern adds depth and complexity that reads differently from across the room than up close.
It suits traditional and transitional interiors especially well.
14. Shiplap With Picture Ledge Display
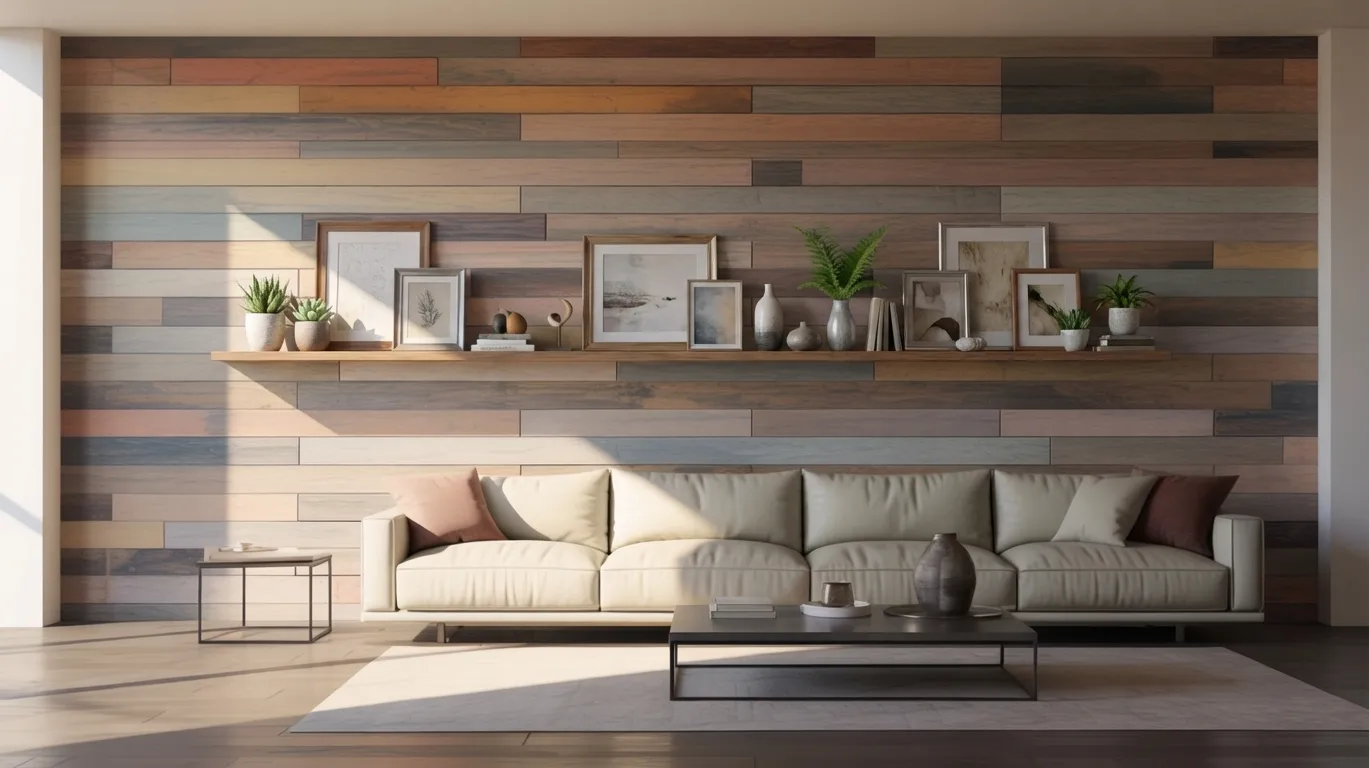
A single picture ledge mounted across the middle of a shiplap wall creates a layered display opportunity. Lean frames, small plants, and objects against the boards for a relaxed, gallery-style result.
The shiplap acts as a textured backdrop that makes the items displayed in front of it look more intentional.
This combination works well in bedrooms, hallways, and living rooms.
15. Floor-to-Ceiling Shiplap Wall
Taking shiplap from the floor all the way to the ceiling maximizes the impact of the material and makes the wall feel like a proper architectural feature.
It works in rooms with enough natural light to handle the amount of wood texture without feeling heavy or closed in.
Keep the color light if ceiling height is standard. Floor-to-ceiling dark shiplap needs generous light to avoid feeling oppressive.
16. Half Wall Shiplap Design
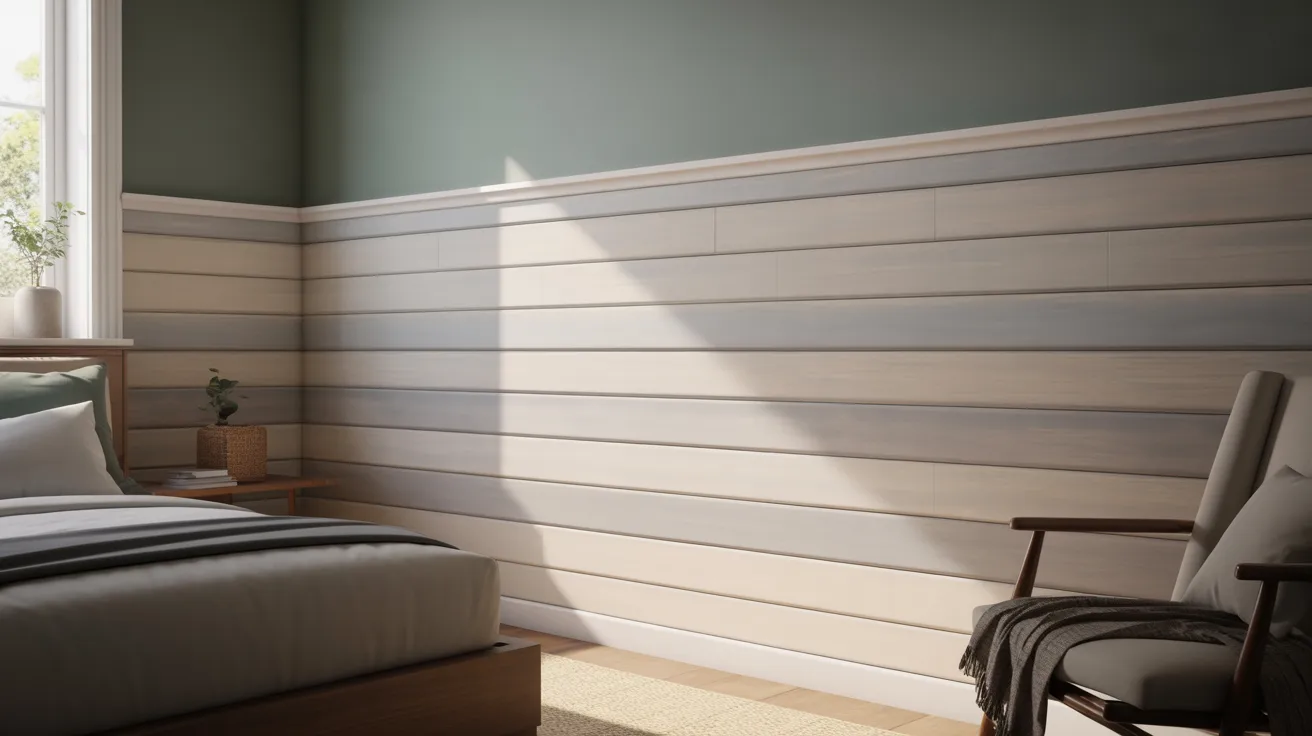
Installing shiplap only on the lower half of a wall, typically to chair rail height, adds texture without committing to a full wall installation. It is a good option for first-time DIYers.
The upper portion can be painted in a complementary tone for a finished two-layer look.
This approach works well in dining rooms, hallways, and bedrooms.
17. Board and Batten Plus Shiplap Combination
Running vertical batten strips over a horizontal shiplap base creates a layered, custom millwork effect that looks far more expensive than it actually is.
The combination adds both horizontal and vertical movement to a single wall and suits traditional and transitional home styles.
It is one of the more involved DIY options on this list but the result is worth the extra effort.
18. Fireplace Shiplap Feature Wall
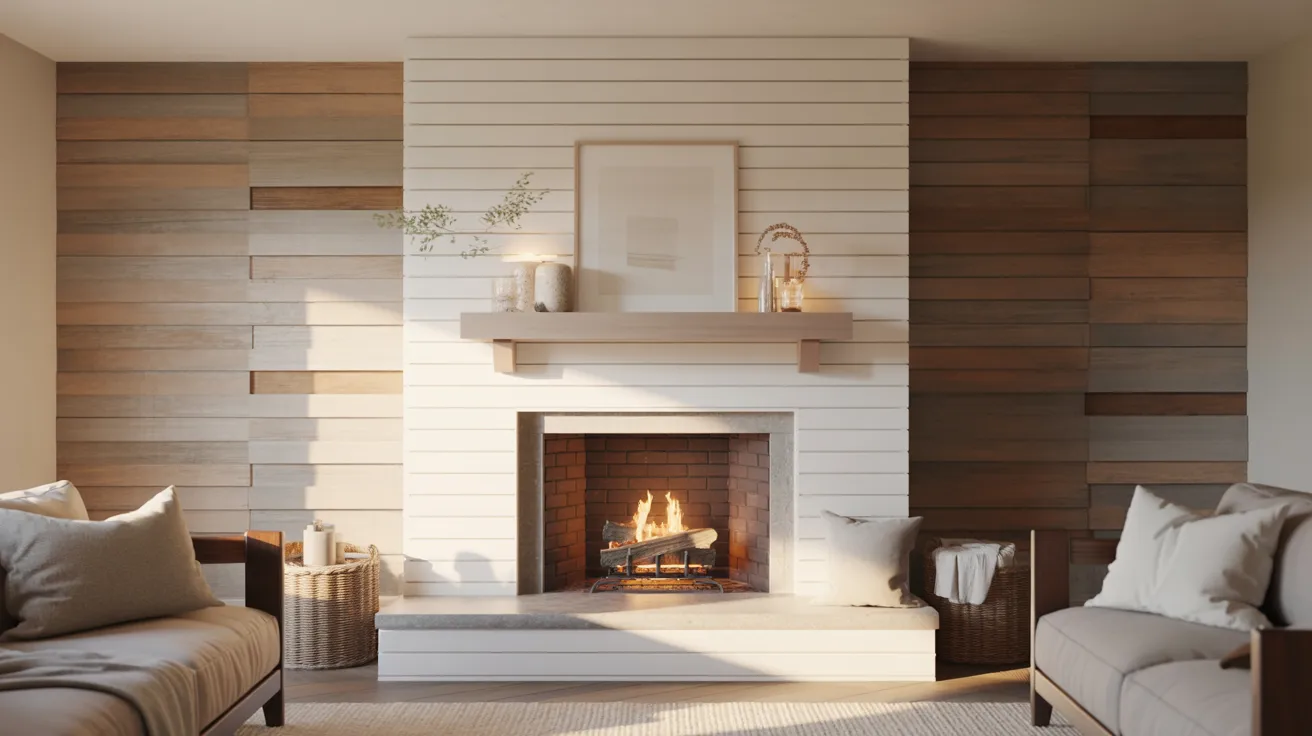
Framing a fireplace with shiplap on the surrounding wall creates a cohesive, designed focal point that makes the whole room feel more intentional.
It is one of the most popular applications of a living room shiplap accent wall for good reason. The combination of fire and wood texture is naturally warm and inviting.
Paint it white or a soft neutral to keep the fireplace itself as the main visual focus.
19. TV Wall With Shiplap Panels

Mounting a TV directly onto a shiplap wall gives the screen a built-in, purposeful look rather than the floating-box-on-a-white-wall effect.
Running the boards horizontally at the same level as the TV keeps the eye moving across the wall rather than just up to the screen.
This is one of the most functional applications of a shiplap accent wall and one of the easiest to style.
20. Painted Gray Shiplap Accent Wall
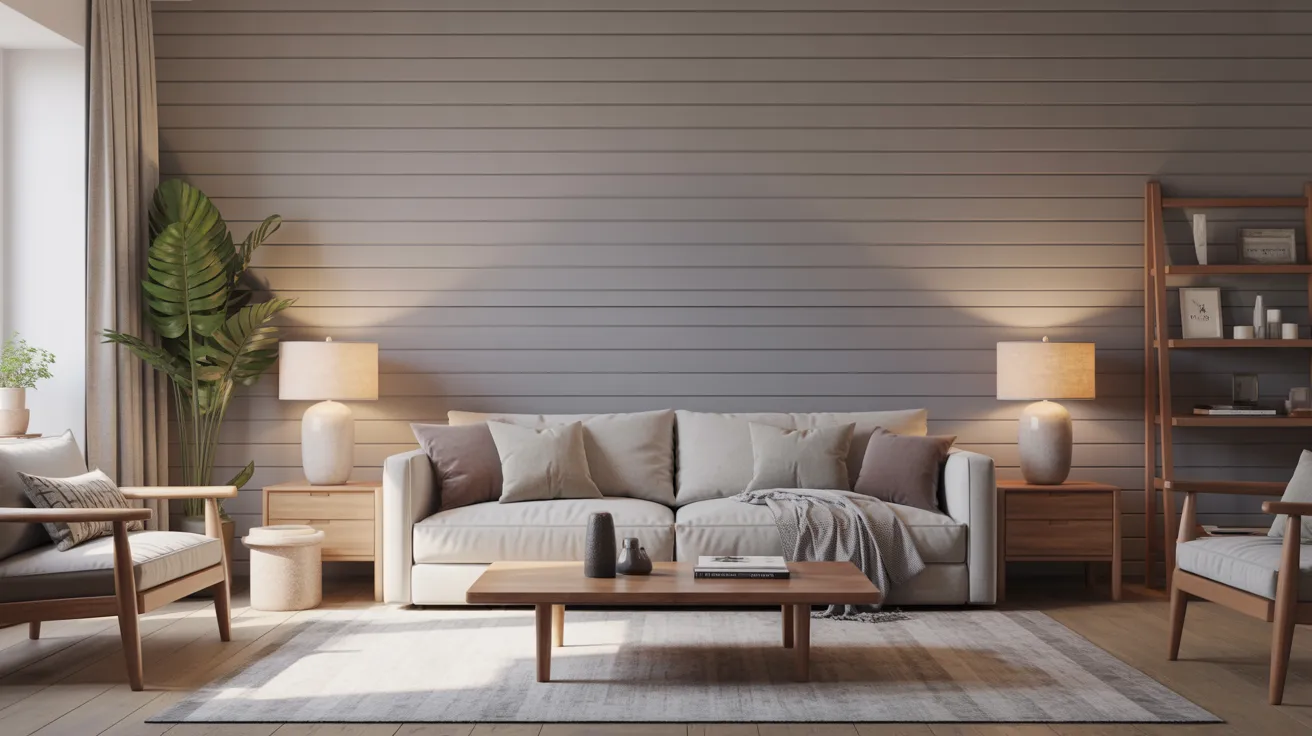
Medium gray shiplap sits between the extremes of white and black and works well in rooms with warm wood furniture and soft textile tones.
It reads as modern without being stark. Sophisticated without being cold.
A good all-round choice for living rooms, home offices, and shiplap accent wall bedroom applications.
21. Black Shiplap Statement Wall
Matte black shiplap is a confident design choice that pays off well in the right room. It creates strong contrast against light walls and makes other elements in the room stand out more.
It works best in rooms with plenty of natural light and light-colored furniture to balance the dark tone.
In a bedroom, a black shiplap wall behind the bed creates a dramatic, hotel-like atmosphere.
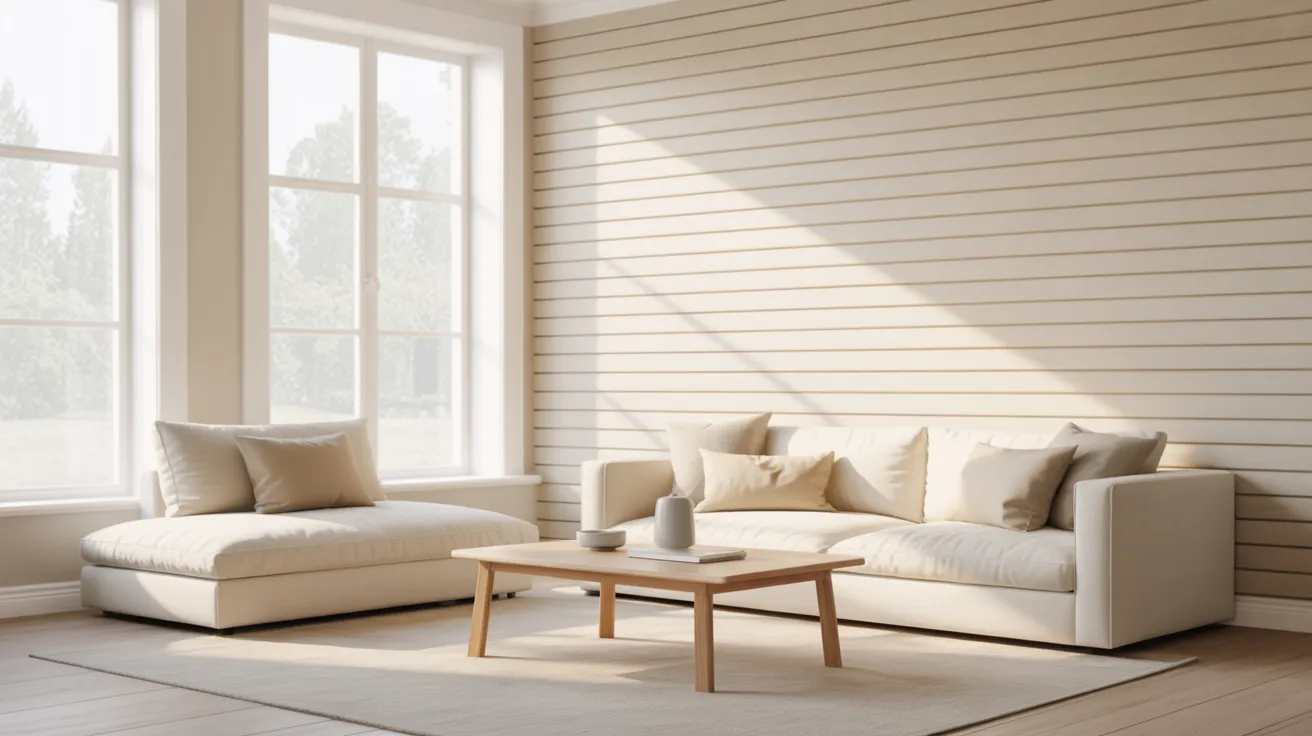
22. Neutral Beige Shiplap Wall
Warm beige or greige shiplap is one of the most versatile color choices because it works with almost any other tone in the room.
It is warmer than white but lighter than wood tone, sitting comfortably between the two.
This is a particularly good choice for living rooms and bedrooms where a calm, cohesive feel is the priority.
23. Pastel Painted Shiplap Accent Wall
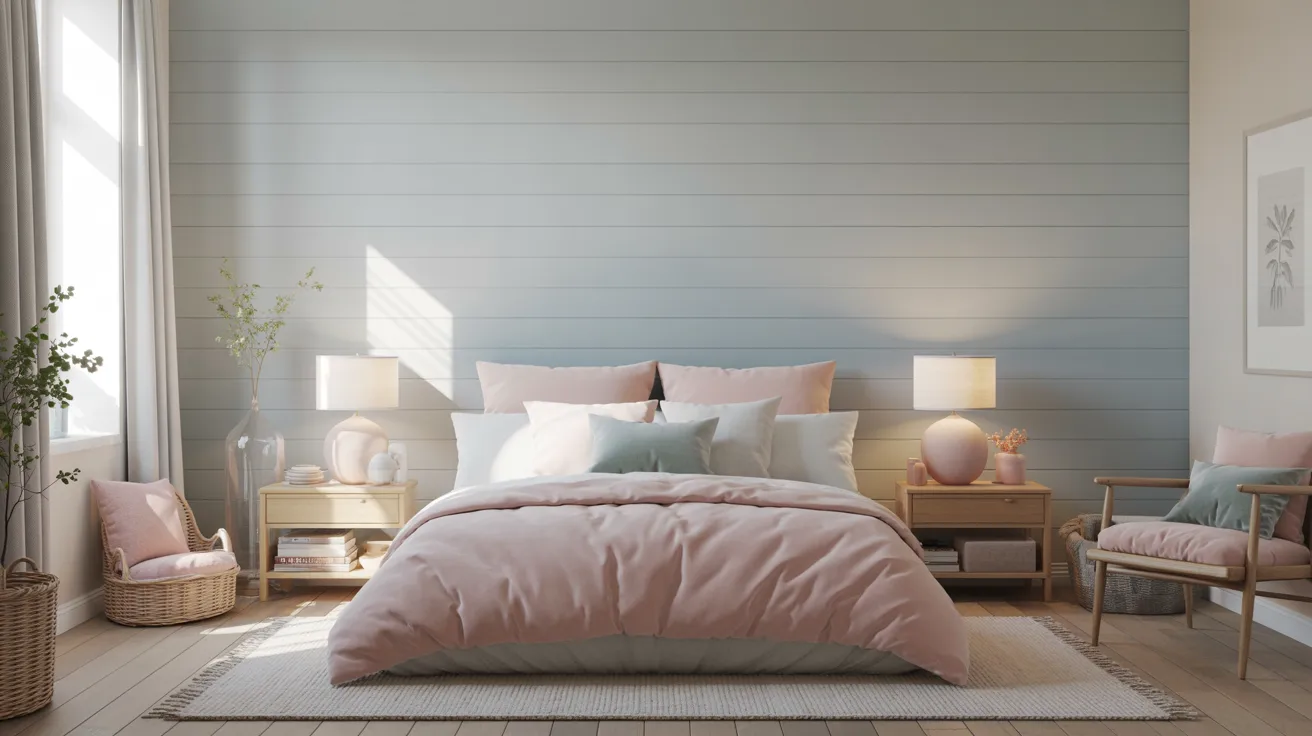
Soft sage, dusty pink, or pale blue shiplap adds color to a room without overwhelming it. The texture of the boards keeps the pastel from reading as flat or plain.
This works well in kids rooms, nurseries, and bedrooms where a gentle color presence is wanted.
Keep surrounding decor simple so the pastel shiplap wall reads as intentional rather than overly busy.
24. Geometric Shiplap Layout
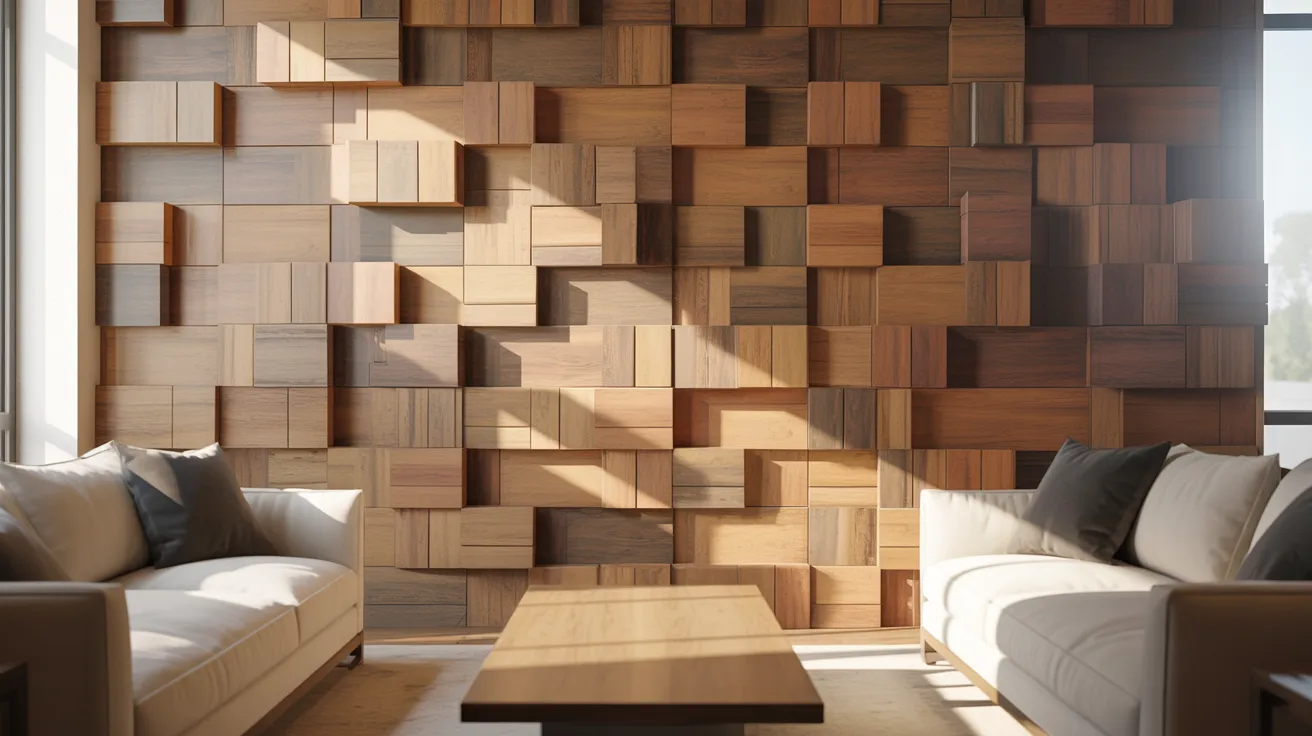
Cutting shiplap boards into shorter sections and arranging them in a geometric pattern, such as herringbone or stacked squares, produces a highly custom result that stands out from standard installations.
It requires more planning and precise cutting than a straight layout but uses the same basic materials.
Best reserved for a single small wall or panel where the pattern can be fully appreciated.
25. Vertical Narrow Strip Shiplap Wall
Very narrow vertical strips, around one to two inches wide, create a fine-lined wall texture that reads more like paneling than standard shiplap.
The tightly spaced vertical lines add real height to a room and suit modern and contemporary interiors especially well.
This is a more labor-intensive option but produces a result that looks genuinely custom.
26. Ceiling Extension Shiplap Wall
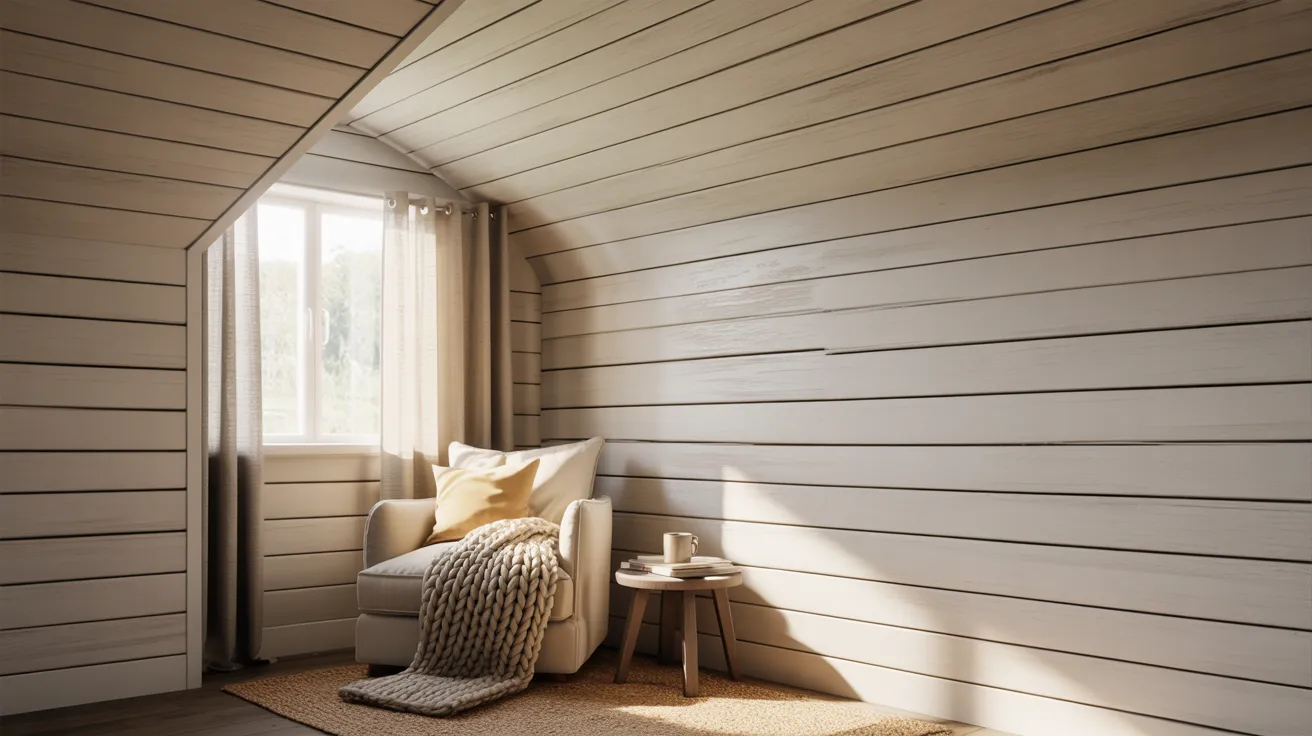
Extending shiplap from the wall onto the ceiling removes the hard line where the two surfaces meet and creates a wraparound, cocooning effect in the room.
It works particularly well in bedrooms and reading nooks where a contained, intimate atmosphere is the goal.
Paint everything the same color for the most seamless result.
27. Framed Shiplap Panel Design
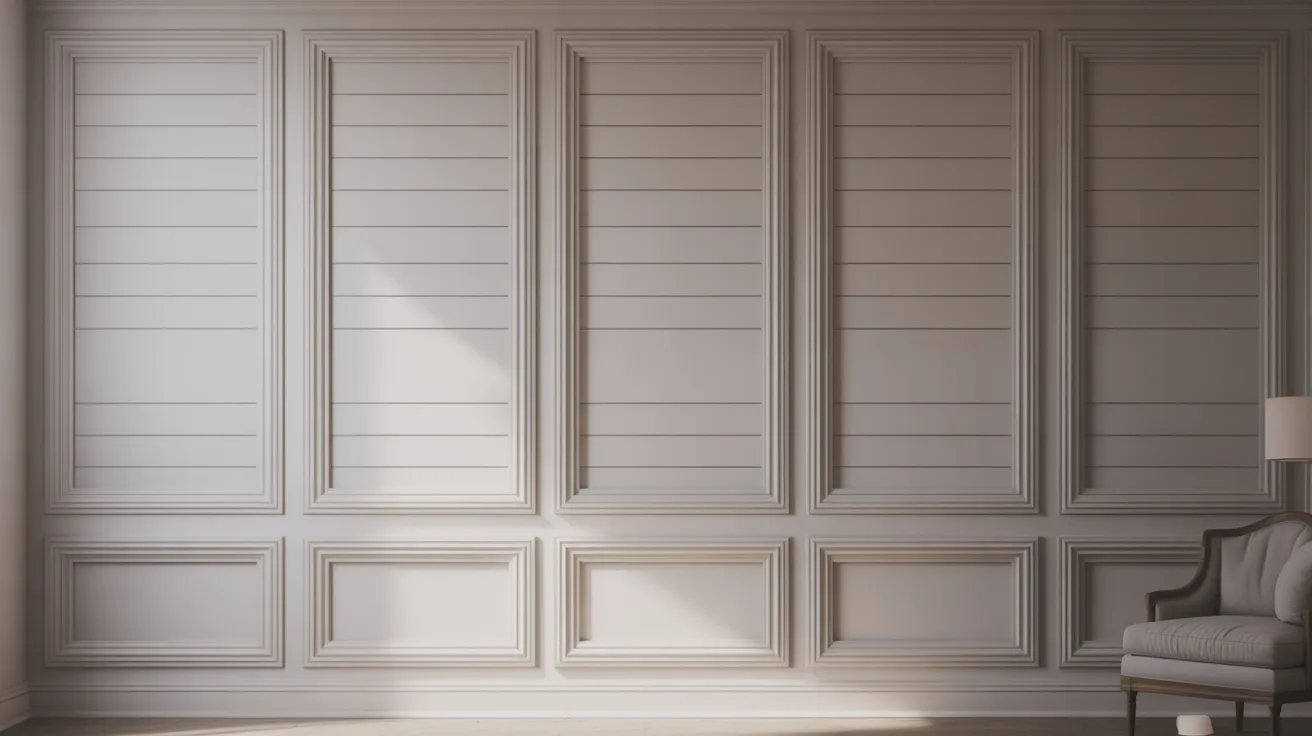
Installing shiplap within a framed border of trim creates a panel effect that looks like custom built-in millwork. Multiple panels across a single wall add visual rhythm and structure.
This approach suits formal living rooms, dining rooms, and home offices especially well.
It is one of the more polished and architectural takes on a shiplap accent wall.
28. Shiplap With Built-In Storage
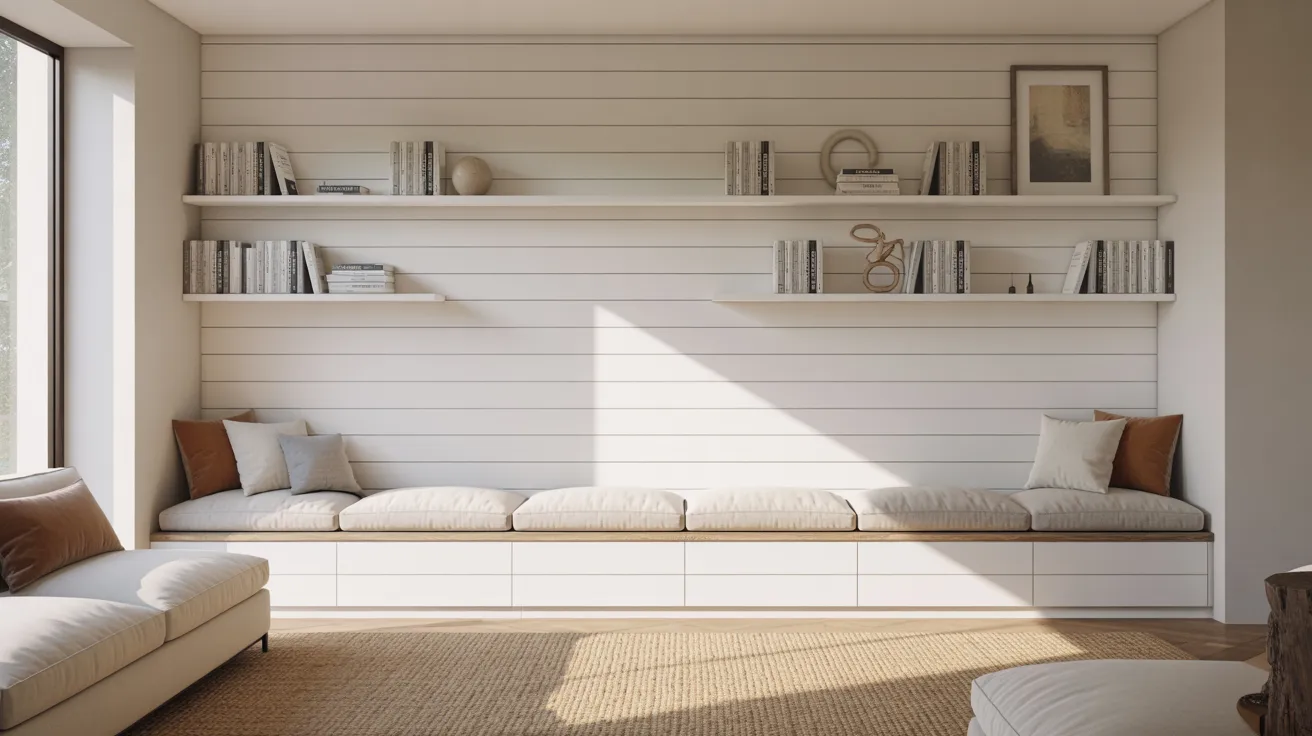
Combining shiplap with built-in shelving, a bench, or cabinetry creates a wall that is both decorative and highly functional.
The shiplap provides the backdrop and ties the built-in elements together visually so the whole wall reads as one cohesive feature.
This works well in entryways, bedrooms, and living rooms where storage is needed but the finish still matters.
29. Entryway Shiplap Accent Wall
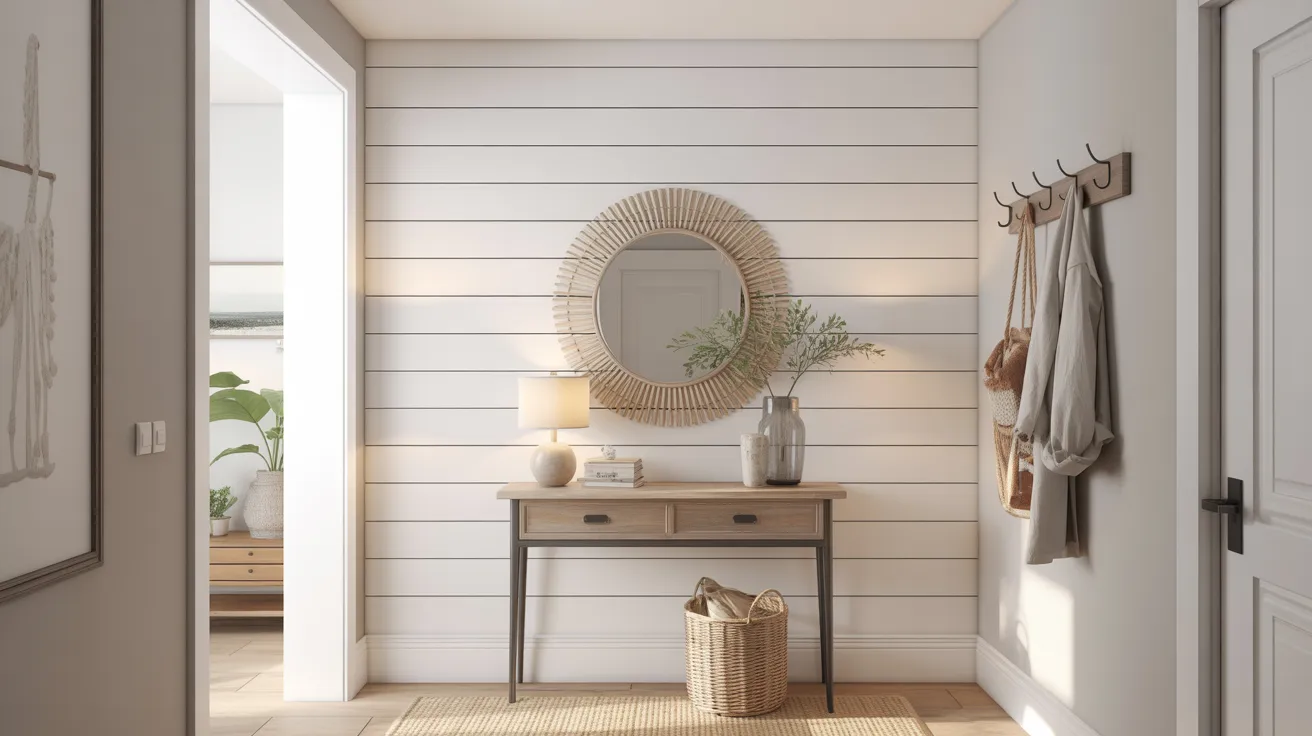
A shiplap wall in an entryway sets the tone for the rest of the home the moment someone walks through the door. It is a high-impact placement that takes very little square footage.
Pair it with a console table, a mirror, and wall hooks for a functional and well-styled entry.
White or a warm neutral works best in entryways since they tend to receive limited natural light.
30. Staircase Shiplap Feature Wall
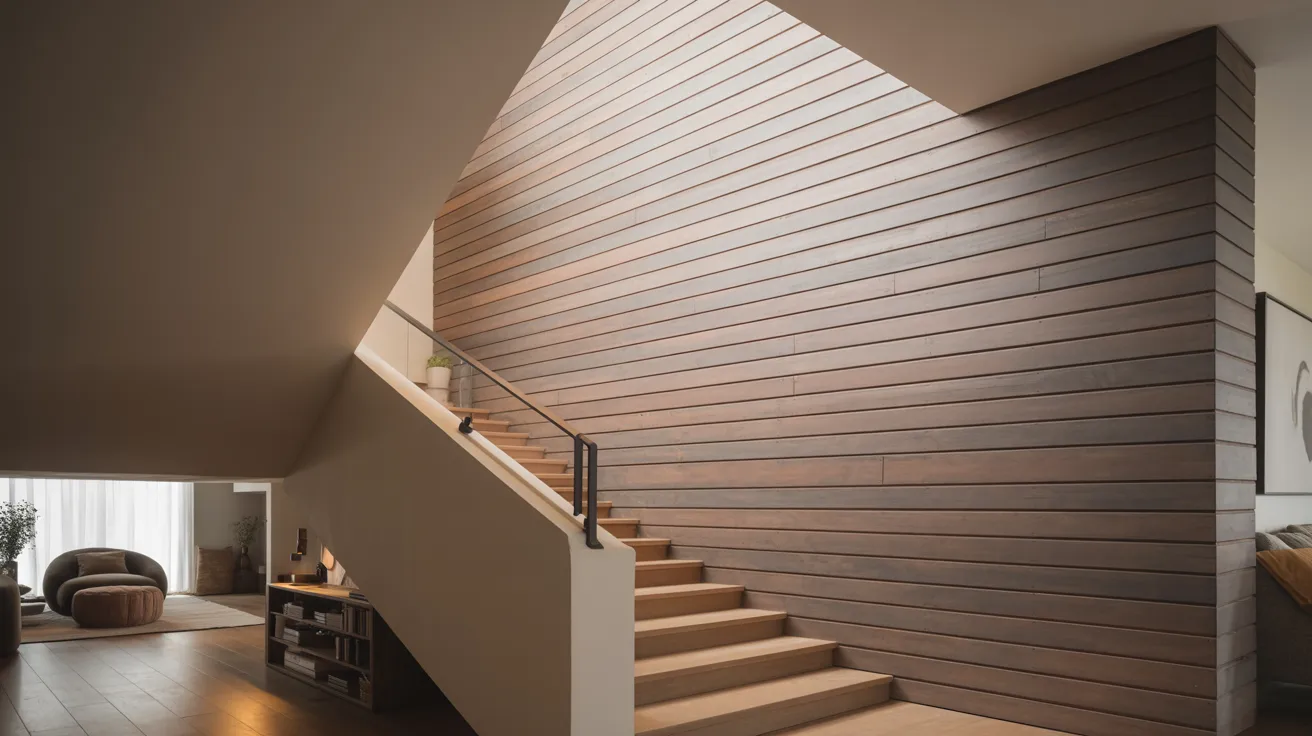
Running shiplap along the wall beside a staircase fills what is usually an awkward, difficult-to-decorate surface with texture and character.
The diagonal angle of the staircase creates interesting geometry when the boards are installed horizontally.
It is one of the more dramatic DIY applications of shiplap in a home and one that gets noticed immediately by visitors.
31. Home Office Shiplap Wall
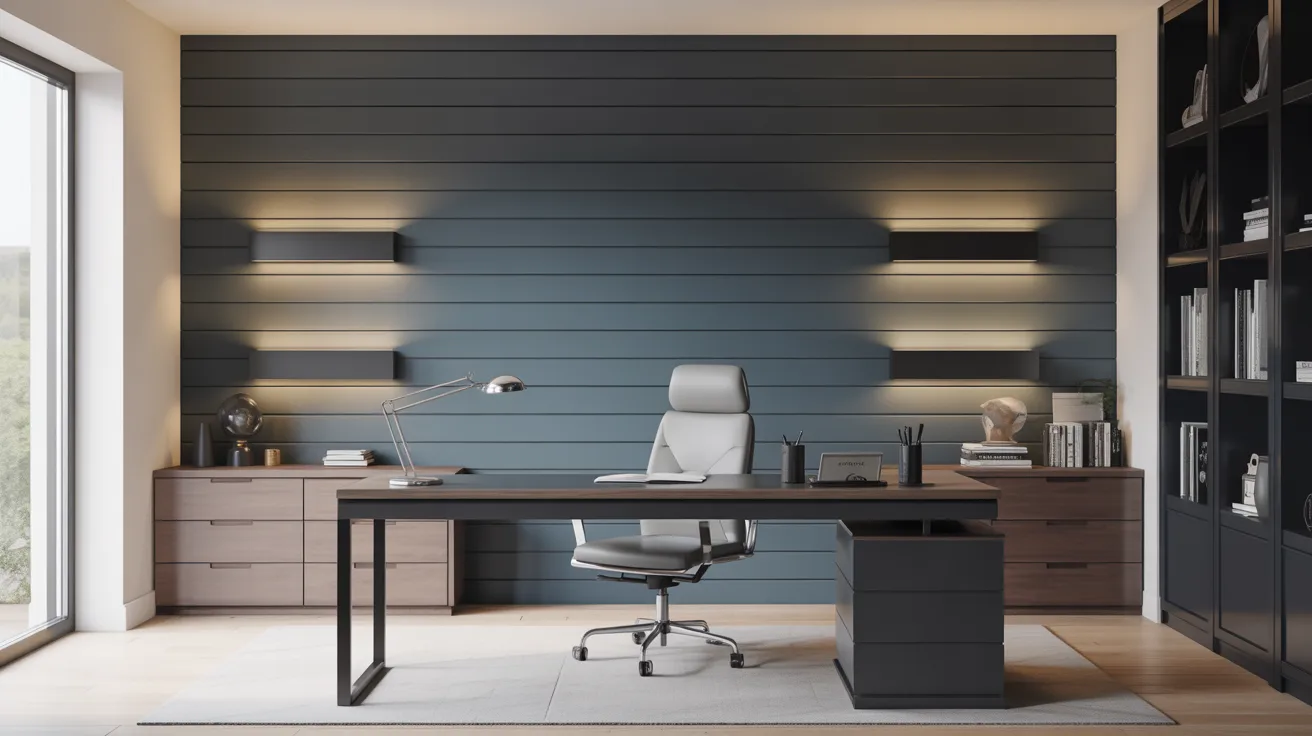
A shiplap accent wall behind a desk adds professional polish to a home office setup and looks significantly better on video calls than a plain painted wall.
Dark tones like navy or forest green add focus and gravitas to a workspace. Lighter tones keep the room feeling open and energized.
It is a practical upgrade that improves both the look and the function of a home office.
32. Kids Room Shiplap Accent Wall
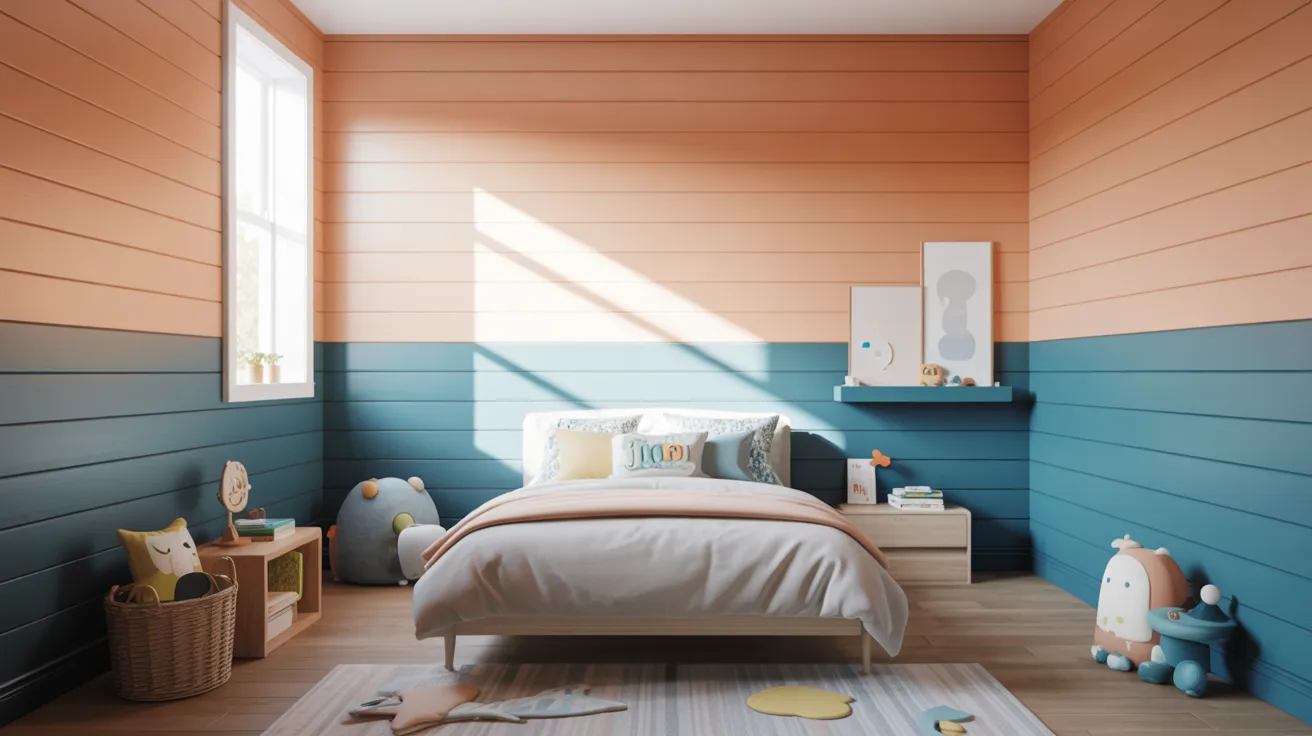
Shiplap in a kids room is durable, easy to repaint as tastes change, and adds real design quality to a space that often gets overlooked in the styling department.
Pastel tones work well for younger children. Bolder colors like teal or deep blue suit older kids and teenagers.
Horizontal shiplap at half-wall height combined with a bold paint color above is a particularly good combination for a playful, designed look.
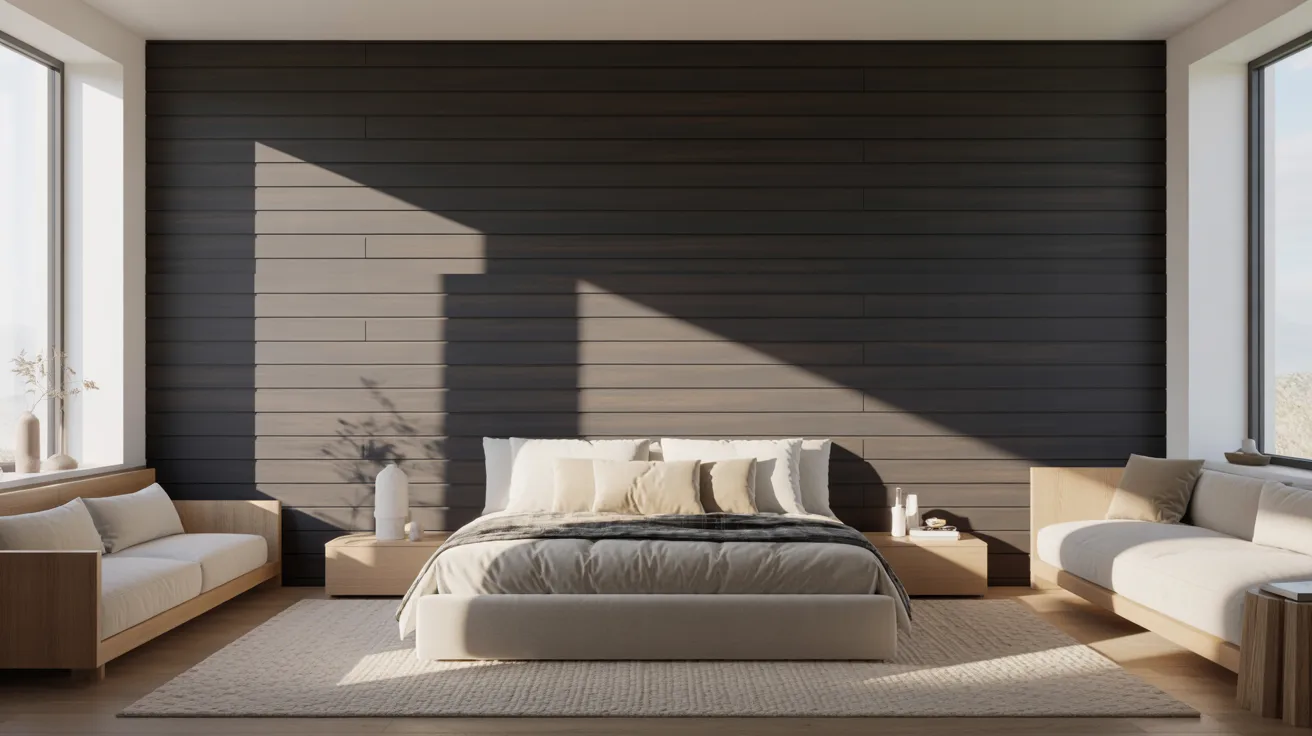
33. Statement Shiplap Accent Wall Bedroom Behind the Bed
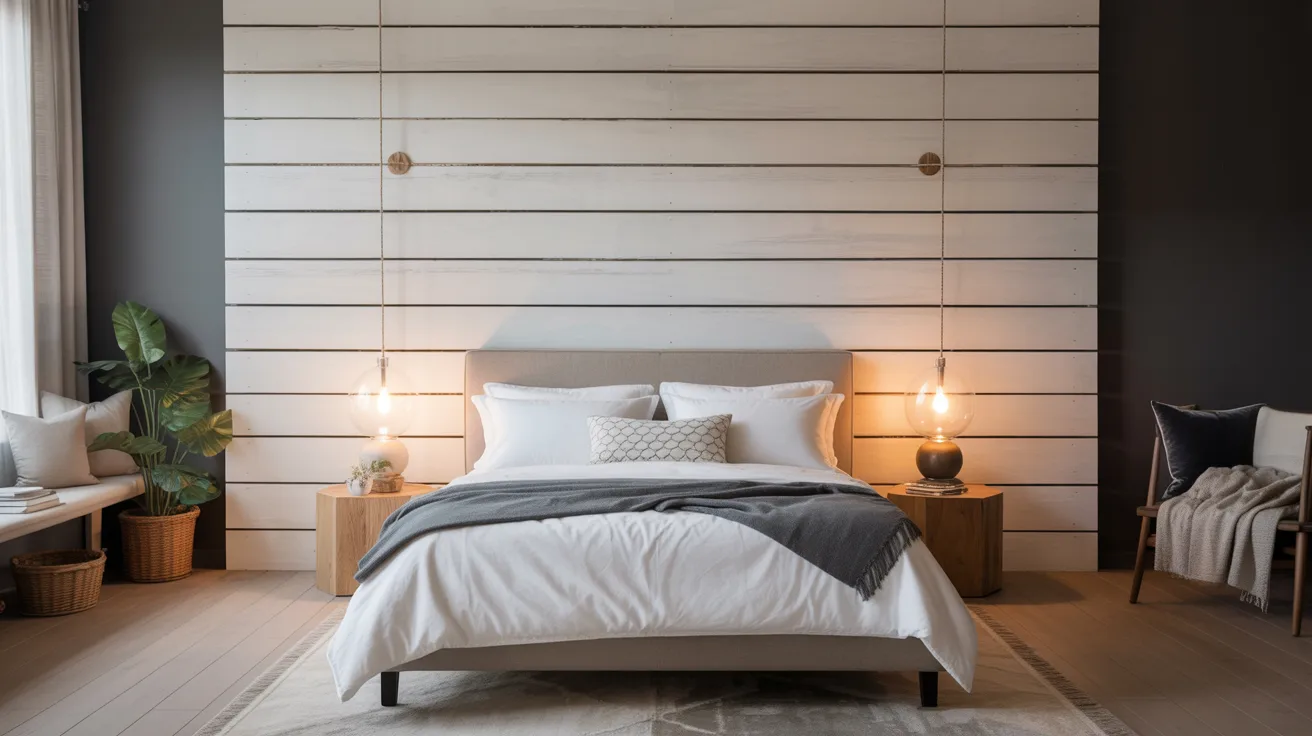
A shiplap accent wall bedroom installation behind the headboard is one of the most popular and effective uses of the material. It replaces the need for a headboard entirely while adding far more visual impact.
Floor-to-ceiling shiplap in this position makes the bed feel anchored and the room feel intentionally designed.
White shiplap suits bright, airy bedrooms. Dark shiplap creates a moody, cocoon-like atmosphere that feels genuinely restful.
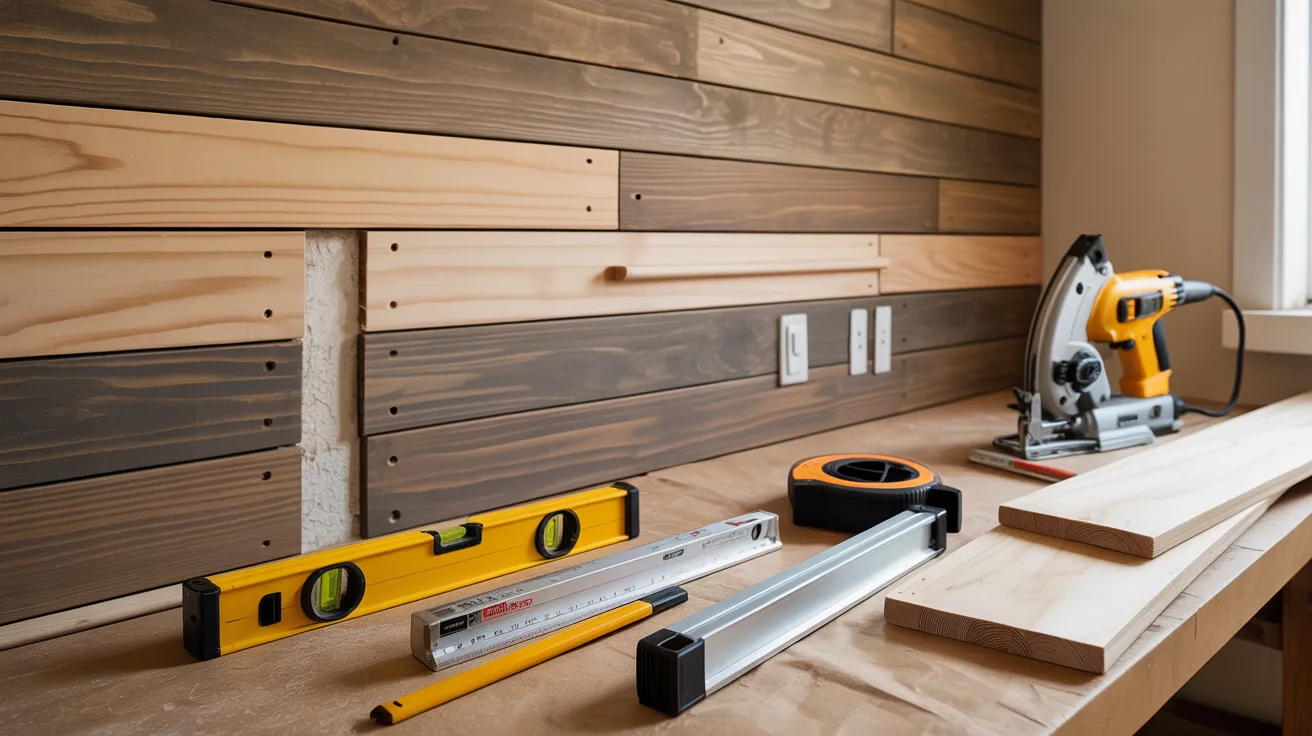
Tools and Materials Needed for a DIY Shiplap Accent Wall
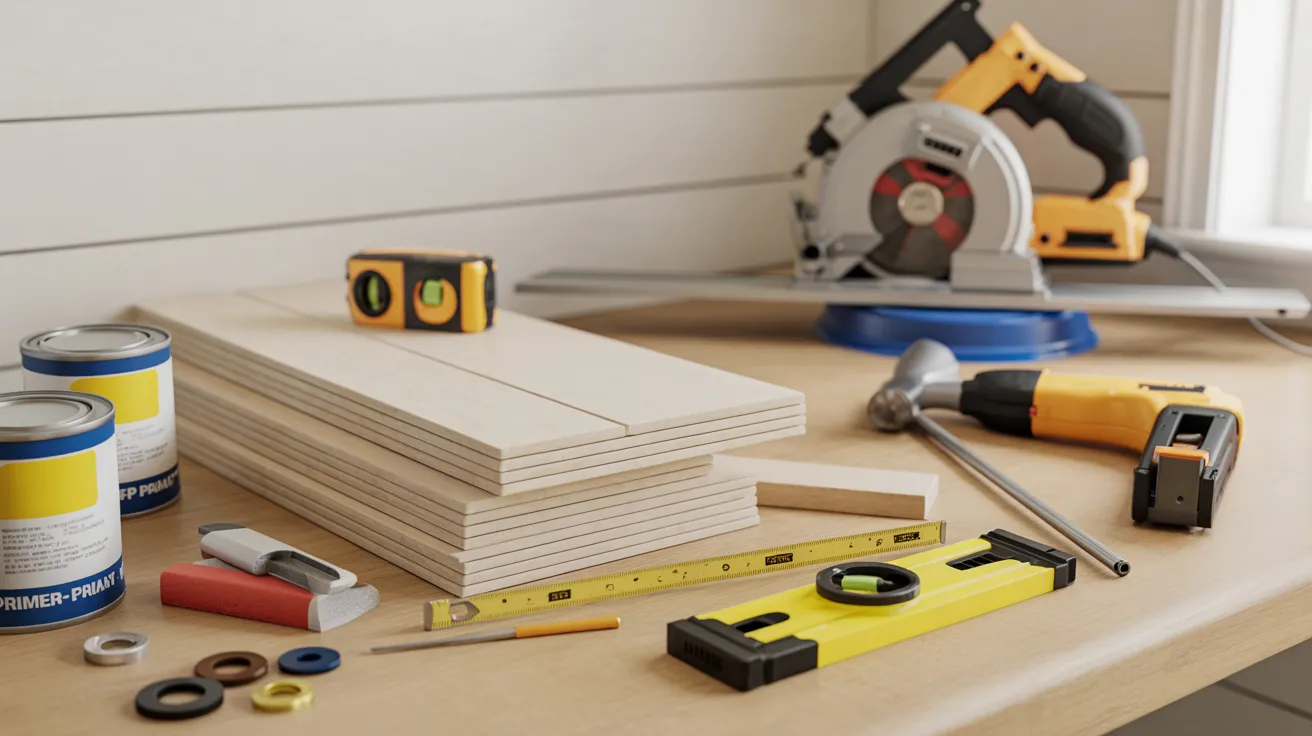
Getting the right materials together before you start saves a lot of back-and-forth trips and keeps the project moving smoothly. Here is what you will need for a standard installation.
- Shiplap boards or MDF panels. Pre-primed shiplap panels save time. Pine boards work well for a more natural finish.
- Stud finder. Essential for locating wall studs so boards are secured properly.
- Level. A long level keeps rows straight across the full width of the wall.
- Measuring tape and pencil. Accurate measurements before every cut prevent wasted material.
- Circular saw or miter saw. For cutting boards to length and making precise angle cuts.
- Nail gun or finish nails and hammer. A nail gun speeds up installation significantly on larger walls.
- Wood filler. For covering nail holes before painting.
- Sandpaper. For smoothing filled holes and rough edges.
- Primer and paint. Specifically interior wall paint in your chosen finish.
- Spacers. Coins or small washers work well to keep consistent gaps between boards during installation.
Having everything on hand before you start means the project stays on track and the installation goes much faster than expected.
How to Install a Shiplap Accent Wall (Step-by-Step Guide)
This process works for a standard horizontal installation on a single accent wall. Follow each step in order and the whole project typically comes together in a single weekend.
- Step 1: Prepare the wall. Fill any existing holes, sand rough patches, and wipe the surface clean. A smooth, clean wall makes installation easier and the finished result cleaner.
- Step 2: Locate and mark the studs. Use a stud finder to mark stud positions across the full wall. Boards need to be nailed into studs for a secure hold.
- Step 3: Measure and cut the first board. Start at the bottom of the wall. Measure the wall width, cut your first board to length, and check it against the wall before nailing.
- Step 4: Install the first row. Use a level to confirm the board is straight, then nail it into the studs. The first row sets the alignment for everything above it, so take extra care here.
- Step 5: Add spacers and continue upward. Place spacers along the top edge of the installed board before laying the next one. This keeps the gap consistent across every row.
- Step 6: Stagger the joints. Offset the seams between rows so they do not line up vertically. This looks better and makes the wall structurally stronger.
- Step 7: Cut around outlets and switches. Measure carefully and use a jigsaw for clean cuts around electrical boxes. Turn off power before working near outlets.
- Step 8: Fill nail holes and sand. Once all boards are up, fill every nail hole with wood filler, let it dry, then sand smooth.
- Step 9: Prime and paint. Apply a coat of primer first, let it dry fully, then apply two coats of your chosen paint color.
Take your time on the first few rows. Once the alignment is set and the process feels natural, the rest of the wall goes up quickly.
Common Mistakes to Avoid When Installing Shiplap
Most shiplap installation problems are avoidable. Knowing what tends to go wrong before you start is the most effective way to prevent them.
- Not measuring boards precisely. Even a small measurement error compounds across a full wall. Measure twice and cut once every single time.
- Ignoring stud placement. Nailing into drywall alone will not hold boards securely over time. Always locate and use the studs.
- Skipping expansion gaps. Wood expands and contracts with temperature and humidity changes. Without gaps between boards, the panels can buckle over time.
- Uneven board alignment. A single row that is even slightly off level throws every row above it off too. Check level at every third row at minimum.
- Painting before filling nail holes. Paint over unfilled holes shows every imperfection. Always fill and sand before applying any paint.
These are all simple things to get right the first time. Rushing through any of them is what leads to results that do not look as good as they should.
Budget Breakdown for a DIY Shiplap Accent Wall
The cost of a shiplap accent wall project varies based on wall size, material choice, and whether you already own the tools needed. Here is a general breakdown to help you plan.
| Item | Estimated Cost |
|---|---|
| Shiplap boards or MDF panels | $50 to $150 |
| Primer and paint | $30 to $80 |
| Nails, filler, sandpaper | $15 to $30 |
| Tools (if purchasing) | $50 to $150 |
| Total DIY cost | $100 to $500 |
Most standard accent walls fall in the $150 to $300 range when tools are already on hand.
Professional installation typically adds $300 to $800 on top of material costs depending on location and wall size.
Maintenance Tips for Shiplap Walls
A well-installed shiplap wall is low maintenance, but a few simple habits keep it looking its best for years.
- Clean painted shiplap with a damp cloth. Avoid soaking the wood. A lightly damp microfiber cloth removes dust and smudges without damaging the paint or boards.
- Keep moisture away. Shiplap in bathrooms or laundry rooms needs a moisture-resistant primer and paint. In high-humidity spaces, ensure proper ventilation to prevent long-term warping.
- Touch up paint as needed. Keep a small amount of the original paint for quick touch-ups on chips or scuffs. It takes five minutes and keeps the wall looking freshly done.
- Check for loose boards annually. Temperature changes can loosen nails over time. Press along the boards once a year and re-nail any sections that have shifted.
- Avoid harsh cleaning products. Abrasive cleaners scratch paint finishes. Mild soap and water is all that is needed for most cleaning tasks.
A shiplap wall that is looked after properly will hold up and look good for well over a decade without any significant maintenance.
Final Thoughts
One wall. One weekend. That is genuinely all it takes to change how a room feels.
I have done this project more than once now, and the reaction from people who see it is always the same.
They ask how much it cost to have it done professionally. When I tell them I did it myself, they never believe me at first.
That is the power of shiplap.
Pick your wall and start this weekend. Then come back and drop a comment below with a photo.
And share this with someone who has been putting off their own accent wall project for too long.
Frequently Asked Questions
Is a shiplap accent wall easy to install for beginners?
Yes. Most first-time DIYers can complete a standard shiplap accent wall in a weekend using basic tools and careful measurements.
Should shiplap be installed vertically or horizontally?
Both work well depending on the goal. A vertical shiplap accent wall makes ceilings feel taller, while horizontal layouts make rooms feel wider.
What type of wood is best for shiplap walls?
Pine boards, MDF panels, and pre-primed shiplap are the most common choices. Each offers a slightly different finish and price point.
How much does a DIY shiplap accent wall cost?
Most DIY projects land between $100 and $500 depending on wall size, materials used, and whether tools need to be purchased.
Can I install shiplap over drywall?
Yes. Shiplap installs directly over drywall as long as boards are nailed into the wall studs for a secure hold.