
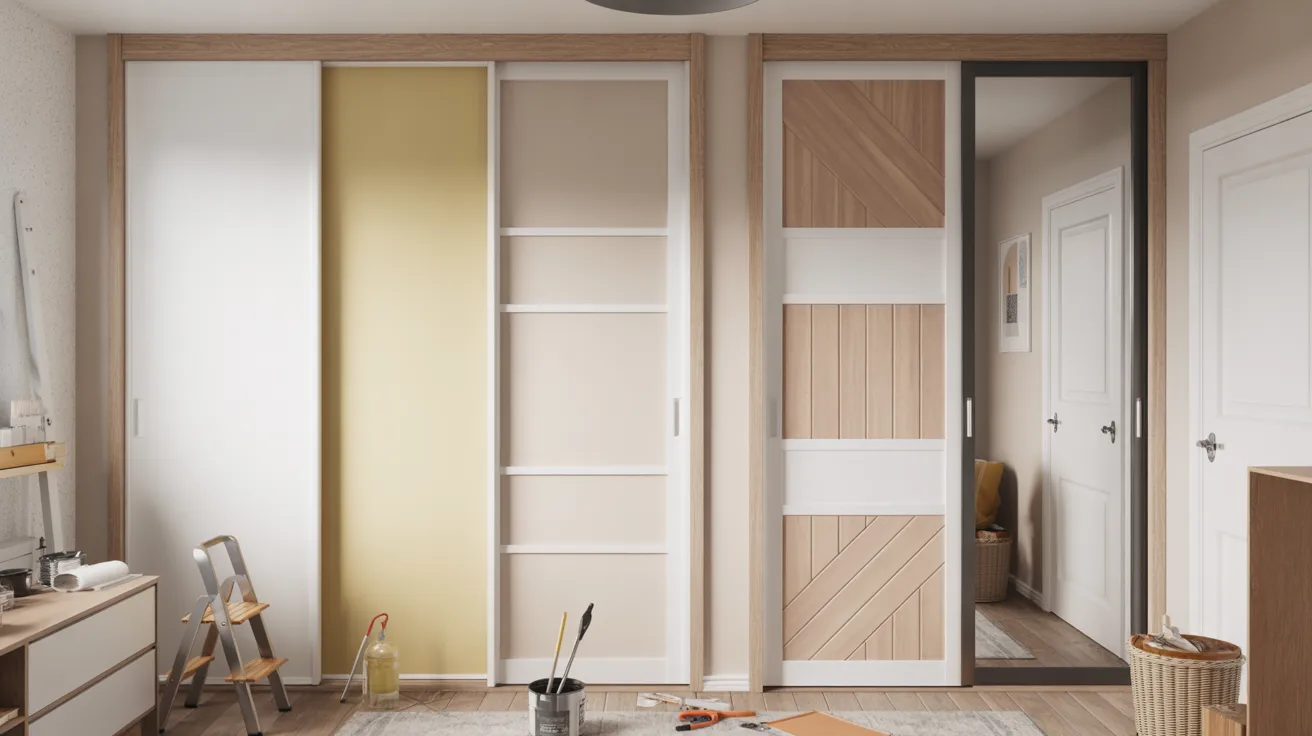
I stared at my bedroom’s sliding closet doors for two years before doing anything about them.
Flat, beige, and completely forgettable. They didn’t ruin the room but they definitely weren’t helping it.
Replacing them felt excessive. Then I started digging into sliding closet door makeover ideas and realised I’d been overthinking it the whole time.
Whether dealing with an old sliding closet door makeover that needs rescuing or just want fresh DIY sliding closet door makeover ideas for a room refresh, this guide has you covered.
Twenty-seven ideas, every budget, no full replacement needed.
Let’s get started.
Why a Sliding Closet Door Makeover Is One of the Easiest Room Upgrades
Replacing sliding closet doors properly costs hundreds of dollars once you factor in hardware, installation, and finishing.
A makeover can achieve a similar visual result for anywhere between $20 and $150.
It’s also a genuine weekend project. Most ideas on this list require basic tools, a free afternoon, and a bit of patience. No contractor needed.
The upgrade works across bedrooms, hallways, and apartments. Outdated mirrored doors, plain wood panels, hollow core slabs, all of them respond well to the right treatment.
Many homeowners search specifically for sliding closet door makeover ideas because the transformation can be dramatic with minimal effort.
The doors take up a large visual footprint in any room. Changing them changes the whole space.
Tools and Materials Needed for a DIY Sliding Closet Door Makeover
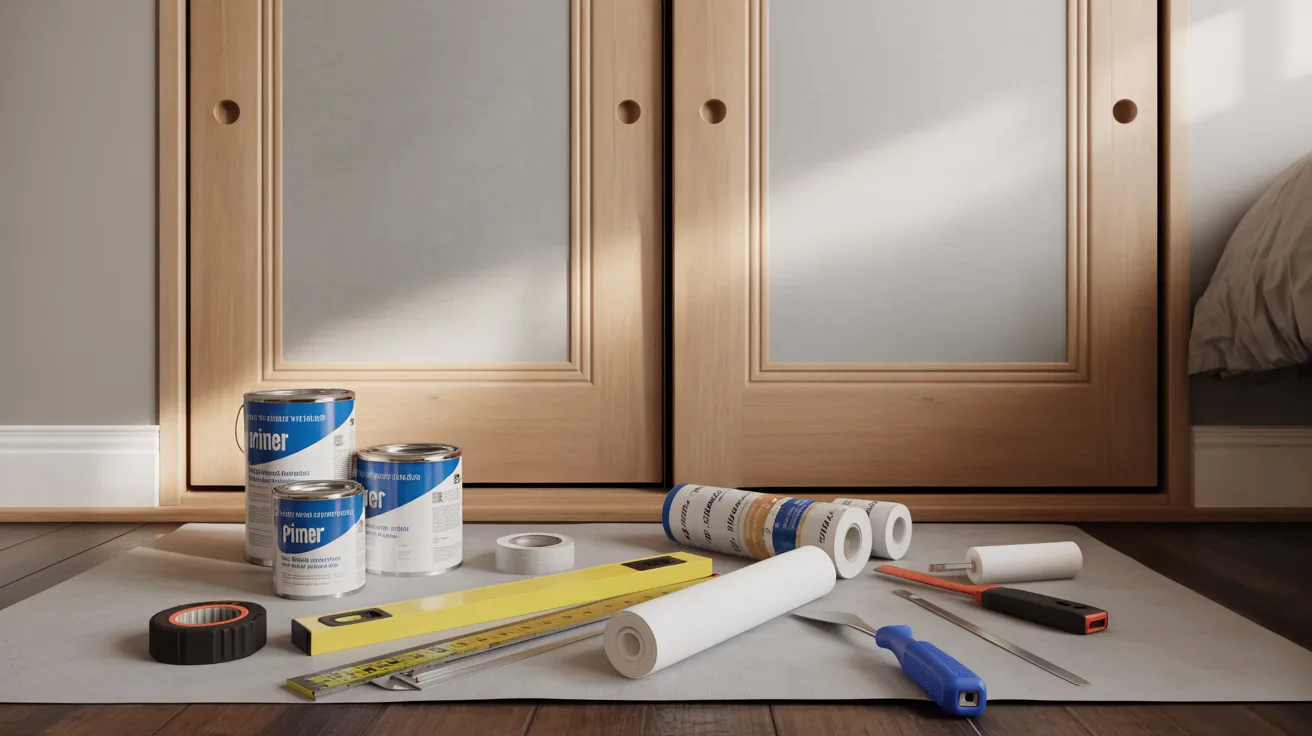
Most DIY sliding closet door makeover projects require only basic tools you likely already own. Here’s what covers the majority of ideas in this list.
- Paint and primer
- Painter’s tape
- Trim molding and construction adhesive
- Peel-and-stick wallpaper or contact paper
- Measuring tape and level
- Screwdriver
- Sandpaper
- Utility knife or scissors
- Foam roller or paintbrush
Nothing on this list requires specialist skills or expensive equipment. If you’ve painted a wall before, you can handle most of these projects comfortably.
27 Sliding Closet Door Makeover Ideas You Can Easily DIY
Some of these take an afternoon. Some take a weekend. All of them cost less than new doors and most produce results that genuinely surprise people. Here’s the full list.
1. Paint the Doors a Bold Accent Color
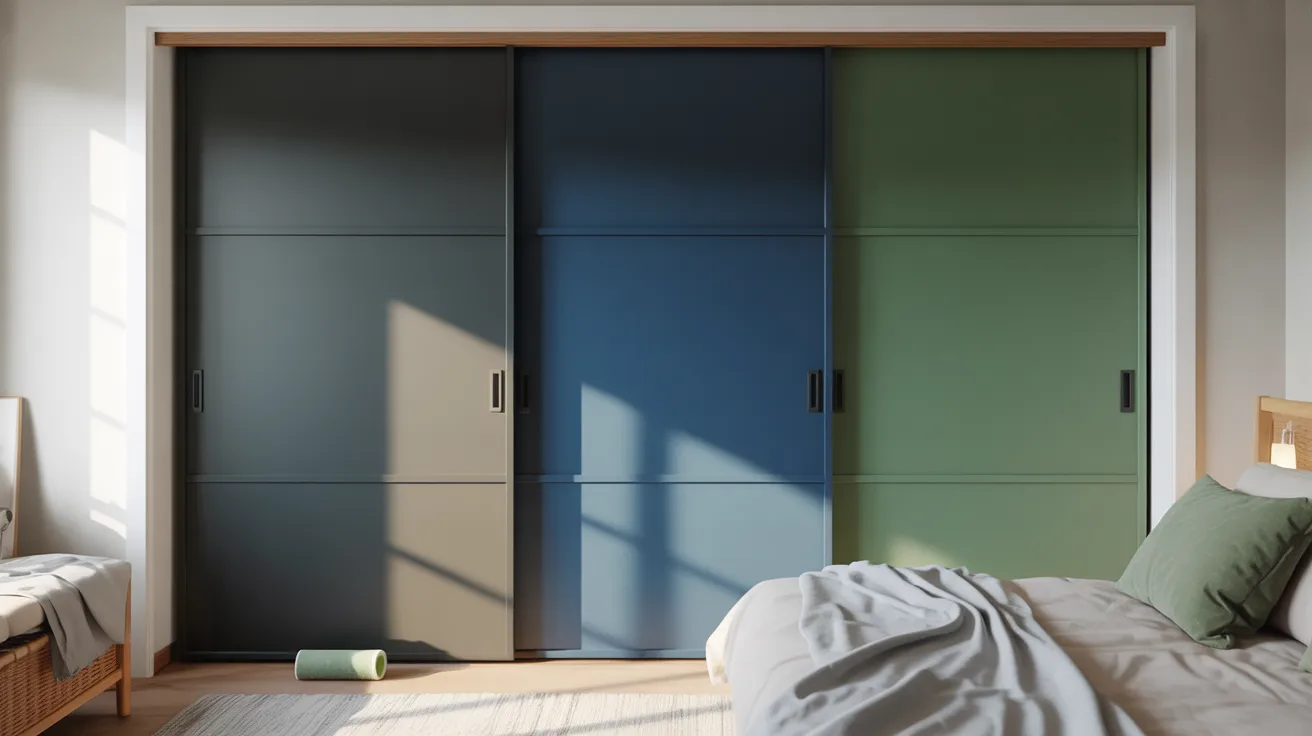
A single coat of the right colour changes everything. Matte black, deep navy, sage green, and warm terracotta are all performing well in modern interiors right now.
Use a foam roller for a smooth finish and tape off the edges carefully. Two thin coats beat one thick one every time.
This is the fastest sliding closet door makeover on the list. Low cost, high impact, completely reversible if you change your mind later.
2. Add Peel-and-Stick Wallpaper

Removable wallpaper is one of the best developments in renter-friendly design. It applies cleanly, repositions easily, and removes without damaging the surface underneath.
Pattern options are genuinely good now. Botanical prints, geometric designs, linen textures, and faux grasscloth all work well on a flat door surface.
Measure carefully and use a squeegee to press out bubbles as you go. The result looks far more expensive than the materials cost.
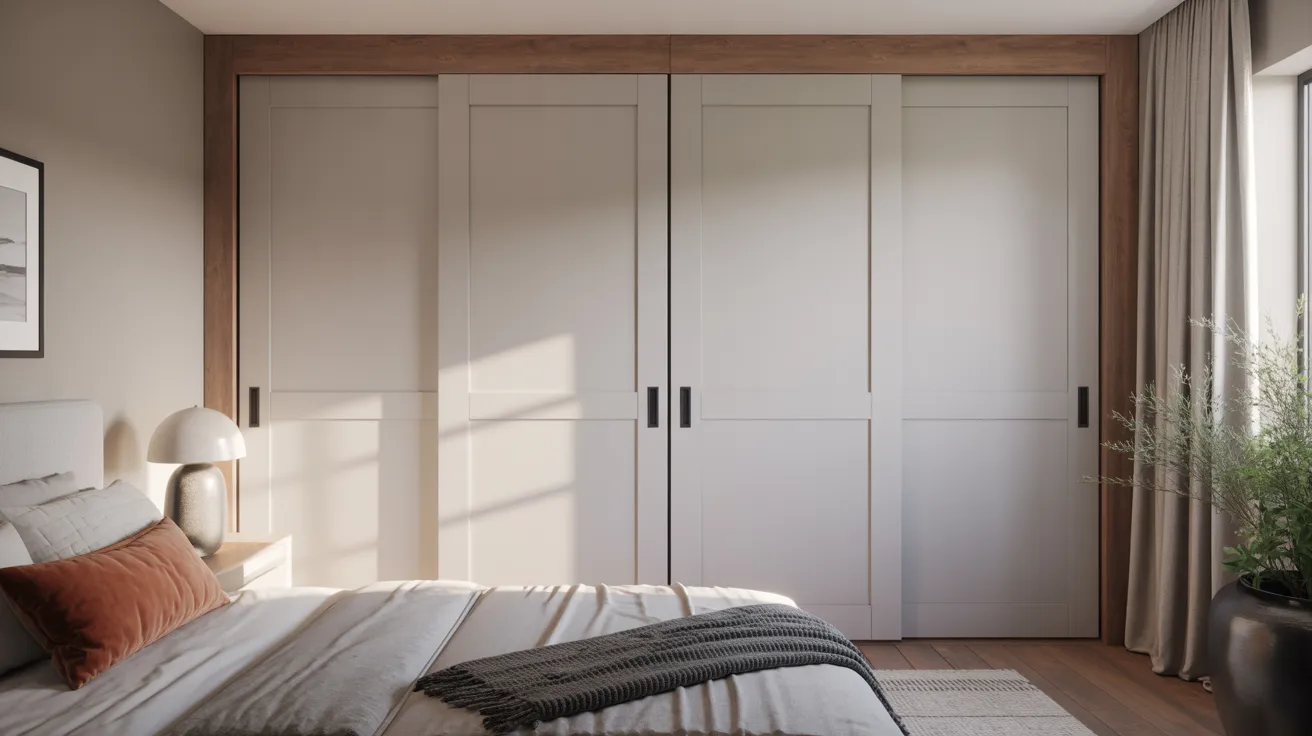
3. Turn Doors Into Faux French Panels
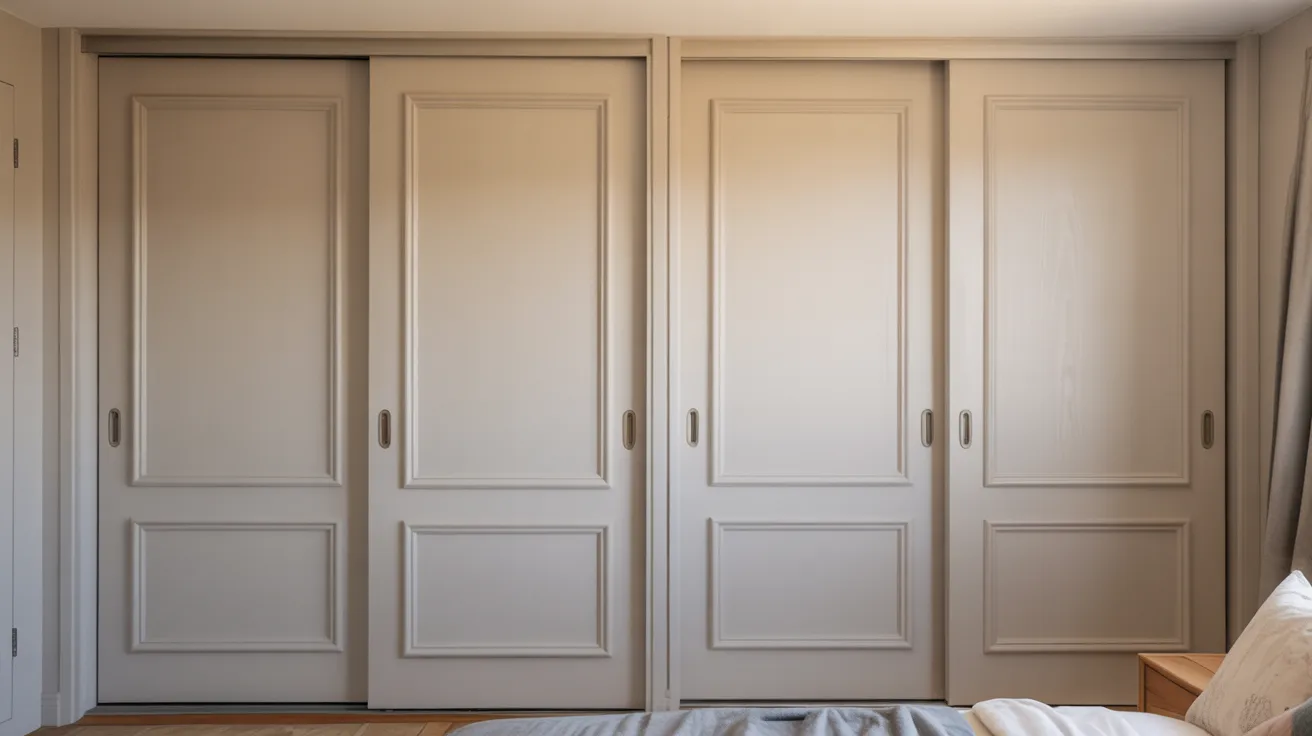
Gluing trim molding onto flat doors in a panel pattern is one of the most popular old sliding closet door makeover techniques because it looks genuinely architectural.
Use lightweight MDF trim, construction adhesive, and a level to keep lines straight. Paint the whole door one colour once the trim is dry to unify the look.
It reads as custom millwork from across the room. Most people assume the doors were always that way.
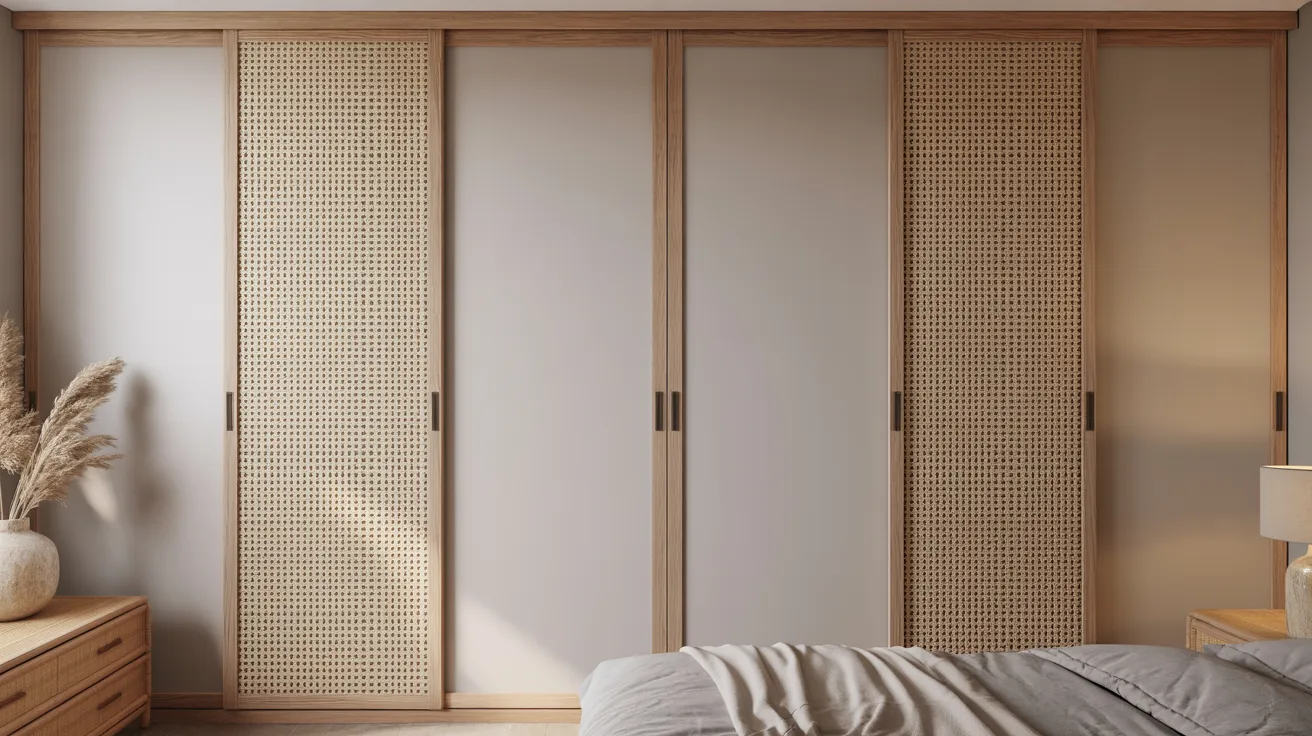
4. Install Cane Webbing Inserts
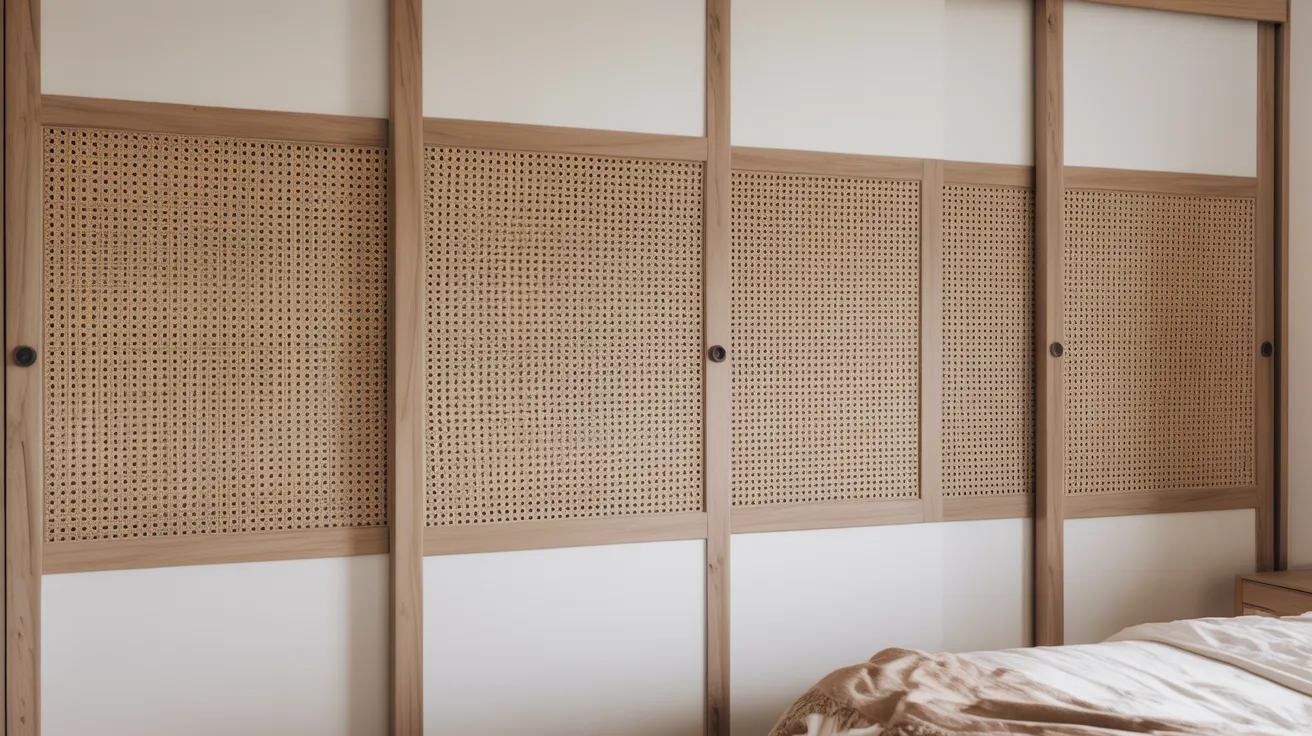
Cut a section out of the door panel and fill it with cane webbing stretched over a timber frame. The result is textured, warm, and very much on trend in contemporary interiors.
This works best on hollow-core doors where cutting is manageable. The natural material adds depth that paint alone can’t achieve.
Pair it with a warm white or natural timber stain for a boho or coastal finish that feels relaxed and intentional.
5. Create a Modern Slat Wall Design
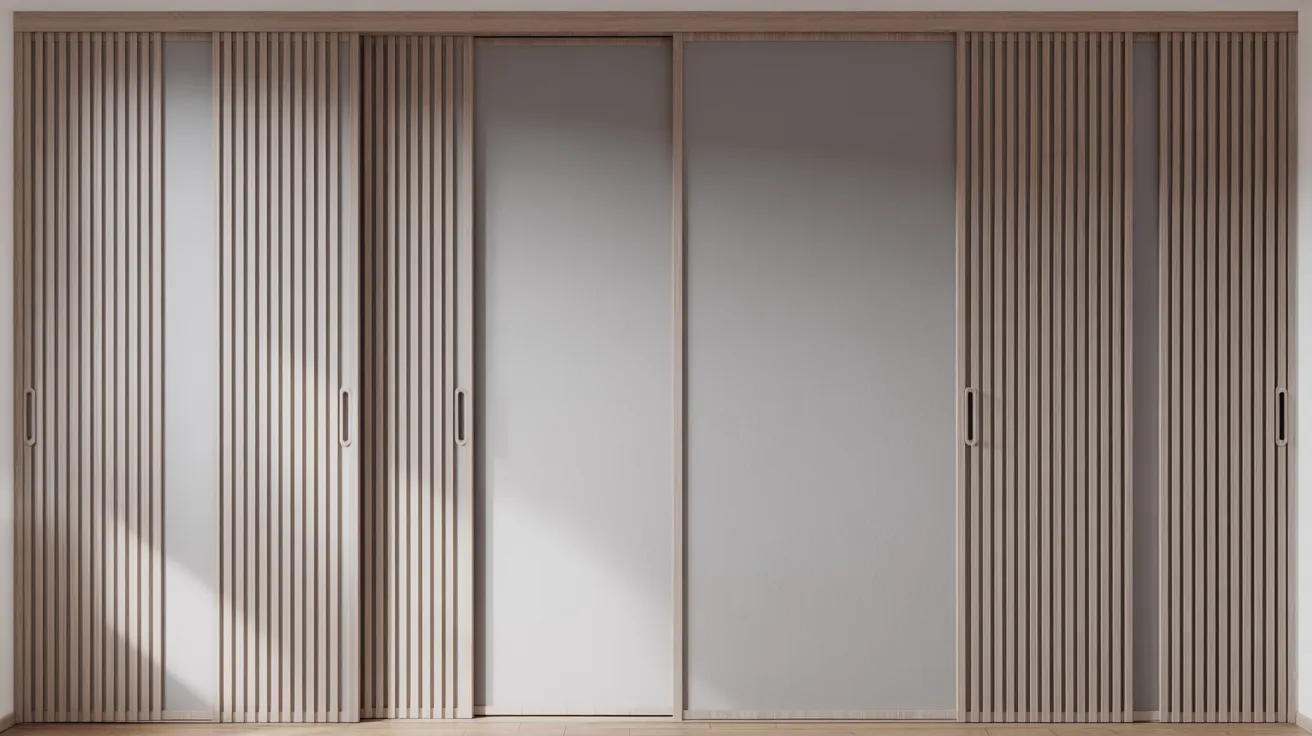
Thin vertical timber slats glued or nailed onto the door surface create depth and shadow that makes a flat door look three-dimensional.
Space the slats evenly using a measuring tape and level. Paint them the same colour as the door for a subtle effect or contrast them for something bolder.
This Scandinavian-inspired approach suits minimalist and Japandi-style interiors particularly well.
6. Use Chalkboard Paint
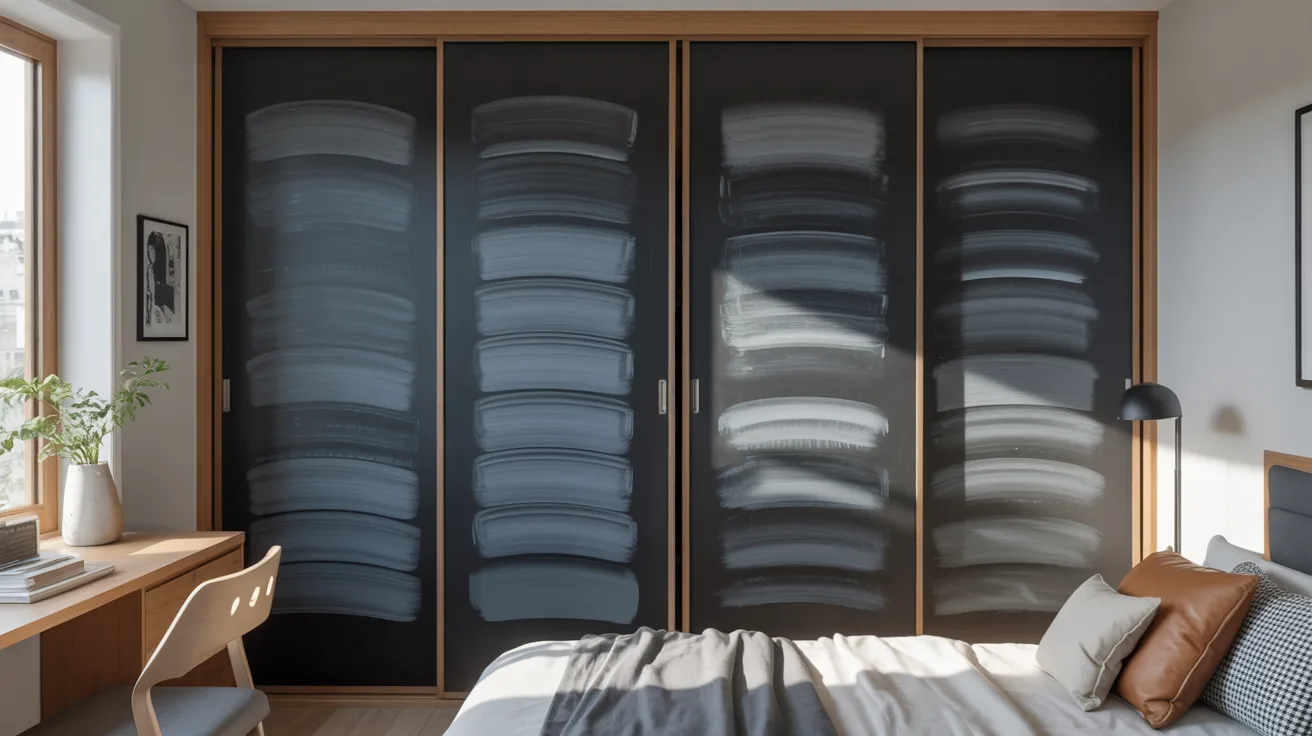
Chalkboard paint turns a plain door into a functional surface. It’s an especially practical idea for kids’ rooms where the door becomes a drawing board, calendar, or message wall.
Apply two to three coats and allow full curing time before use. A light sand between coats keeps the finish even.
For adults, a chalkboard closet door in a home office or hallway works well as a weekly planner or to-do wall.
7. Apply Frosted Window Film
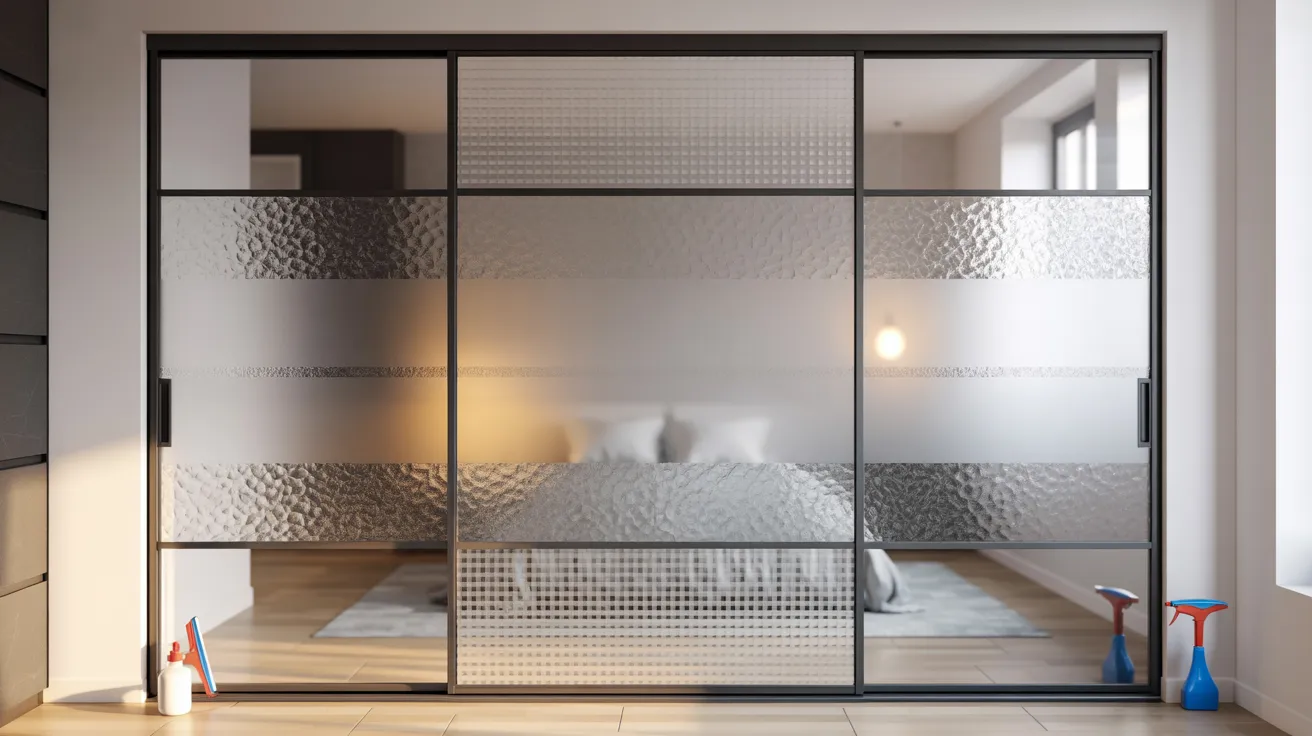
Frosted film is the cleanest fix for outdated mirrored sliding doors. It softens the reflection, diffuses light gently, and gives the mirror a far more contemporary feel.
The film applies with water and a squeegee, requires no tools, and is completely removable. It costs under $20 for a standard door and takes under an hour to apply.
Partial frosting in geometric patterns is a popular variation that adds visual interest while keeping some reflective quality.
8. Add Decorative Molding Frames
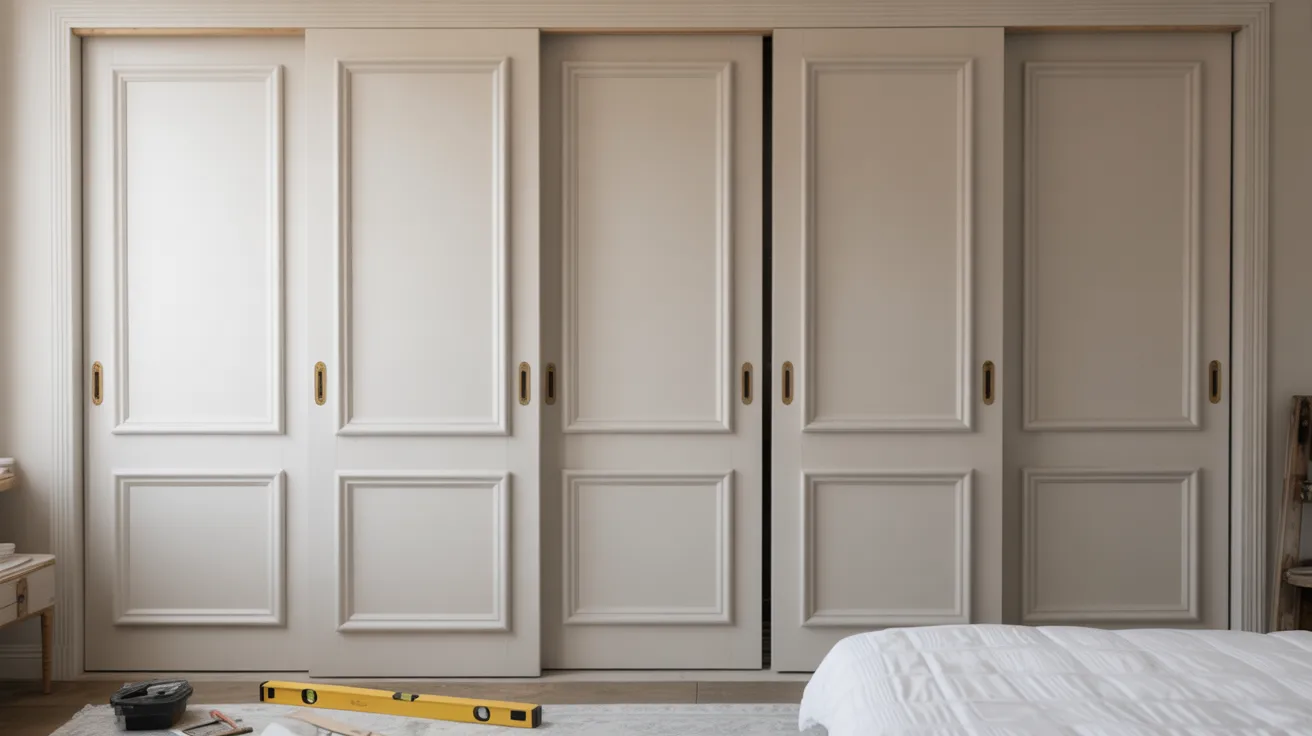
Similar to the French panel approach but simpler, adding a single rectangular frame of trim around each door panel creates definition and character on what was previously a flat slab.
This works particularly well as an old sliding closet door makeover where the original surface is plain and featureless. The molding adds instant structure without requiring major work.
Paint the whole door including the added trim in one colour for a clean, finished result.
9. Cover Doors With Fabric Panels
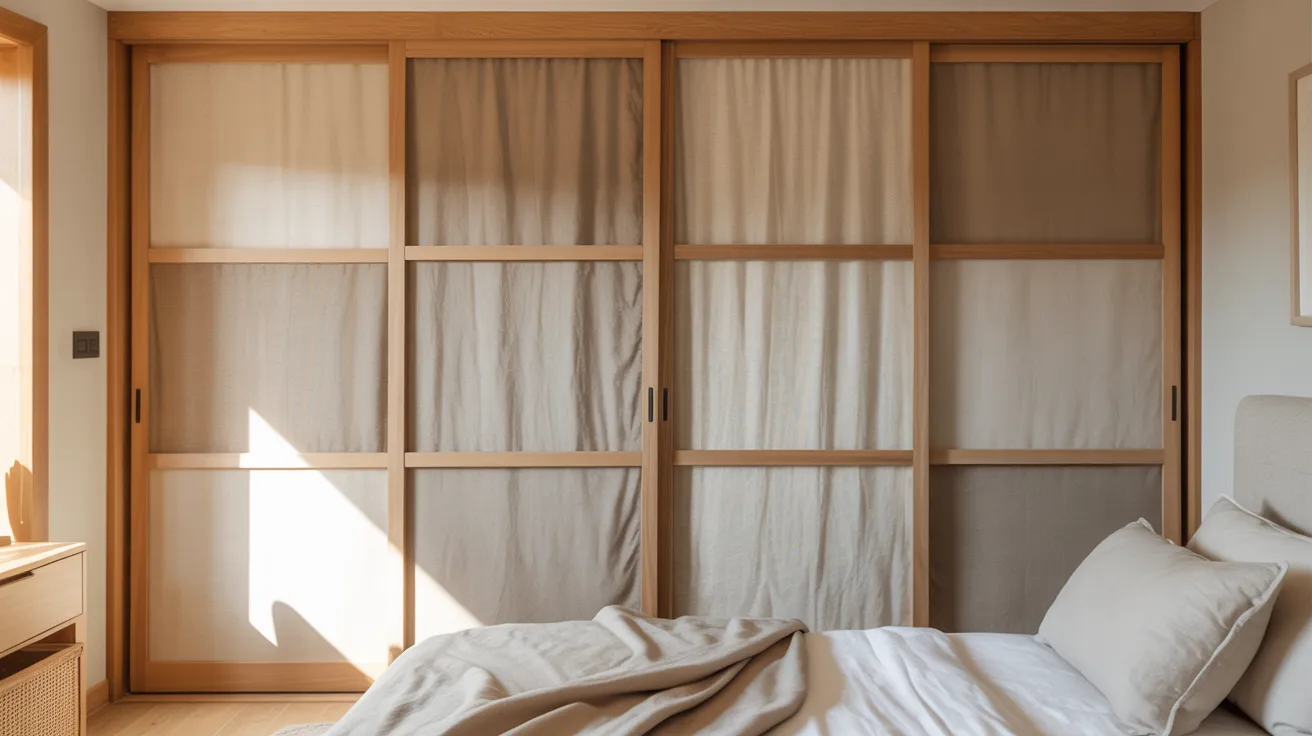
Fabric stretched over a thin frame and mounted flat against the door adds softness and texture that hard materials can’t match. It works well in bedrooms where warmth and quiet are priorities.
Use upholstery fabric, linen, or even thick curtain material. Staple it to a thin timber frame cut to fit the door and attach the frame with adhesive strips or small brackets.
Swap the fabric out seasonally to completely change the room’s feel without touching the door itself.
10. Create a Shiplap Door Design
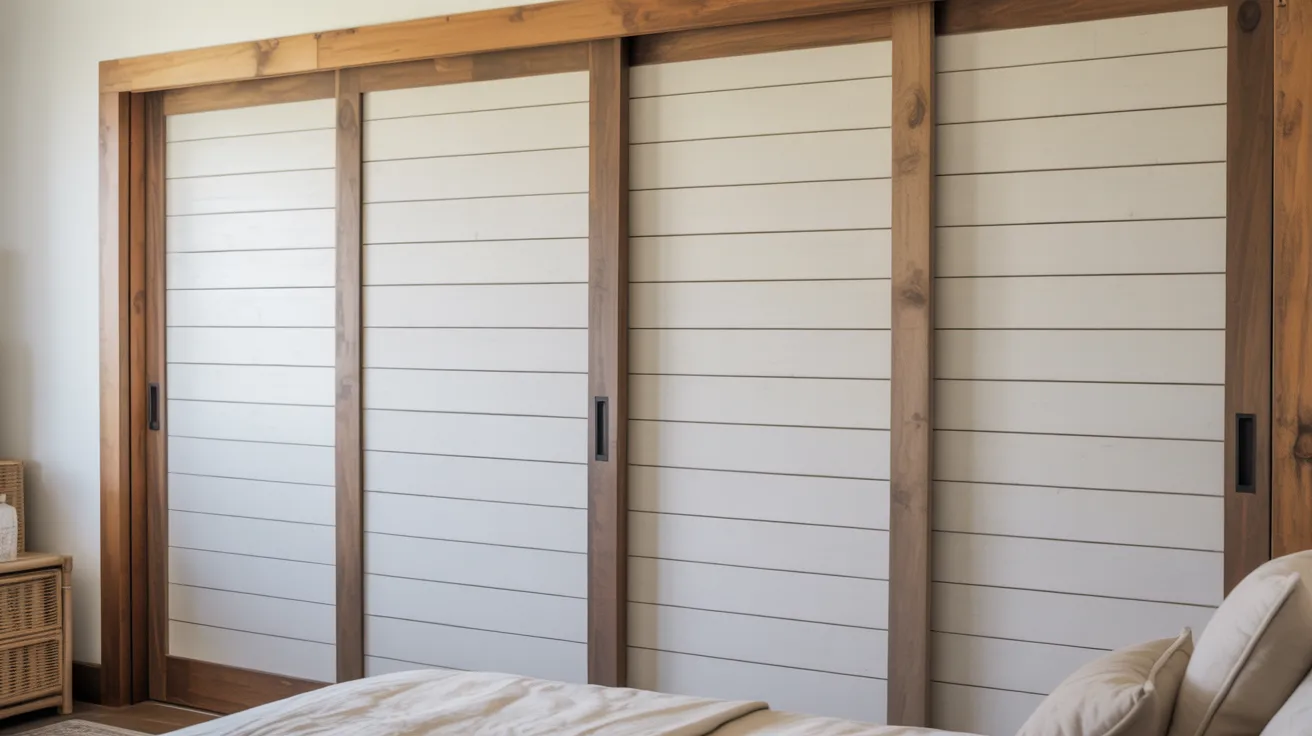
Thin shiplap boards or tongue-and-groove timber panels glued over an existing door surface give a flat slab a farmhouse character that looks genuinely built-in.
Keep the boards lightweight. MDF beadboard panelling works well here because it’s thin enough not to affect the door’s sliding clearance.
Paint it white for a classic farmhouse finish or leave it in natural timber tones for a warmer, more rustic result.
11. Install Rattan Panels
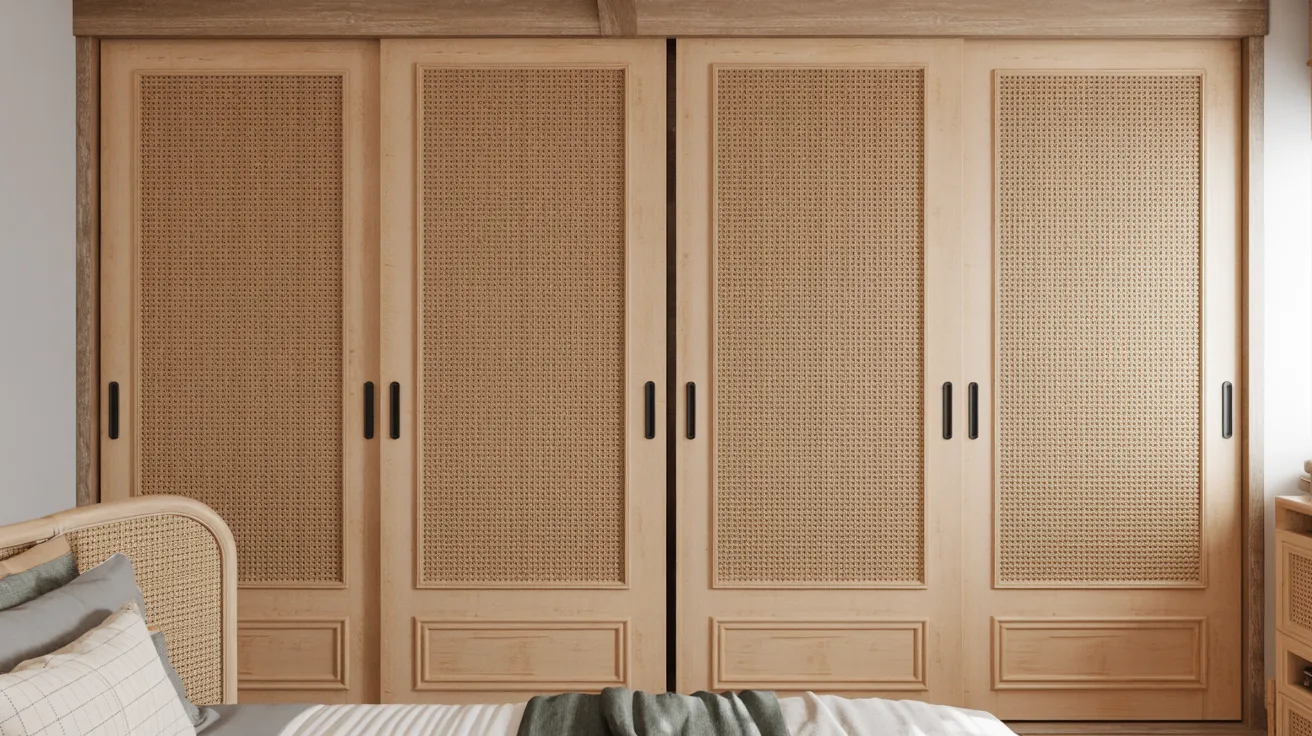
Rattan sheet material can be cut to size and applied directly over a door panel or fitted into a routed-out recess. The woven texture is instantly recognisable and works across coastal, tropical, and contemporary styles.
It’s lightweight, easy to work with, and available in several weave densities depending on how much privacy you want behind the door.
Frame the rattan with timber trim for a cleaner, more finished look.
12. Use Contact Paper for a Wood Look
Wood-effect contact paper has improved significantly. The better options have realistic grain patterns and a matt finish that genuinely reads as timber from a normal viewing distance.
Clean the door surface thoroughly before applying. Work from top to bottom in overlapping strips and use a card or squeegee to press out any bubbles as you go.
This is one of the most budget-friendly options on the list and is fully reversible.
13. Turn Doors Into Full Length Mirrors
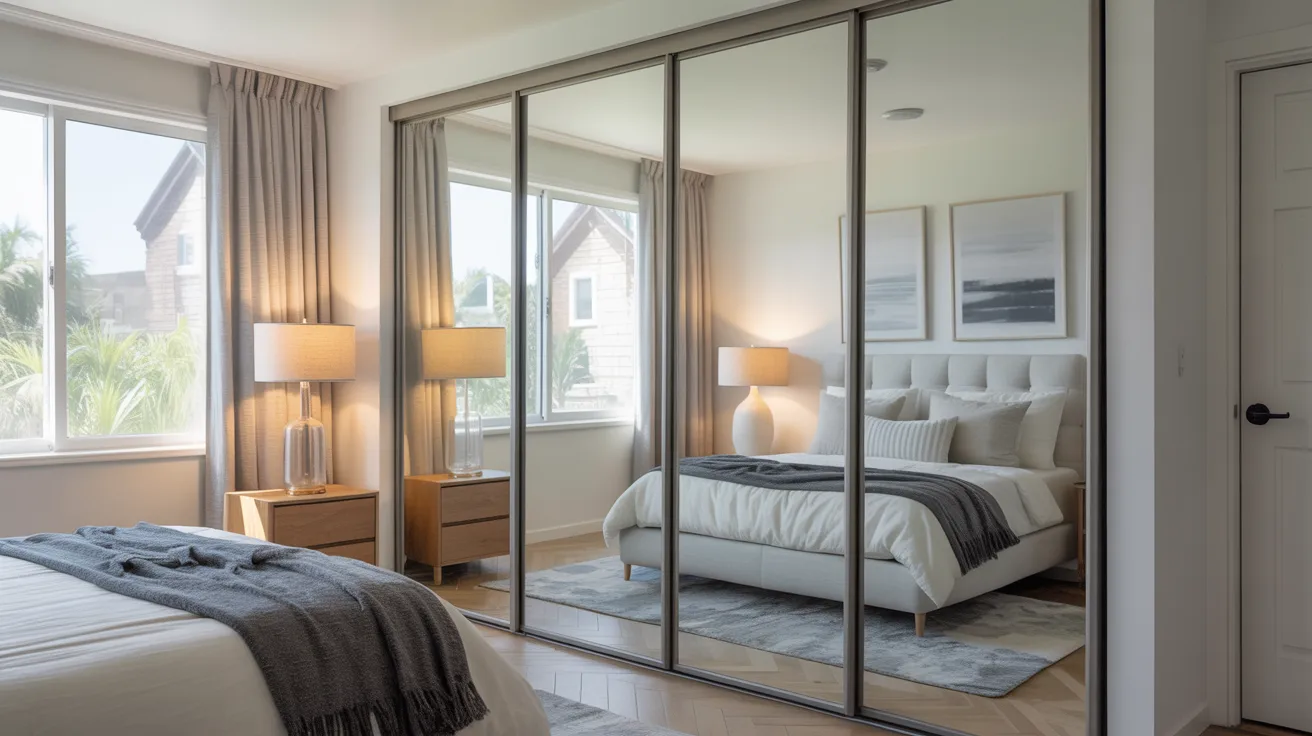
If your doors don’t already have mirrors, adding mirror panels is a practical upgrade that makes any room feel larger and brighter.
Cut-to-size mirror panels are available from most glass suppliers and can be attached with mirror adhesive or mirror clips. The result looks intentional and high-end.
This works especially well in small bedrooms where a full-length mirror is useful but floor space is limited.
14. Add Geometric Painted Patterns
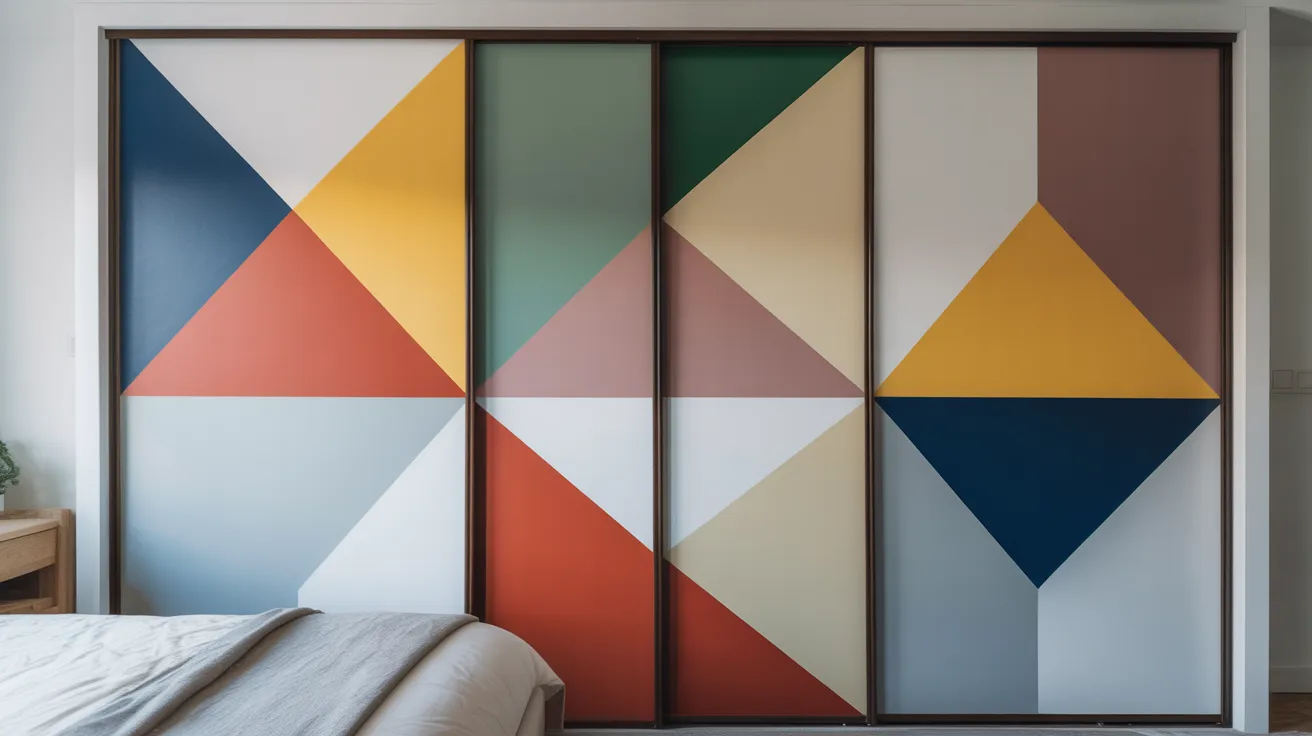
Painter’s tape lets you create clean geometric designs directly on the door surface. Triangles, diamonds, colour-blocked halves, and grid patterns all work well at this scale.
Plan the design on paper first and transfer measurements carefully to the door. Use a level throughout to keep lines sharp.
The finished result looks like something from a design studio. The actual process is just paint and tape.
15. Install Sliding Barn Door Hardware Look

You don’t need to replace the entire door to get the barn door aesthetic. Adding an exposed black metal rail along the top of the door frame gives the existing door a completely different visual identity.
Pair it with a dark paint colour and simple black hardware and the door reads as intentionally industrial rather than an original fitting.
This is one of the most effective style shifts on this list for the cost involved.
16. Use Vertical Board and Batten
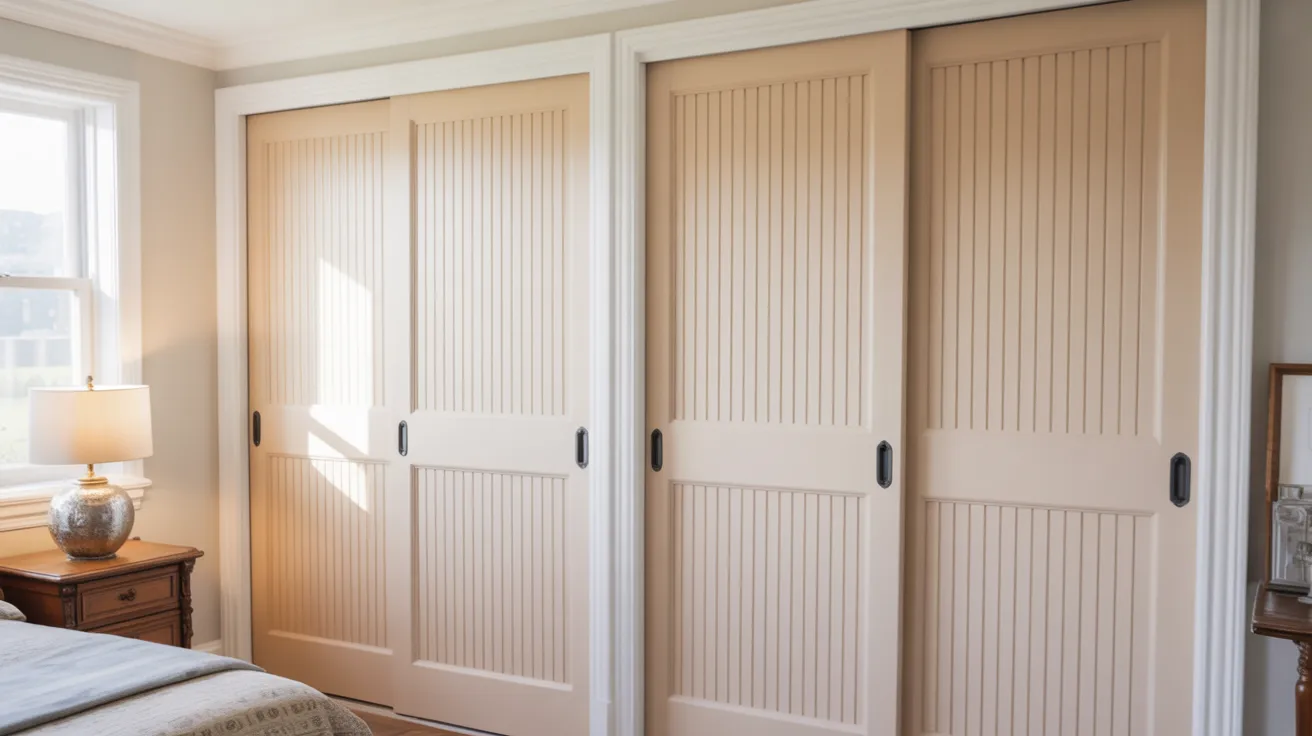
Vertical strips of thin timber or MDF applied in a board-and-batten pattern give a flat door a classic, structured look that suits traditional and transitional interiors.
Space the battens evenly, use construction adhesive for a clean application, and fill the nail holes before painting. One uniform paint colour ties the whole surface together.
This is consistently one of the most searched DIY sliding closet door makeover approaches because the result looks expensive and the process is genuinely simple.
17. Create a Minimalist Japandi Style
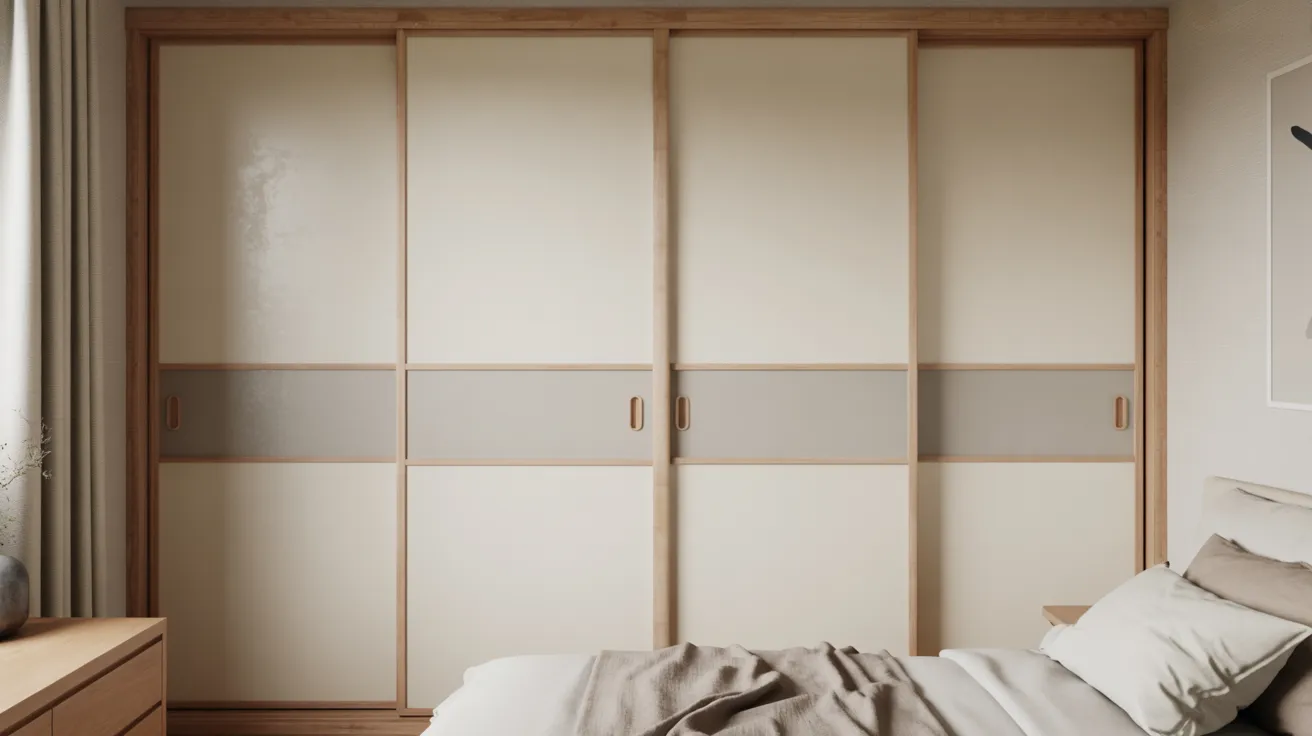
A warm white or greige base coat paired with thin natural wood trim accents creates a Japandi finish that feels calm and carefully considered.
Keep lines clean, hardware minimal, and the overall palette restrained. This style works by doing less, not more. Every element on the door should earn its place.
It suits bedrooms particularly well where the goal is a space that feels settled and serene.
18. Apply Marble Contact Paper
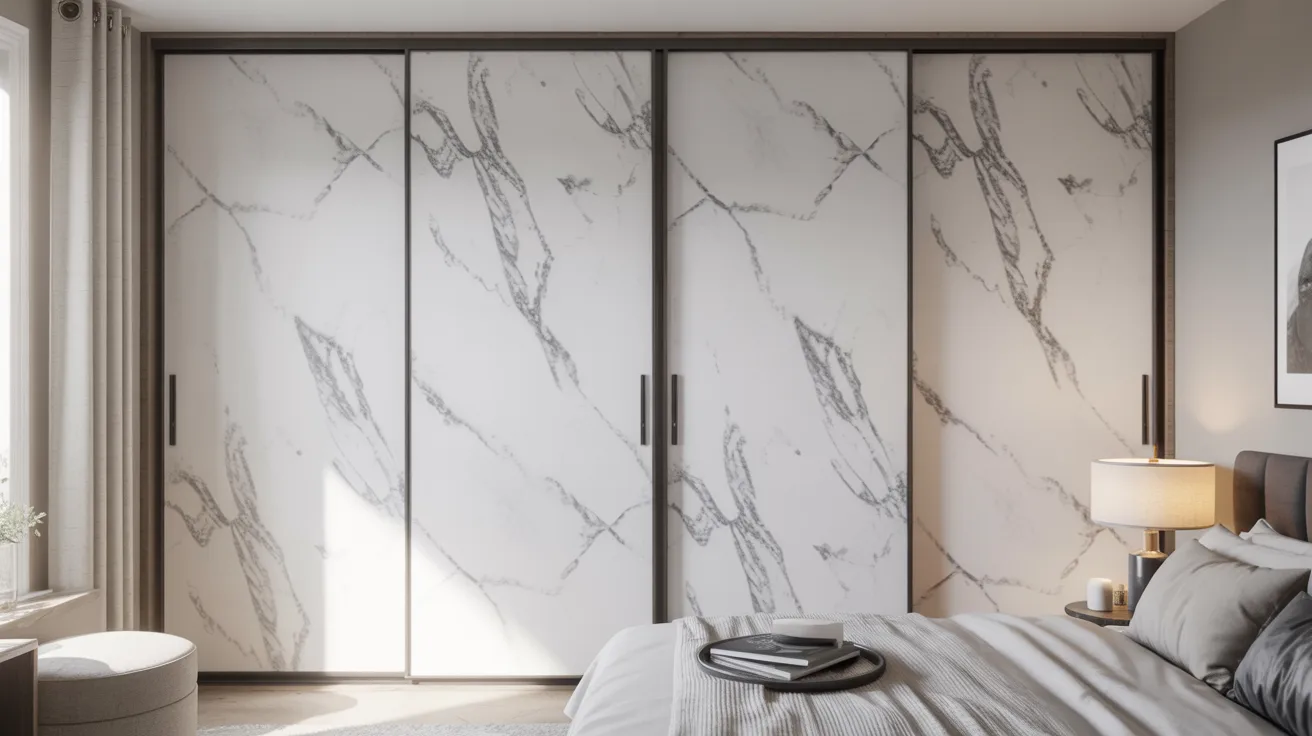
Marble-effect contact paper delivers a luxury appearance for under $30. The larger the marble pattern, the more convincing the result at normal viewing distance.
Apply it in full-door sections rather than strips for the most seamless finish. Overlap seams carefully and align the pattern across panels where possible.
This works well in contemporary and glam-style interiors where statement surfaces are part of the design language.
19. Add Leather Pull Handles
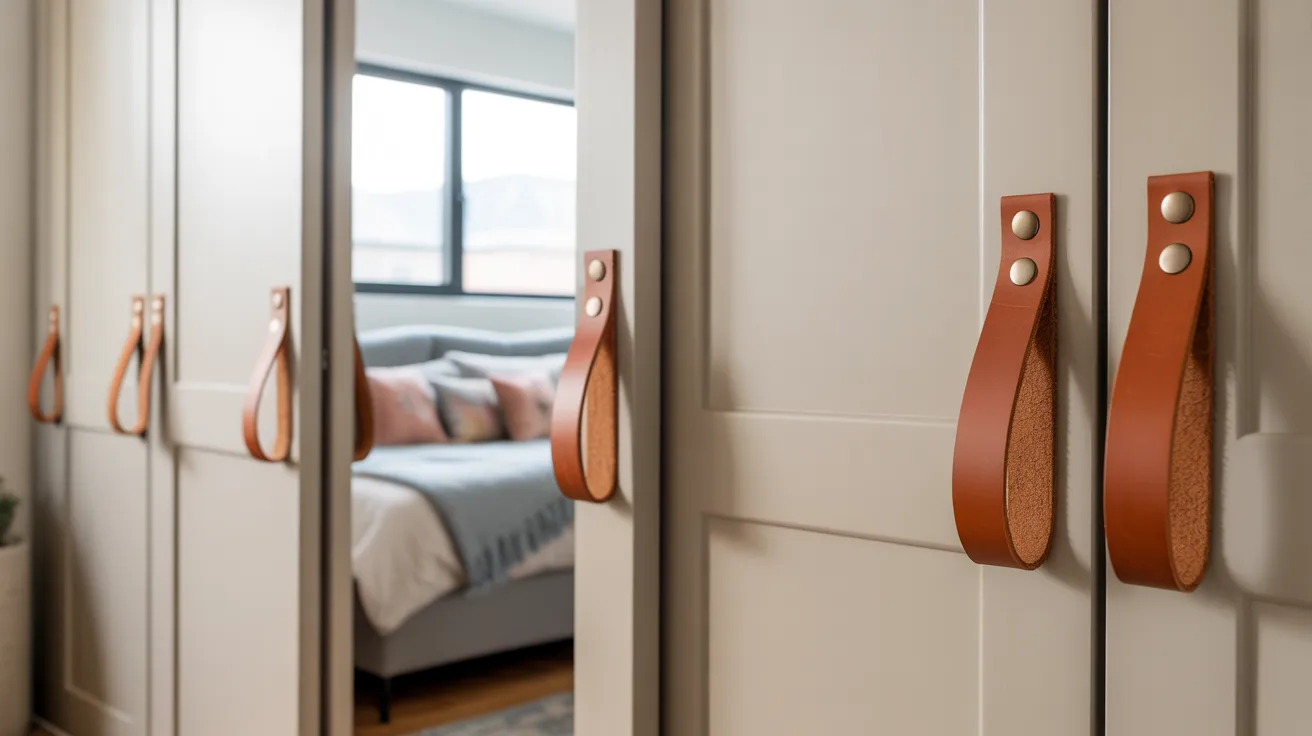
Swapping out the original door handles for leather tab pulls is a small detail that makes a disproportionately large difference to how finished the door looks.
Leather pulls are available ready-made or can be made from a strip of leather and two screws. They add warmth and craftsmanship to any door style.
This works as a standalone upgrade or pairs well with any of the other ideas on this list.
20. Use Decorative Wall Panels
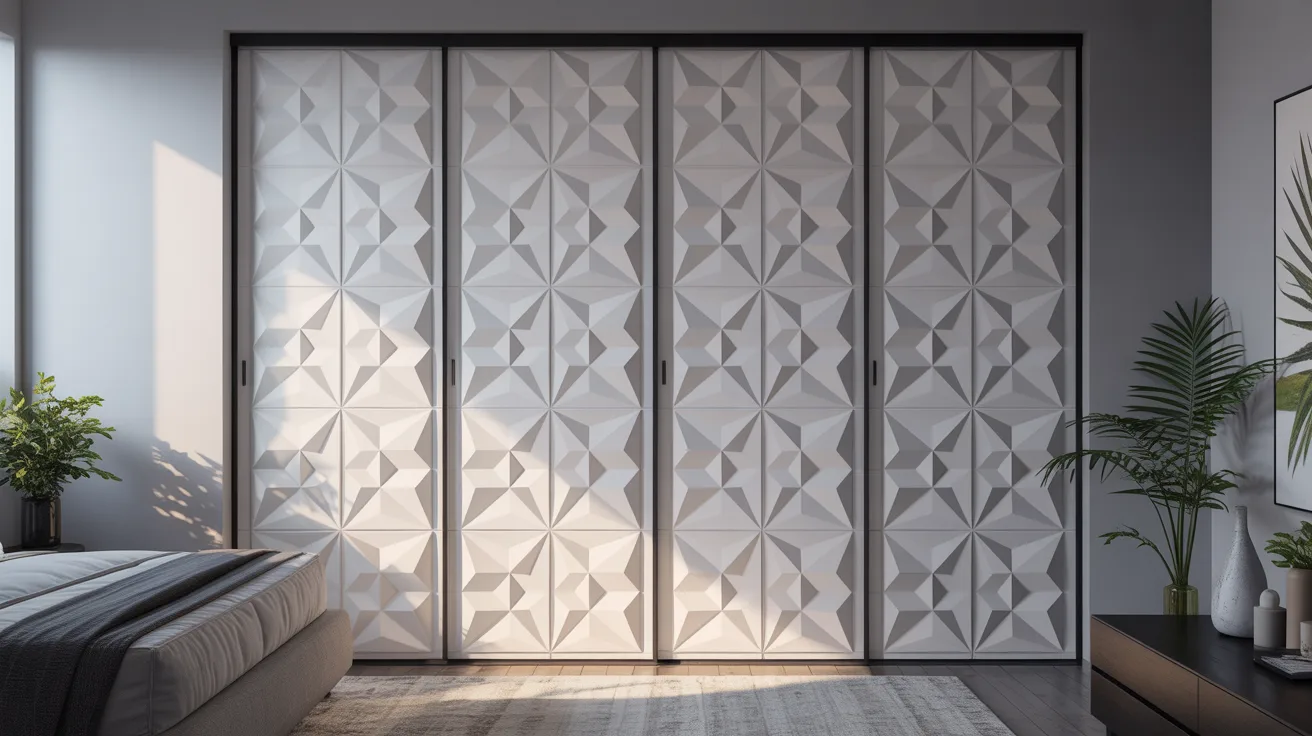
Three-dimensional wall panels applied to a flat door surface add texture and shadow that completely change how the door reads in a room.
Lightweight polyurethane or PVC 3D panels are easy to cut and apply with adhesive. Paint them in one colour to let the texture do the work.
This suits contemporary and art-deco inspired interiors where surface detail is part of the design vocabulary.
21. Paint a Two-Tone Design
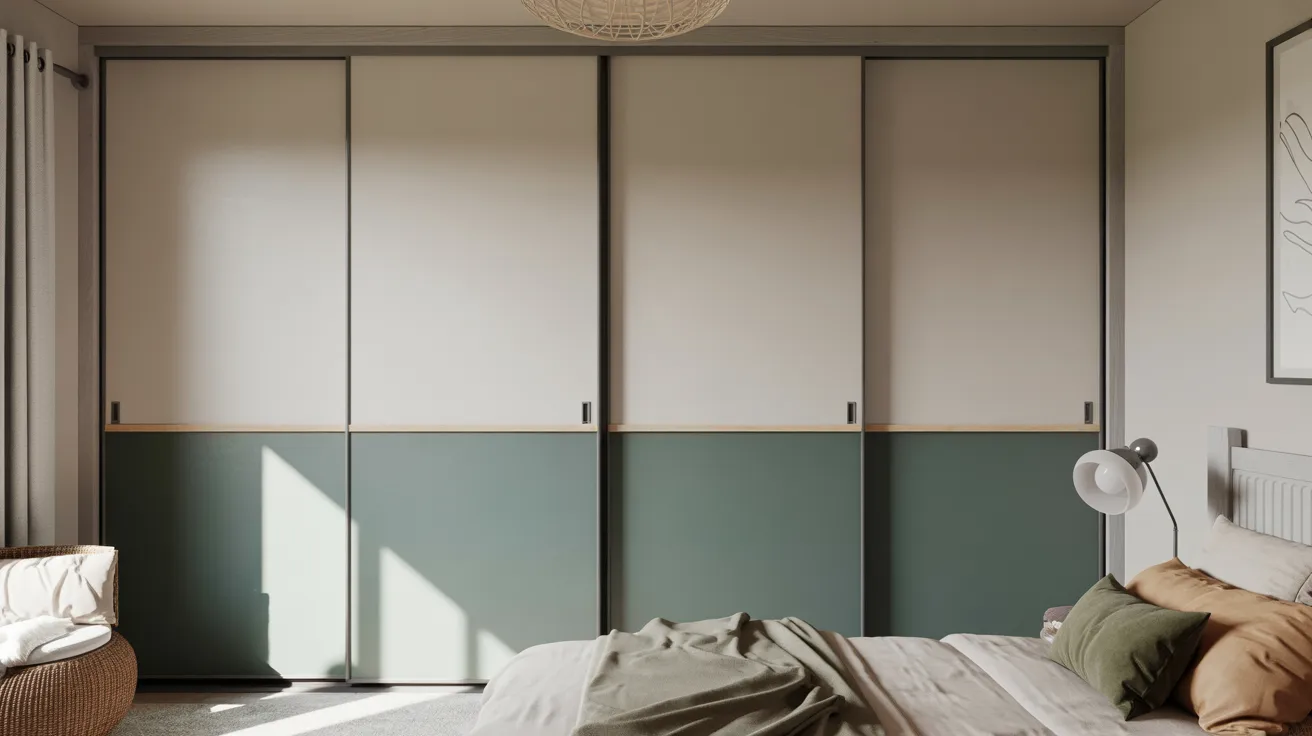
Dividing the door horizontally with two contrasting colours adds visual interest without any additional materials beyond paint.
The split typically works best at around two thirds of the way up the door. Darker colour on the bottom, lighter on top is the most common and balanced approach.
Add a thin strip of contrasting trim along the dividing line for a more polished finish.
22. Install Cane Trim Frames
Framing a door panel with thin cane trim rather than standard timber molding adds a layer of texture alongside the structure. It bridges the gap between classic panelling and the current natural materials trend.
Use construction adhesive and clamps or tape to hold the cane trim in position while it sets. Seal it with a clear varnish to prevent fraying at the cut ends.
23. Turn Doors Into Gallery Walls
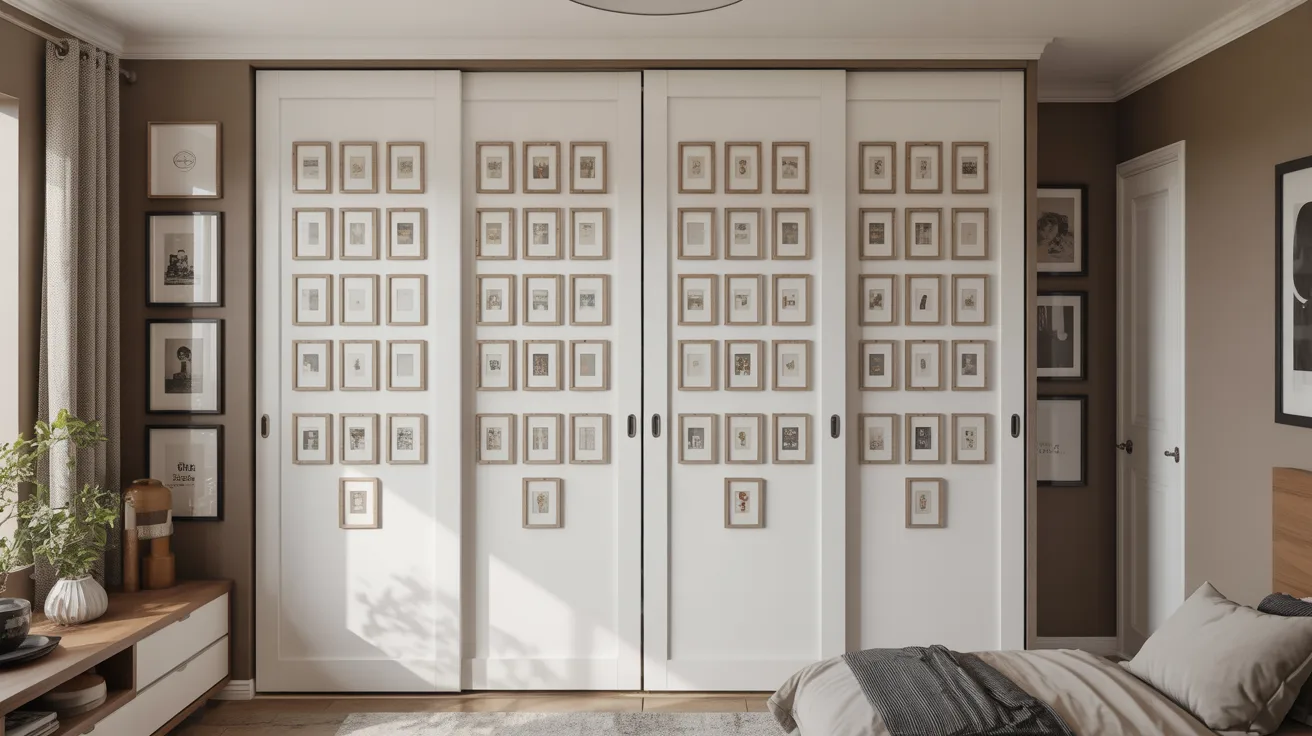
Attach a grid of small framed prints, photographs, or art pieces directly to the door panels using picture-hanging strips. The door becomes a display surface without losing any wall space.
Keep frames consistent in size or style for a curated look. This works well in hallways and bedrooms where the doors are frequently seen but the walls around them are limited.
24. Add LED Backlighting
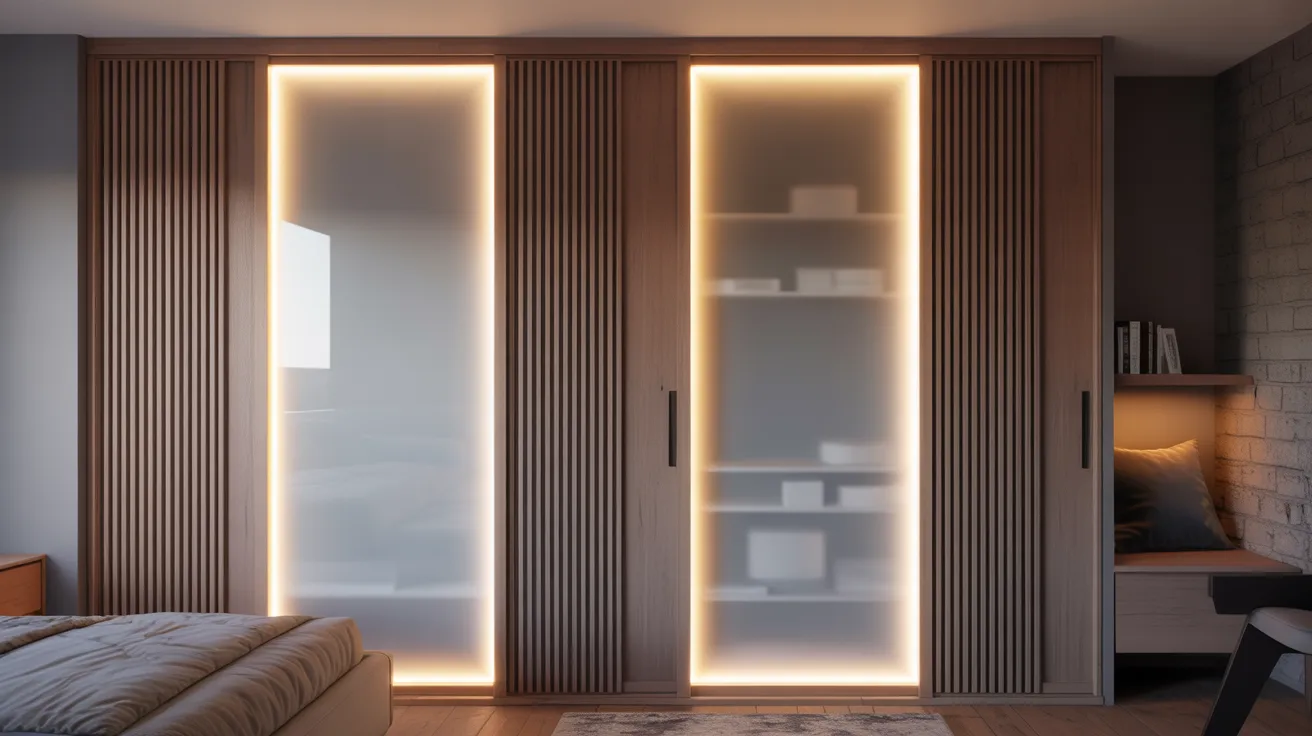
Peel-and-stick LED strip lighting along the door frame edges or behind a frosted panel insert creates ambient lighting that transforms the door into a design feature after dark.
Use a warm white or soft colour tone to keep the effect subtle. Harsh cool white looks clinical rather than atmospheric in a bedroom setting.
This pairs particularly well with frosted film or slat wall designs where the light can diffuse through the material.
25. Use Metallic Spray Paint
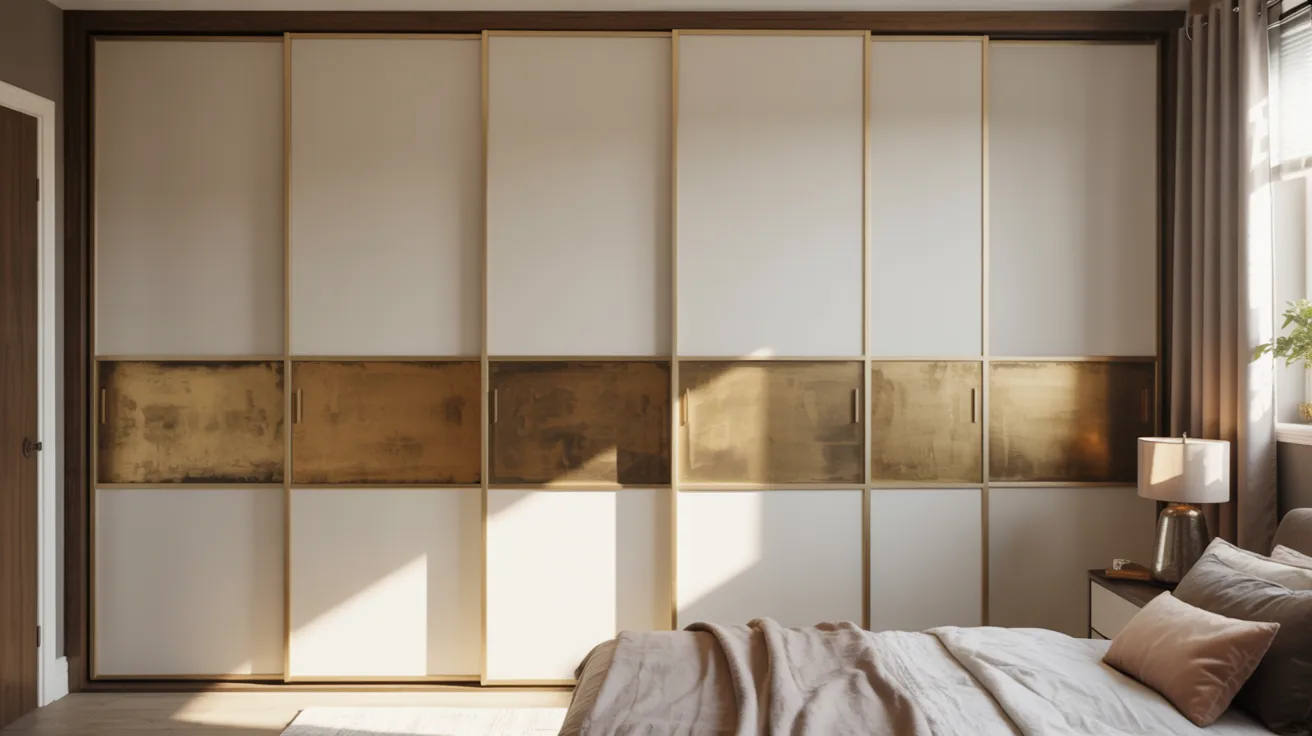
Gold, brass, and bronze spray paint applied to door trim, handles, or an entire door panel adds warmth and a high-end feel that flat paint can’t replicate.
Use a light hand with multiple thin coats rather than one heavy application to avoid drips. Seal with a clear lacquer once dry to prevent the metallic finish from wearing off.
This works as an accent treatment rather than a full door finish in most interiors.
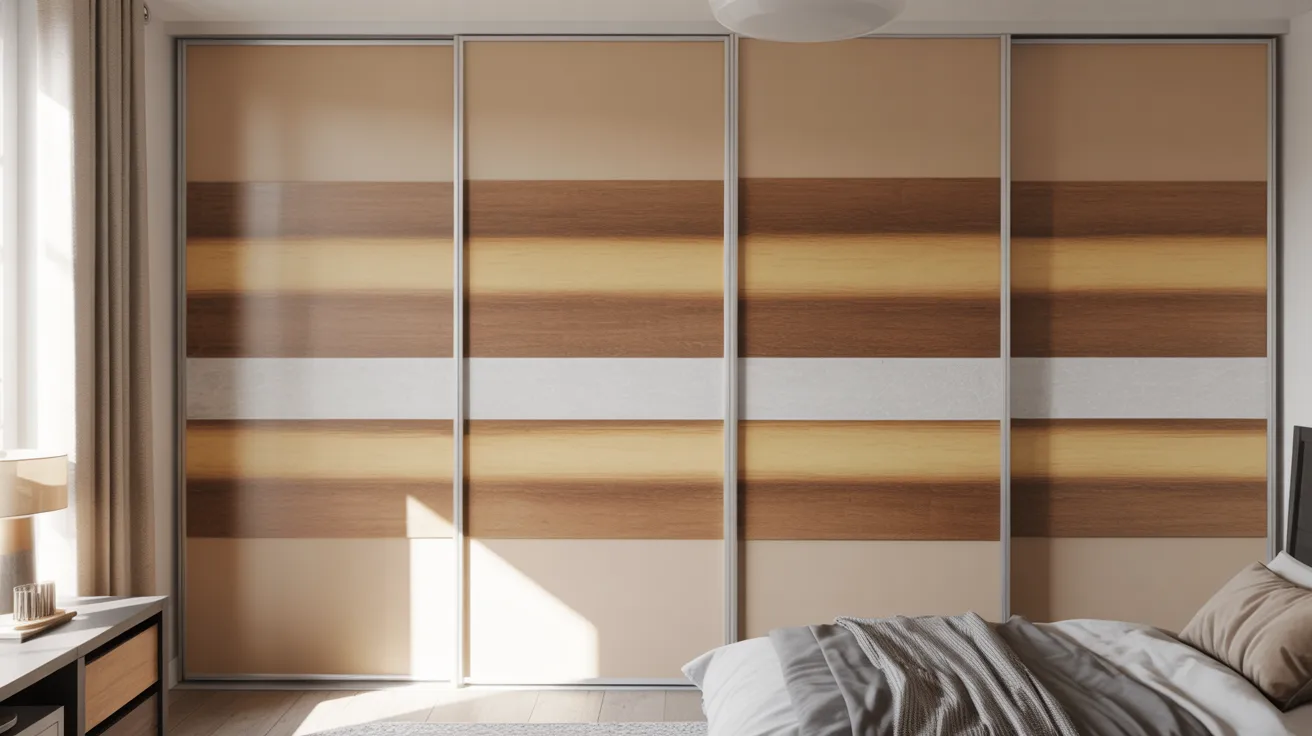
26. Add Wood Plank Panels
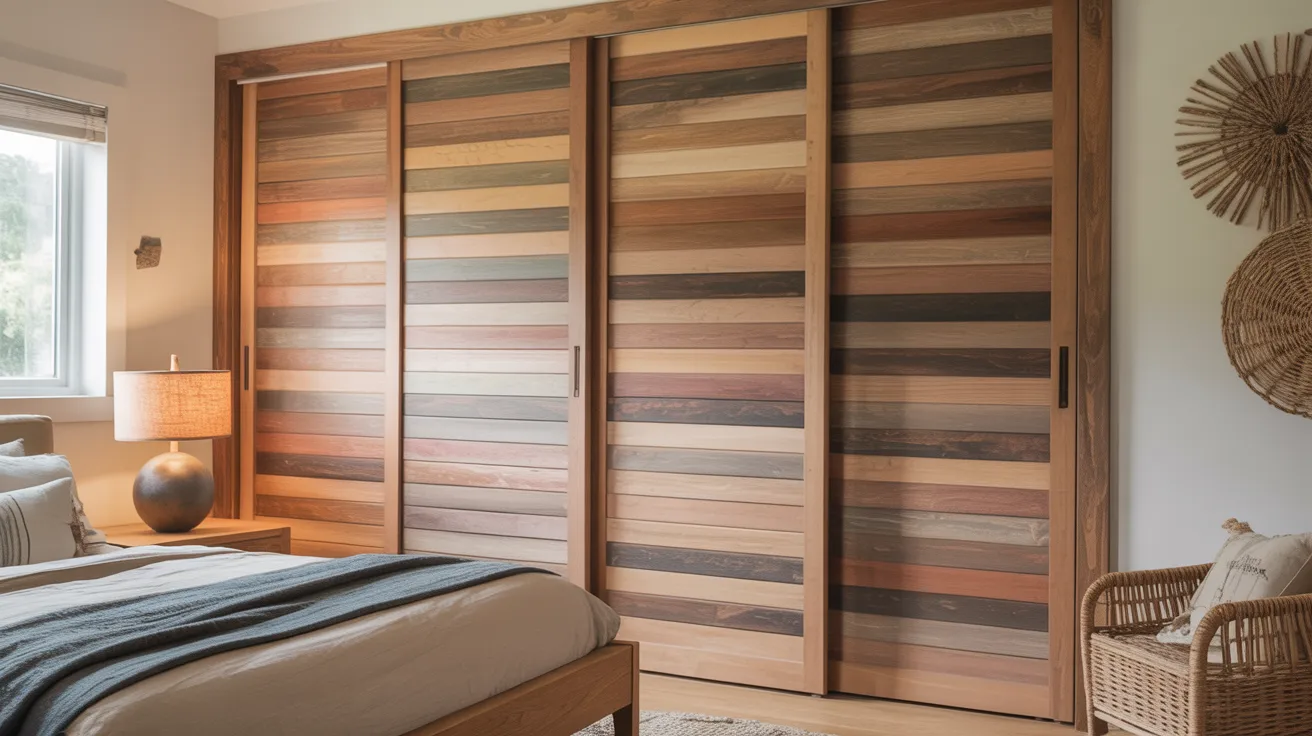
Thin reclaimed or new timber planks applied horizontally across the door surface create a warm, natural finish that suits farmhouse, coastal, and organic modern styles.
Keep planks lightweight to avoid adding excessive weight to the door. Finish with a clear oil or wax rather than paint to let the natural grain show through.
The texture variation between planks gives each door a slightly different character which adds to the handmade feel.
27. Create a Built-In Closet Wall Look
Extending the door trim out onto the surrounding wall, adding matching paint, and framing the entire closet opening as one architectural unit makes the whole thing look like a custom built-in.
This is the most involved idea on the list but also one of the most impactful. The closet stops looking like a closet and starts looking like it was always part of the room’s design.
It works best in bedrooms with plain surrounding walls where the extended treatment can really land.
Step-by-Step Guide to a Simple Sliding Closet Door Makeover
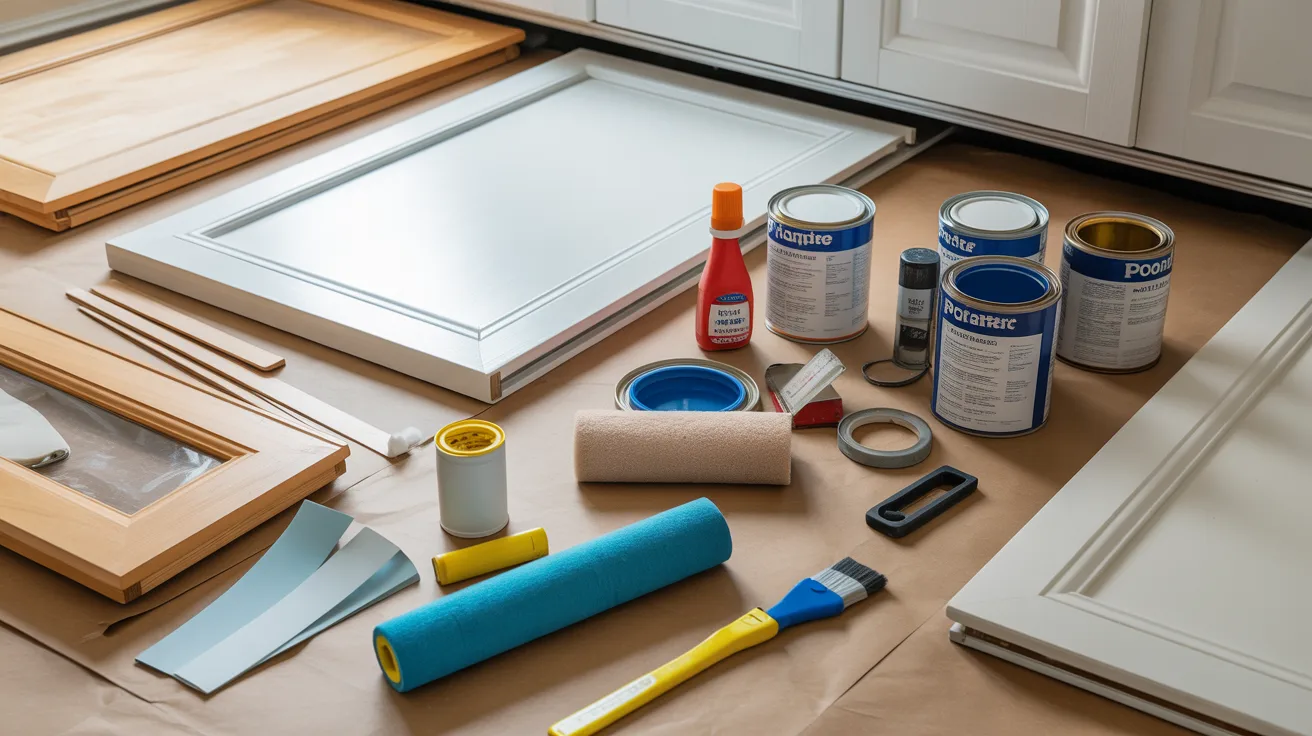
Most DIY sliding closet door makeover projects follow the same basic process. Getting the preparation right is what separates a clean result from one that looks rushed.
- Remove the doors from the track if possible. Working flat is easier than working vertical for most finishes
- Clean the surface thoroughly with a degreaser. Dust and grease prevent paint and adhesive from bonding properly
- Sand lightly if painting. This gives the new coat something to grip and removes any existing gloss
- Apply primer before painting, especially on slick or previously painted surfaces
- Tape off all edges with painter’s tape and use a foam roller for a smooth, even application
- Allow full drying time between coats. Rushing this step causes peeling and uneven finish
- Apply any trim, panels, or contact paper after the base coat is fully dry
- Rehang the doors and check the slide action. Add new hardware last once everything else is finished
Take your time with the prep and the actual application goes much faster.
Budget Tips for an Affordable Closet Door Makeover
You don’t need to spend much to get a result that looks considered and deliberate. Most of the best sliding closet door makeover ideas on this list cost well under $100.
- Use leftover paint from other rooms for a zero-cost colour upgrade
- Peel-and-stick wallpaper and contact paper deliver high visual impact for under $30
- Repurpose timber offcuts or scrap MDF for trim and panel work instead of buying new
- Check thrift stores and habitat restore outlets for mirrors, handles, and decorative pieces
- Choose removable and renter-friendly options if you’re not in a permanent home
Many homeowners search specifically for budget sliding closet door makeover ideas because they want an upgrade without the cost of full replacement. Every idea on this list fits that goal.
Final Thoughts
Your sliding closet doors take up more visual space in a room than most people realise. Updating them is one of the fastest ways to make a bedroom or hallway feel genuinely different.
You don’t need to replace them. A sliding closet door makeover can start as simply as a can of paint and an afternoon.
Start with one idea that feels manageable and see how it changes the room. Once you see the difference, you’ll wonder why you waited.
Which of these 27 ideas are you planning to try first? Drop it in the comments.
And if you’re mid-project and want a second opinion, share what you’re working with. Someone else is tackling the same doors right now.
Frequently Asked Questions
What Is the Easiest Sliding Closet Door Makeover?
Painting the doors or applying peel-and-stick wallpaper is the quickest and most beginner-friendly option. Both can be completed in a few hours with basic tools.
How Much Does a Sliding Closet Door Makeover Cost?
Most DIY projects cost between $20 and $150 depending on materials used. Paint and contact paper are the most affordable options.
Can You Makeover Mirrored Sliding Closet Doors?
Yes. Frosted film, decorative frames, wallpaper borders, and paint on surrounding panels all work well on mirrored doors without removing the mirror itself.
Are Sliding Closet Door Makeovers Renter Friendly?
Yes. Contact paper, removable wallpaper, temporary trim, and peel-and-stick options are all renter-safe and leave no permanent damage.
How Long Does a DIY Sliding Closet Door Makeover Take?
Most projects complete in one weekend or even a few hours depending on the design chosen. Paint upgrades are the fastest. Panel and trim work takes slightly longer.


