Installing a tile backsplash stands out as an ideal first tiling project for DIY beginners because it involves a manageable wall area with forgiving techniques and impressive visual results.
Unlike large floor installations that require extensive preparation and precision, backsplash projects offer a controlled workspace where mistakes can be easily corrected and learning happens naturally.
This comprehensive guide will walk you through five straightforward steps that transform your kitchen or bathroom with professional-looking tile work.
From selecting the right materials and preparing your wall surface to applying adhesive, setting tiles, and finishing with grout, each phase builds your confidence and skills progressively.
First-time tilers should feel encouraged knowing that backsplash installation requires no special expertise—just patience, basic tools, and attention to detail for stunning results.
5 Steps to Install a DIY Tile Backsplash
Follow these five straightforward steps to create a professional-looking tile backsplash that transforms your kitchen with stunning results.
Step 1: Plan, Measure & Gather Materials
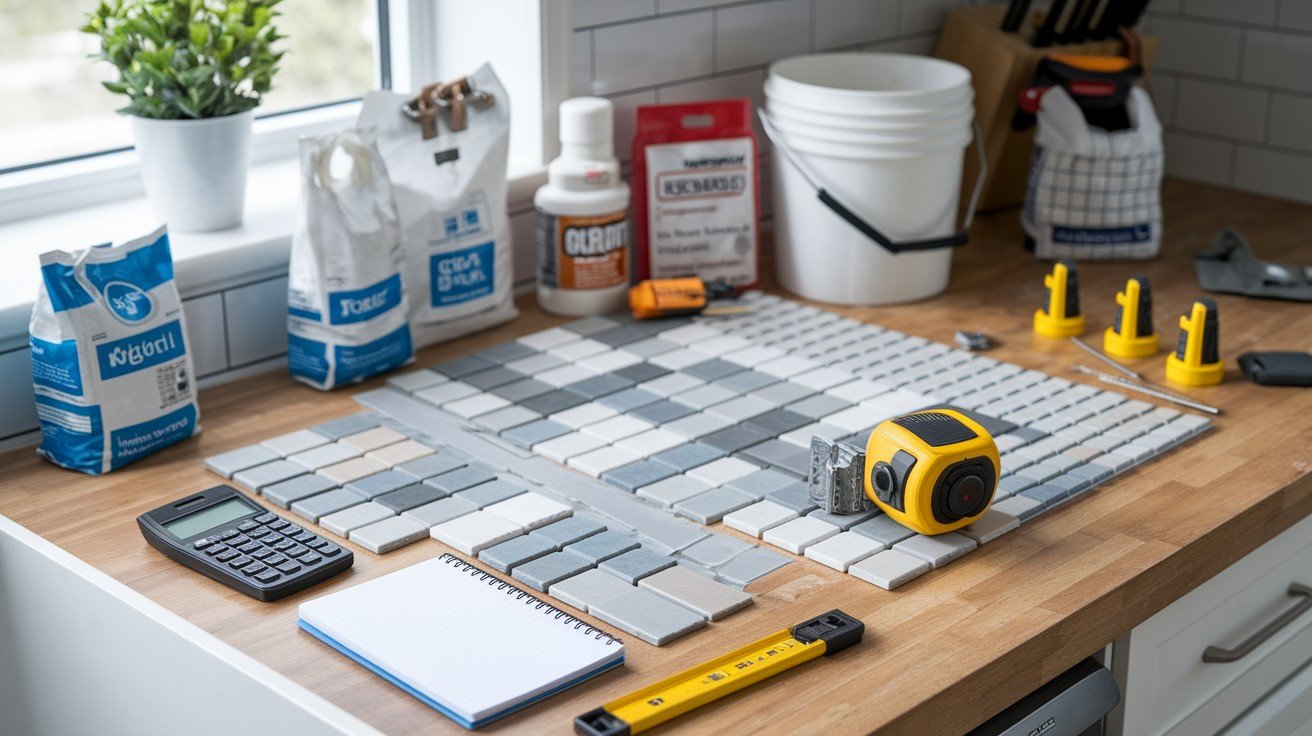
Measure Your Backsplash Area Begin your backsplash project by accurately measuring the wall area to calculate total square footage needed for your tile installation.
Measure the length and height of each wall section, multiplying these dimensions to determine square footage, then subtract the area of windows, outlets, and other openings.
Decide whether you want to include side splashes that extend along adjacent walls, as this affects your total material needs.
Always purchase 10-20% extra tile beyond your calculated needs to account for cutting waste, breakage, and future repairs.
Choose Tile, Tools & Supplies Select from various tile options including classic subway tiles, intricate mosaic patterns, or unique handmade varieties based on your style preferences and budget.
Gather essential tools including a notched trowel for adhesive application, tile spacers for consistent gaps, a wet saw for precise cuts, laser level for straight installation lines, grout float for application, and mixing buckets.
Purchase necessary materials including tile mortar or adhesive, grout in your chosen color, caulk that matches your grout, tile sealer if required, and primer for proper wall preparation.
Step 2: Prep the Wall Surface
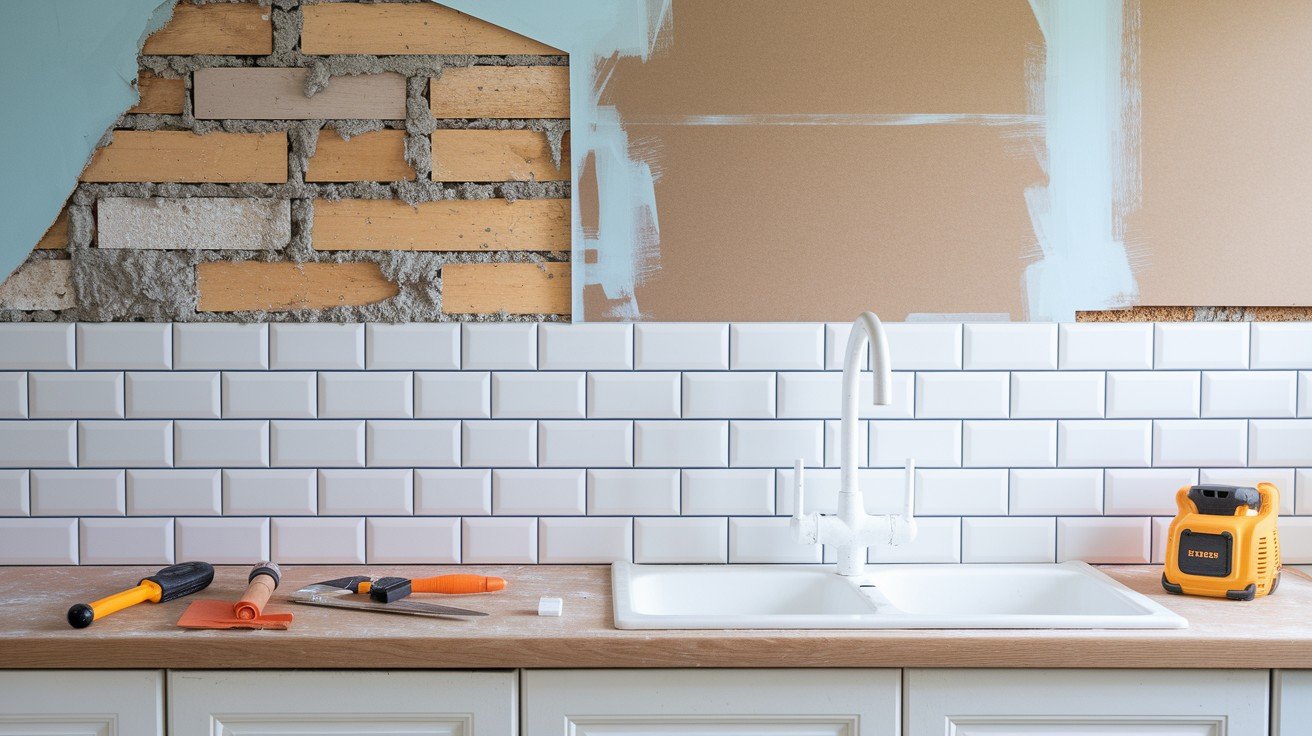
Remove Existing Tile (If Necessary) If replacing existing tile, carefully remove old tiles using a hammer and chisel or oscillating tool, working systematically to minimize damage to the underlying drywall.
Start at corners or edges where tiles may be looser, and work slowly to preserve as much wall surface as possible.
When extensive drywall damage occurs during removal, replacing entire sections often proves more efficient and cost-effective than attempting multiple small patches that may create an uneven surface.
Repair or Replace Drywall Cut and install new drywall sections where needed, ensuring all surfaces are level and smooth before tile installation begins.
Use moisture-resistant drywall in areas prone to water exposure, such as behind sinks or near dishwashers, to prevent future moisture damage.
Always apply high-quality primer to all drywall surfaces before tiling, as this creates proper adhesion and prevents the drywall paper from absorbing moisture from the adhesive.
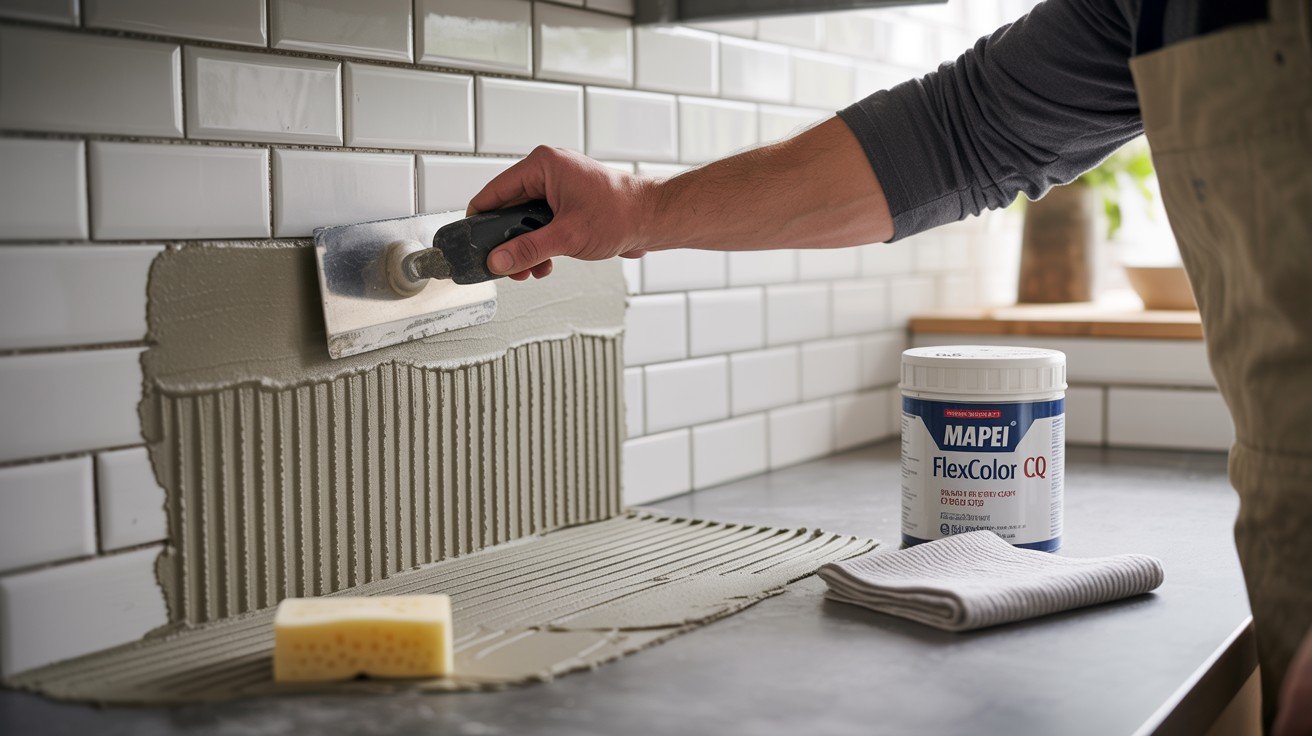
Step 3: Install the Tile

Plan Your Layout Use a laser level to establish perfectly straight reference lines that guide your tile installation and ensure professional results.
Plan your layout to avoid creating tiny tile slivers at edges, which look unprofessional and are difficult to cut and install properly.
Decide whether you’ll finish edges with matching tile pieces that you cut yourself or purchase coordinating trim pieces for a clean, finished appearance.
Apply Mortar and Set Tiles Master proper trowel technique by using the flat side to spread adhesive evenly, then the notched side to create consistent ridges that ensure proper tile adhesion.
Work in small sections to maintain control over the adhesive’s working time and prevent it from drying before tiles are set.
Begin tile installation from the bottom row, using spacers to maintain consistent gaps, and work systematically upward.
Learn proper cutting techniques for tiles around electrical outlets, corners, and other obstacles using appropriate tools for clean, precise cuts.
Step 4: Grout the Tile
Clean Tile Before Grouting Remove any dried adhesive from tile surfaces and ensure grout lines are clean and free of debris before beginning the grouting process.
Using grout and mortar in matching or complementary colors helps create a cohesive look and makes any minor cleanup issues less noticeable in the final installation.
Apply Grout Hold the grout float at a 45-degree angle while spreading grout diagonally across tiles to ensure complete filling of all joints.
Clean excess grout immediately using a damp sponge with gentle, circular motions, followed by a clean microfiber cloth for final polishing.
When using specialized products like Mapei Flexcolor CQ or other pre-mixed grouts, follow manufacturer-specific instructions for application timing and cleanup procedures.
Step 5: Caulk and Seal
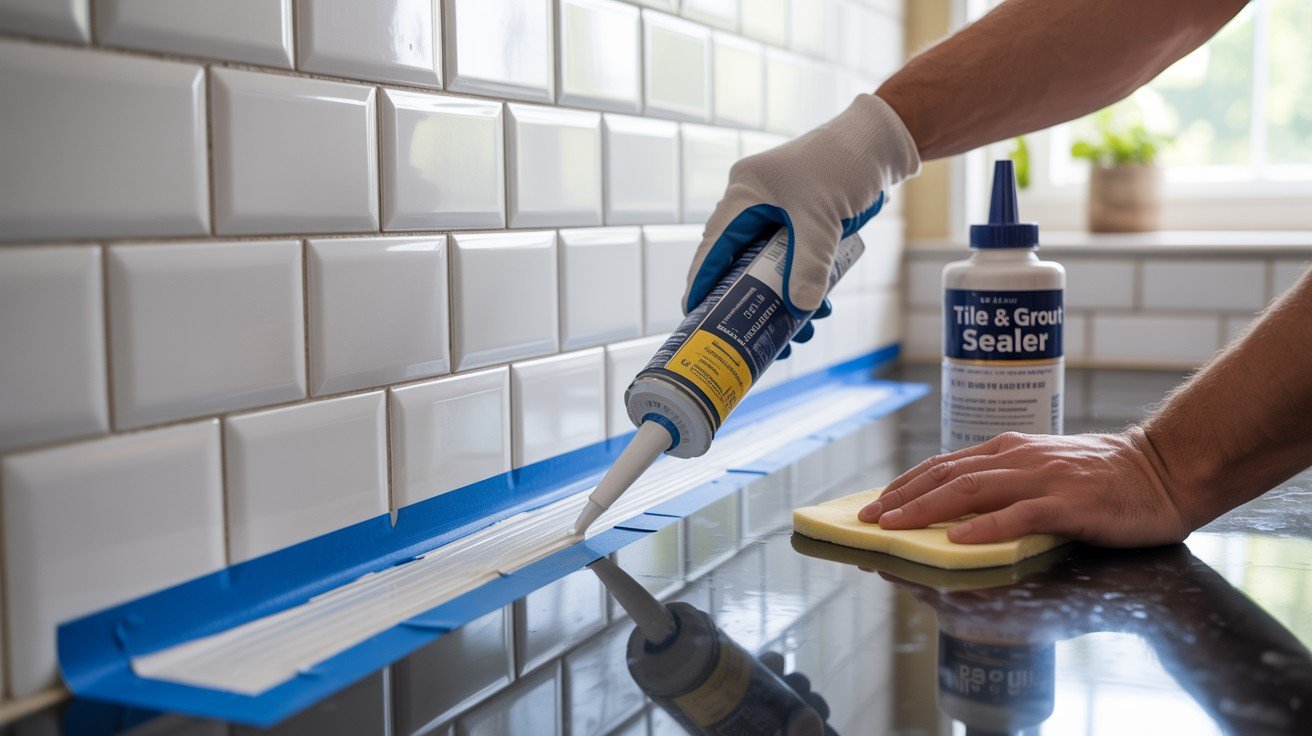
Caulk All Edges Apply caulk at all transitions including where tile meets countertops, inside corners where walls meet, and along outer edges where tile terminates.
Use painter’s tape to create clean, straight caulk lines and remove tape immediately after application for professional results.
Choose a caulk color that matches your grout for a seamless, polished appearance that maintains visual continuity throughout the installation.
Seal the Tile and Grout (If Needed) Determine whether your specific tile and grout combination requires sealing based on porosity and manufacturer recommendations.
Apply sealer according to product instructions, ensuring proper ventilation and allowing adequate drying time between coats for maximum protection and longevity of your backsplash installation.
Tips for a Smooth DIY Tile Backsplash Project
Start Small and Practice First
- Use spare tiles to practice cuts before working on actual installation
- Perform a dry layout to test your pattern and identify spacing issues
Use a Laser Level
- Ensures perfectly straight rows from first tile to final piece
- Essential when working around outlets or windows
Work in Sections
- Apply only as much adhesive as you can tile within 10-15 minutes
- Prevents mortar from drying out before installation
Clean As You Go
- Remove excess mortar immediately while wet and pliable
- Keep a damp sponge nearby for quick cleanup
Don’t Stress About Mistakes
- Purchase extra tiles for cutting errors and breakage
- Most imperfections can be hidden during grouting and caulking
Conclusion
Installing a tile backsplash using this straightforward 5-step method proves that professional-looking results are within reach for any motivated homeowner.
The process breaks down into manageable phases: planning and measuring, preparing your wall surface, installing tiles with proper technique, grouting for durability, and finishing with caulk and sealant.
Approach your kitchen backsplash project with confidence, knowing that thousands of DIY enthusiasts have successfully completed similar installations using these same techniques.
The key to achieving results that rival professional work lies in thorough planning and maintaining patience throughout each step.
Take time to measure accurately, prepare surfaces properly, and work methodically rather than rushing through any phase.
Your attention to detail and careful execution will reward you with a beautiful, lasting backsplash that adds value and style to your home.
Frequently Asked Questions
How long does it take to install a tile backsplash?
Most DIY tile backsplash projects can be completed over a weekend, with installation taking 1-2 days depending on the area size. Allow additional time for adhesive and grout curing, plus any wall preparation work that may be required.
What type of tile is easiest for beginners to install?
Subway tiles and larger format tiles are ideal for first-time installers because they require fewer cuts and create straighter lines. Mosaic tiles on mesh backing also work well since they come pre-spaced and cover more area quickly.
Do I need special tools to cut tiles around outlets?
A wet saw handles most straight cuts, while a tile nipper or oscillating multi-tool works best for detailed cuts around outlets and switches. You can also use a tile hole saw attachment for clean circular cuts around pipes or fixtures.
Can I install tile directly over existing tile?
Yes, you can tile over existing tile if the surface is clean, level, and firmly attached to the wall. Use a bonding primer designed for tile-to-tile applications to ensure proper adhesion of your new installation.
How do I know if my tiles need sealing?
Natural stone tiles like marble, granite, and travertine typically require sealing to prevent staining and moisture damage. Ceramic and porcelain tiles usually don’t need sealing, but always check manufacturer recommendations for your specific tile type.