
Building your own cabinet doors offers an excellent opportunity to save money while achieving the exact look you want for your home.
This DIY project provides significant cost savings compared to purchasing pre-made doors, often reducing expenses by 50% or more.
You’ll gain complete control over sizing, ensuring perfect fits for your specific cabinet openings, and enjoy unlimited design flexibility to match your personal style preferences.
Cabinet door construction works well for various applications throughout your home, including kitchen renovations, bathroom updates, and garage storage solutions.
With basic woodworking skills and the right tools, you can create professional-quality doors that enhance both functionality and appearance.
This comprehensive guide will walk you through each step of the process, from initial planning to final installation.
Tools and Materials Needed
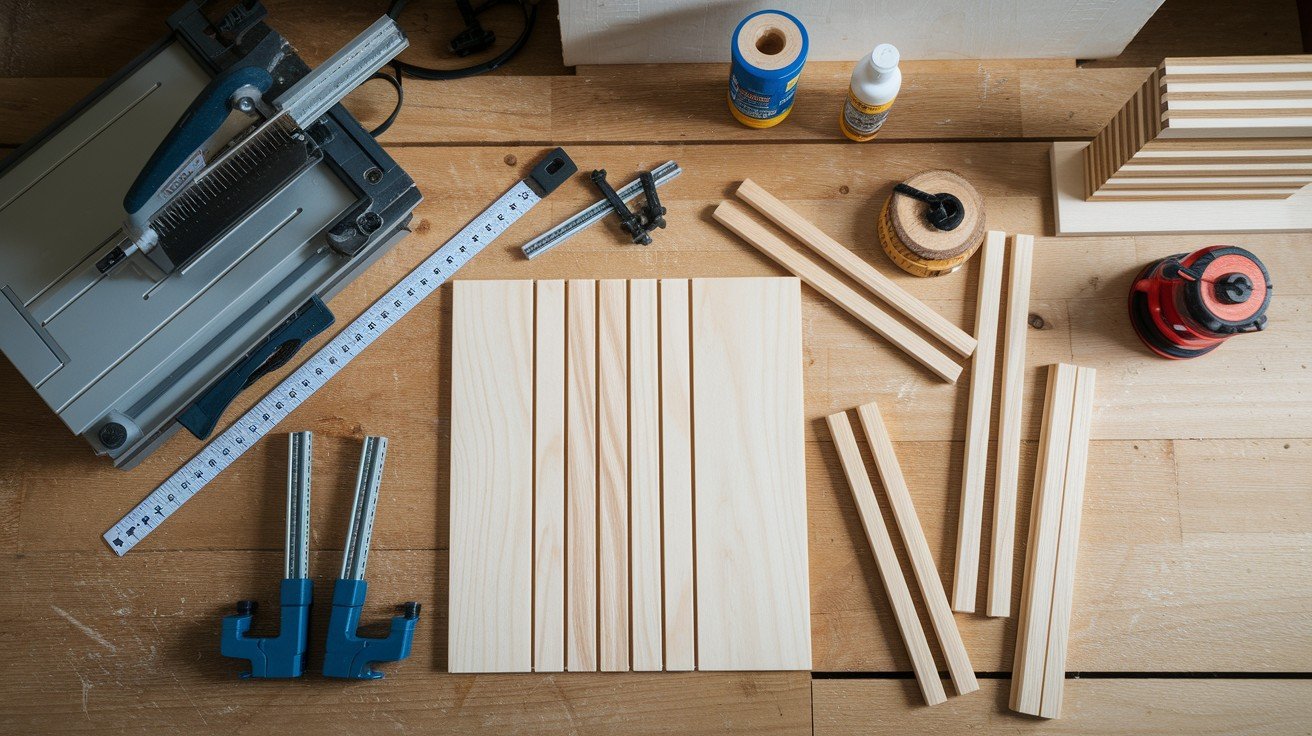
Having the right equipment makes cabinet door construction much easier and ensures professional results. Your essential tools and materials include:
Essential Tools
- Table saw for precise cuts and consistent dimensions
- Miter gauge for accurate angles and square cuts
- Measuring tape for consistent measurements throughout the project
- Feather board to maintain safe, straight cuts during sawing
- C-clamps to secure pieces firmly during assembly
- Combination square to ensure perfect 90-degree angles
Materials
- 1×3 or 1×4 hardwood boards for creating frame rails and stiles
- 1/4-inch plywood for the center panel construction
- Wood glue for strong, lasting bonds between all components
- Euro or cup hinges for smooth operation and easy adjustment
- Sandpaper or orbital sander for creating smooth, finish-ready surfaces
Choose quality lumber like oak, maple, or pine based on your budget and desired final appearance.
Step by Step Guide to to Build a Cabinet Door
A comprehensive tutorial covering measurement, cutting, assembly, and finishing techniques to create professional-quality cabinet doors using basic woodworking tools and materials.
Step 1: Measure and Cut Your Frame Pieces
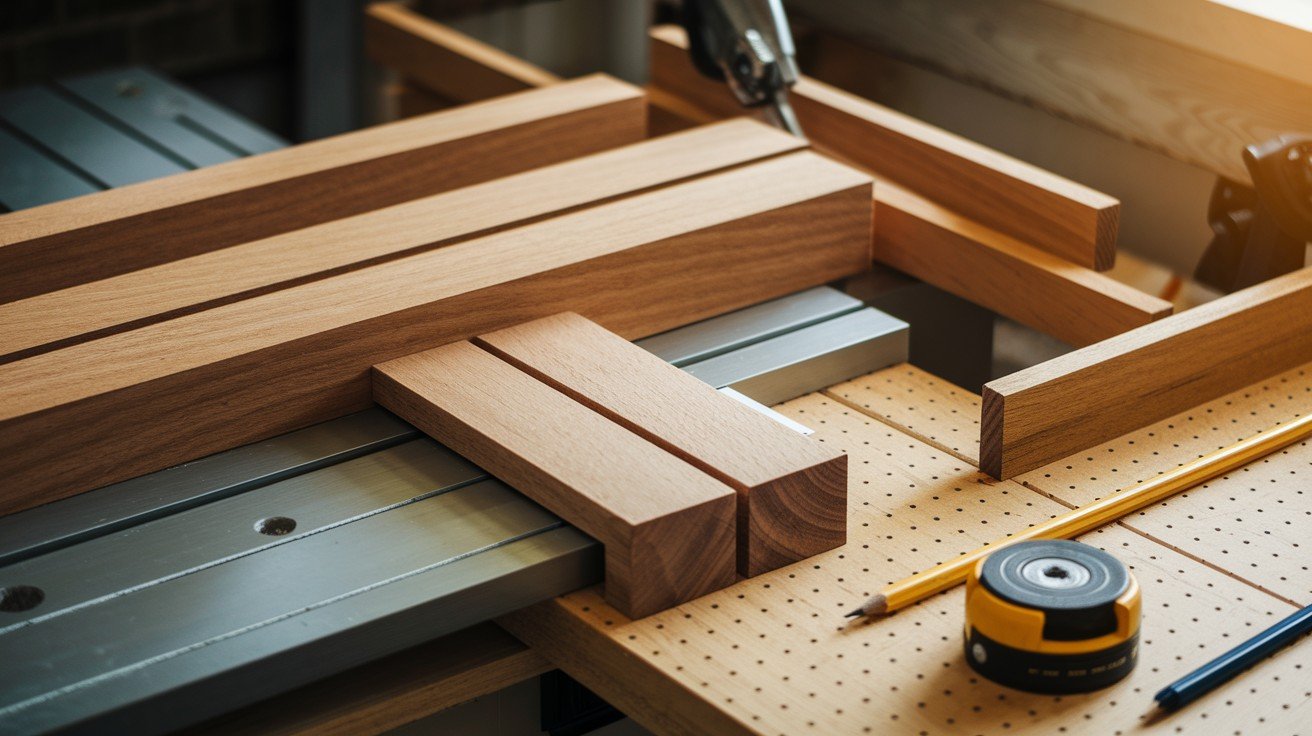
Cut the Stiles and Rails Begin by measuring your cabinet opening carefully and adding extra material if needed for proper overlap.
Cut two vertical stiles and two horizontal rails to your calculated dimensions using your table saw.
Use a stop block on your table saw for consistent lengths across all pieces, ensuring uniformity in your final product.
Double-check all measurements before making cuts, as accuracy at this stage determines the quality of your finished door.
Consider the wood grain direction when selecting your pieces for the most appealing appearance.
Step 2: Cut Grooves and Tenons
Groove for the Center Panel Use your table saw to cut grooves along the inside edges of all frame pieces.
These grooves will hold your center panel securely while allowing for natural wood movement.
Make multiple passes to achieve the exact width needed to match your panel thickness, taking care to maintain consistent depth throughout each cut.
The groove should be centered on the edge of each piece. Test your setup on scrap wood first to ensure proper fit before cutting your actual door pieces.
Tenon Joints for Rails Cut shallow tenons on both ends of each rail piece for strong joint connections.
These tenons should be approximately 1/4 inch thick and match the depth of your grooves. Use a tenoning jig or your table saw’s miter gauge to ensure consistent, square cuts.
Test-fit each tenon into the corresponding grooves to ensure proper snugness without forcing the pieces together.
The joint should slide together with light pressure but remain tight enough to create a strong bond when glued.
Step 3: Cut the Center Panel
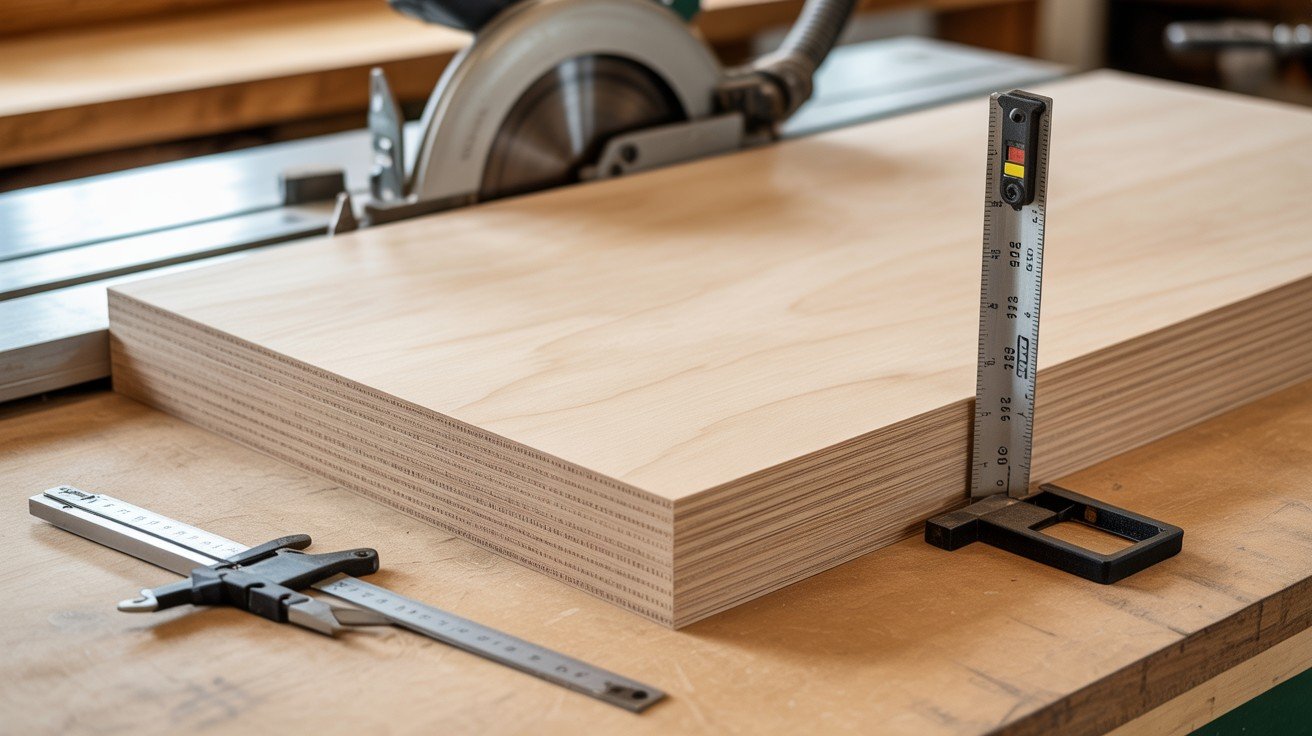
Rip and Crosscut the Plywood Cut your 1/4″ plywood panel slightly smaller than the inside frame space measurements.
Calculate the panel size by measuring the distance between the bottom of opposite grooves, then subtract an additional 1/8 inch for expansion space.
Leave a 1/16″ gap on all sides to allow for natural wood expansion, which prevents buckling and cracking over time.
Use a sharp blade designed for plywood to minimize tear-out and ensure clean edges. Support the plywood properly during cutting to prevent sagging and binding.
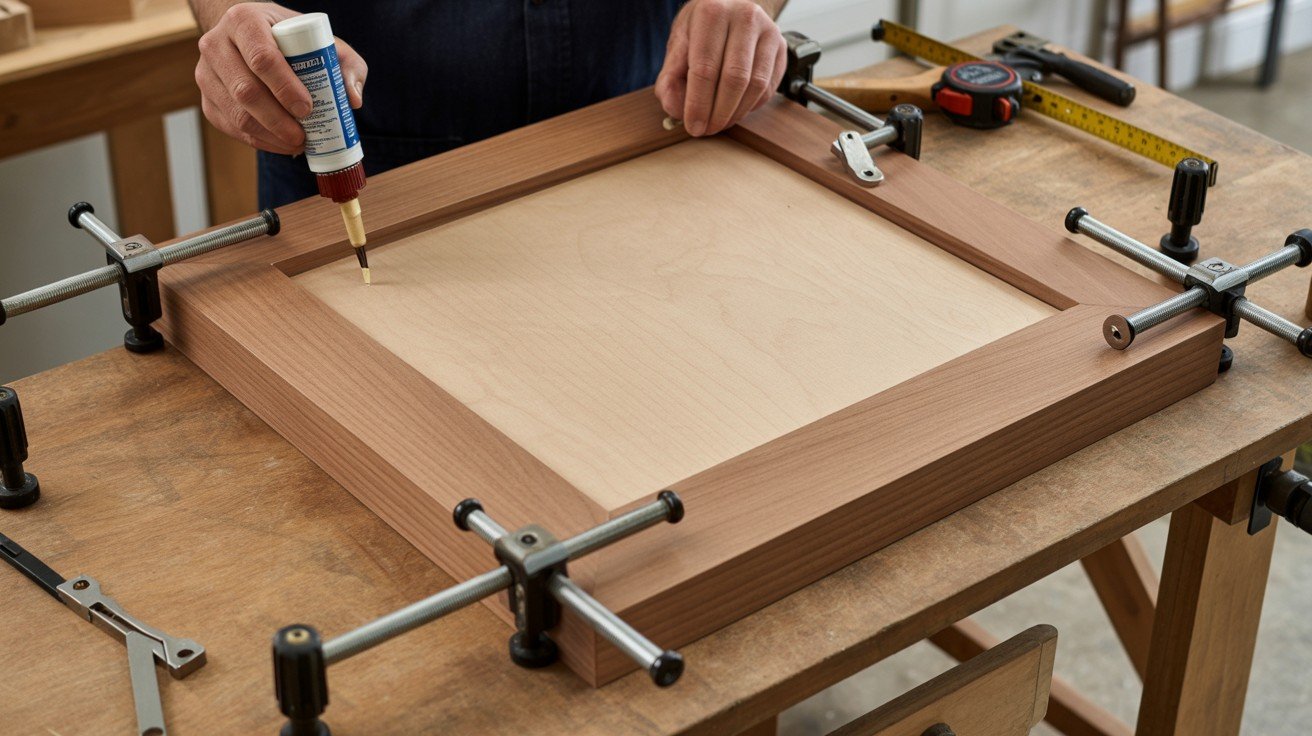
Step 4: Assemble and Glue the Door
Dry Fit First Assemble the entire frame and panel without glue to check all connections and fit.
This step helps identify any issues before applying permanent adhesive. Check that all corners are square using a combination square or by measuring diagonals, which should be equal on a properly square door.
Ensure the panel slides easily into its grooves without binding or excessive looseness. Look for any gaps in the tenon joints that might need adjustment before proceeding with final assembly.
Glue and Clamp Apply wood glue to grooves and tenons, then insert the panel and clamp the door flat.
Work quickly but carefully, as most wood glues provide limited working time before setting begins.
Wipe off excess glue immediately and allow proper drying time according to manufacturer specifications.
Use clamps evenly distributed across the door to ensure consistent pressure. Check that the door remains flat during clamping by placing it on a level surface and adjusting clamps as needed.
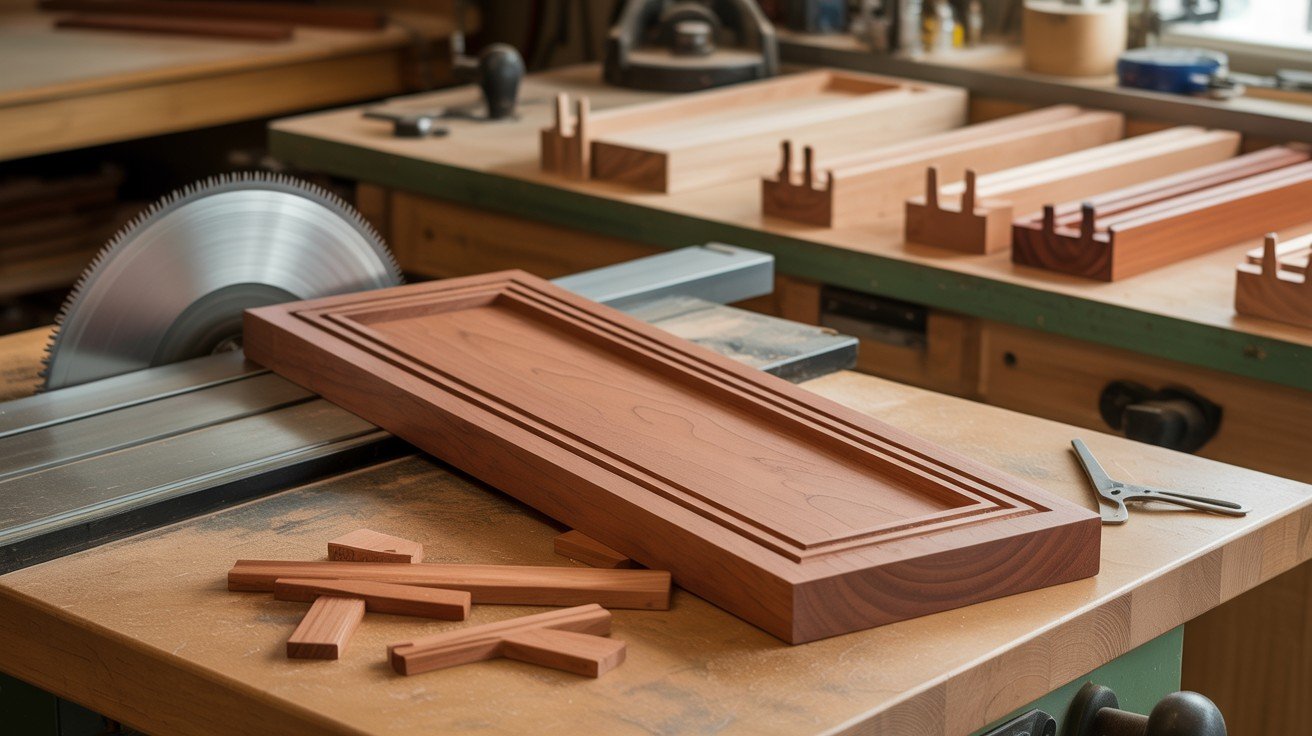
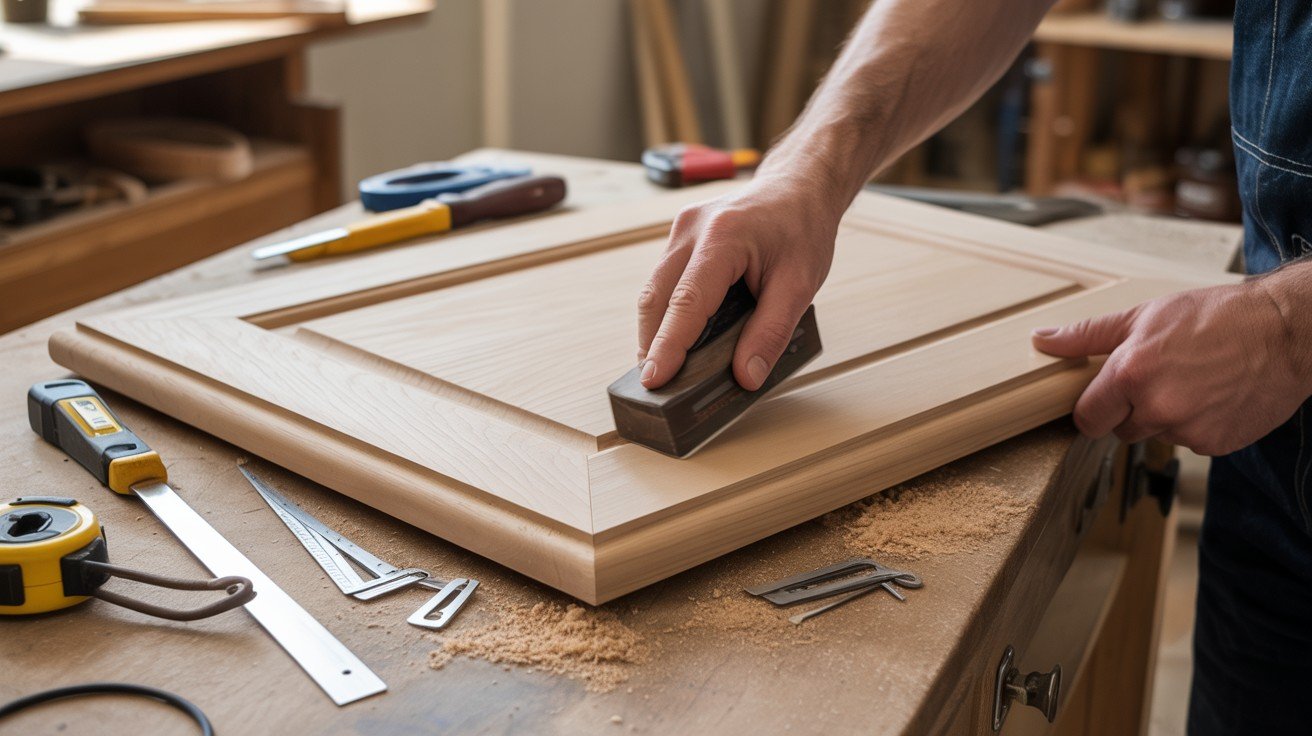
Step 5: Trim, Sand, and Finish
Clean Up the Edges Trim any uneven ends as necessary for clean, square fit on your cabinets. This ensures professional-looking results and proper door operation.
Use a sharp chisel or fine-toothed saw to clean up any minor imperfections in the joints. Check the door’s fit against your cabinet opening and make small adjustments as needed.
Sand any rough spots or tool marks left from the cutting and assembly process for a smooth, professional appearance.
Sand Smooth Sand all corners and edges thoroughly to prepare surfaces for paint or stain application.
Start with coarser grit and progress to finer grits for optimal smoothness. Pay special attention to joint areas where glue squeeze-out might have occurred.
Use a sanding block for flat surfaces to maintain consistent results and avoid creating waves or dips in the wood surface.
Install Hinges Use Euro hinges for a clean, modern installation that operates smoothly. These hinges offer adjustability and concealed mounting for professional appearance.
Mark hinge locations carefully using a template or measuring system to ensure proper alignment. Drill pilot holes for screws to prevent splitting the wood, and test the door’s operation before final installation.
Pro Tips for Success
Achieving professional results requires attention to key details throughout your cabinet door project:
- Choose straight, quality boards to ensure your doors hang properly and avoid warping issues over time
- Always cut test pieces first to verify your measurements and blade settings before working on actual door components
- Clamp evenly to prevent twist during the gluing process, which ensures your door remains flat and square
- Let glue dry at least 1 hour before trimming to allow proper bonding and prevent joint failure during handling
Conclusion
Building your own cabinet doors proves to be a simple, affordable, and rewarding woodworking project that any DIY enthusiast can master.
With basic tools and careful attention to detail, you can create professional-quality doors at a fraction of the cost of store-bought alternatives.
This skill becomes invaluable for home remodels, kitchen upgrades, or custom furniture projects where standard sizes don’t fit your specific needs.
The satisfaction of completing handcrafted cabinet doors extends beyond cost savings.
You gain complete control over materials, dimensions, and finishing options while developing valuable woodworking skills.
Whether updating your kitchen, bathroom, or creating custom storage solutions, these techniques provide the foundation for countless future projects.
Start with simple designs and gradually advance to more complex styles as your confidence grows.
Frequently Asked Questions
What type of wood works best for cabinet doors?
Hardwoods like oak, maple, and cherry provide durability and attractive grain patterns for cabinet doors. Pine and poplar offer budget-friendly alternatives that paint well, though they’re softer and more prone to dents.
How long does it take to build a cabinet door?
A simple cabinet door typically takes 2-3 hours to complete, including cutting, assembly, and initial sanding. This timeframe assumes you have all materials prepared and tools properly set up beforehand.
What’s the most challenging part of cabinet door construction?
Creating tight-fitting tenon joints requires the most precision and practice to master properly. Getting consistent measurements and cuts across all pieces determines the overall quality of your finished door.
Can I build cabinet doors without a table saw?
While a table saw provides the most accurate results, you can use a circular saw with guides for basic cuts. Hand tools like chisels and hand saws work for smaller projects, though they require more time and skill.
How much money can I save building my own cabinet doors?
DIY cabinet doors typically cost 50-70% less than purchasing pre-made doors from retailers. The exact savings depend on your wood choice, hardware selection, and the total number of doors needed.