
Attic baffles are essential ventilation components that maintain proper airflow between your soffit vents and ridge vents, creating a continuous air channel that prevents insulation from blocking critical ventilation pathways.
These simple yet crucial devices ensure your attic ventilation system functions effectively, protecting your home from moisture buildup, temperature extremes, and energy inefficiency.
Poor attic ventilation creates numerous problems including ice dam formation, excessive heat buildup, moisture condensation, mold growth, and reduced insulation effectiveness.
These issues can lead to costly roof damage, higher energy bills, and unhealthy indoor air quality that affects your family’s comfort and safety.
You must install baffles when soffit vents become blocked by insulation, when adding blown-in insulation that could obstruct airflow, or when mold risk increases due to inadequate ventilation.
Proper baffle installation is essential for maintaining healthy attic conditions and protecting your home investment.
What Are Attic Baffles?

Attic baffles are specialized ventilation channels installed between roof rafters to maintain proper airflow from soffit vents to ridge vents, creating a continuous ventilation pathway that keeps your attic healthy and energy-efficient.
These devices serve as protective barriers that prevent insulation from blocking critical air circulation while ensuring adequate space for air movement throughout your attic system.
Purpose of Baffles in Attic Spaces
Attic baffles maintain essential airflow from soffit vents by creating dedicated channels that allow fresh air to enter your attic and flow toward ridge or exhaust vents.
This continuous air movement prevents heat buildup in summer and moisture accumulation in winter, maintaining optimal attic conditions year-round.
These devices prevent insulation from blocking ventilation paths by creating physical barriers that keep blown-in or batt insulation away from soffit openings.
Without baffles, insulation can shift over time and completely block air intake vents, rendering your ventilation system ineffective and creating potential moisture problems.
Baffles protect your roof from moisture damage and ice dams by ensuring proper air circulation that regulates attic temperature and prevents condensation buildup.
This airflow helps maintain consistent roof temperatures that prevent ice formation while removing excess moisture that could lead to mold growth, wood rot, and structural damage.
Types of Attic Baffles
- Foam baffles – Offer superior insulation properties and structural rigidity but cost more than other options.
- Cardboard baffles – Provide an economical solution that’s easy to install but less durable in extreme conditions.
- Plastic/Poly baffles – Combine durability with affordability while offering moisture resistance at moderate cost.
- Recycled composite baffles – Offer an eco-friendly option using recycled materials for environmentally conscious homeowners.
Tools & Materials You’ll Need
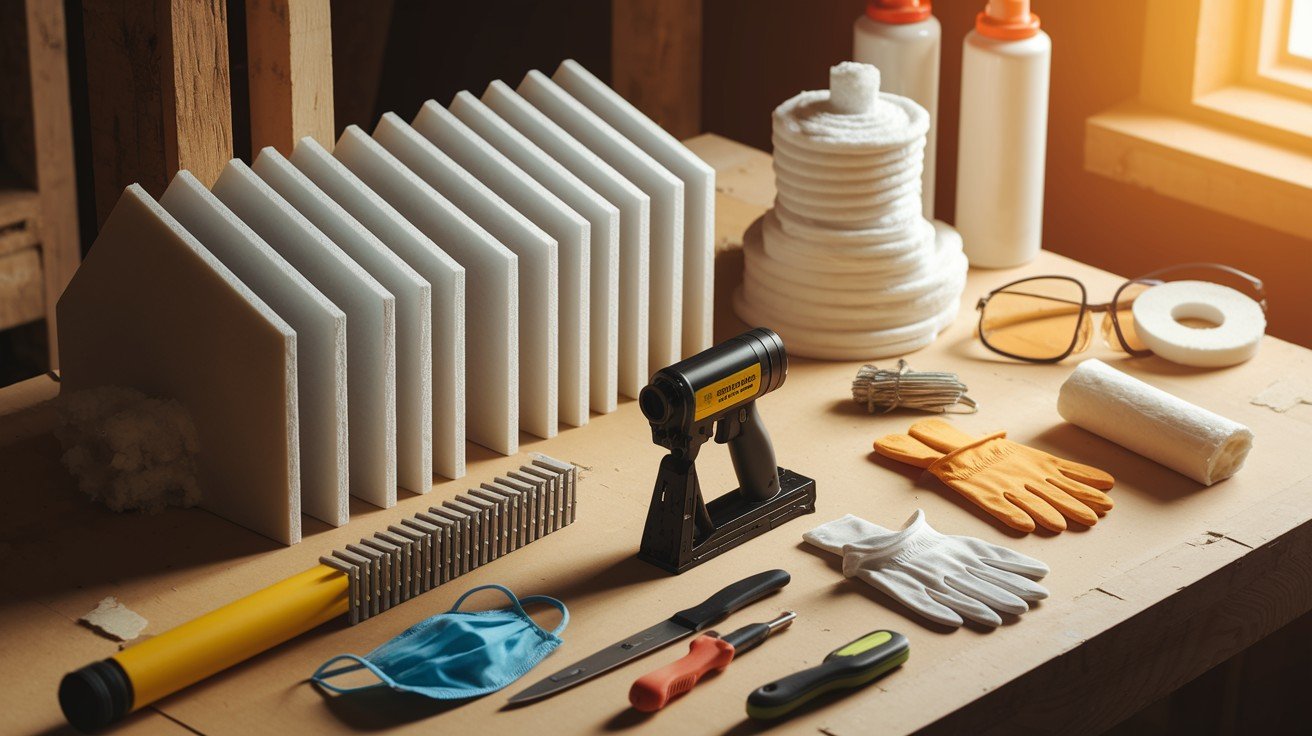
Attic baffles (choose correct width for rafter spacing) – Select baffles that match your rafter spacing (typically 14.5″ for 16″ on center or 22.5″ for 24″ on center) to ensure proper fit and effective ventilation channel creation.
Staple gun with staples – Use a heavy-duty staple gun with appropriate staples to securely attach baffles to roof decking and rafters, ensuring they remain in place over time.
- Dust mask, gloves, goggles – Essential safety equipment to protect against insulation fibers, dust, and debris while working in confined attic spaces with potentially harmful materials.
- Utility knife or insulation rake – Tools for cutting baffles to size and moving existing insulation away from installation areas to create clear working space and proper baffle placement.
- Spray foam or insulation dams (optional) – Additional sealing materials to fill gaps around baffles and create complete air barriers that prevent air leakage and maintain ventilation effectiveness.
Step-by-Step Guide: How to Install Attic Baffles
A comprehensive, step-by-step installation guide covering safety preparation, baffle positioning, secure attachment, and proper insulation management for optimal attic ventilation.
Step 1: Access the Attic Safely
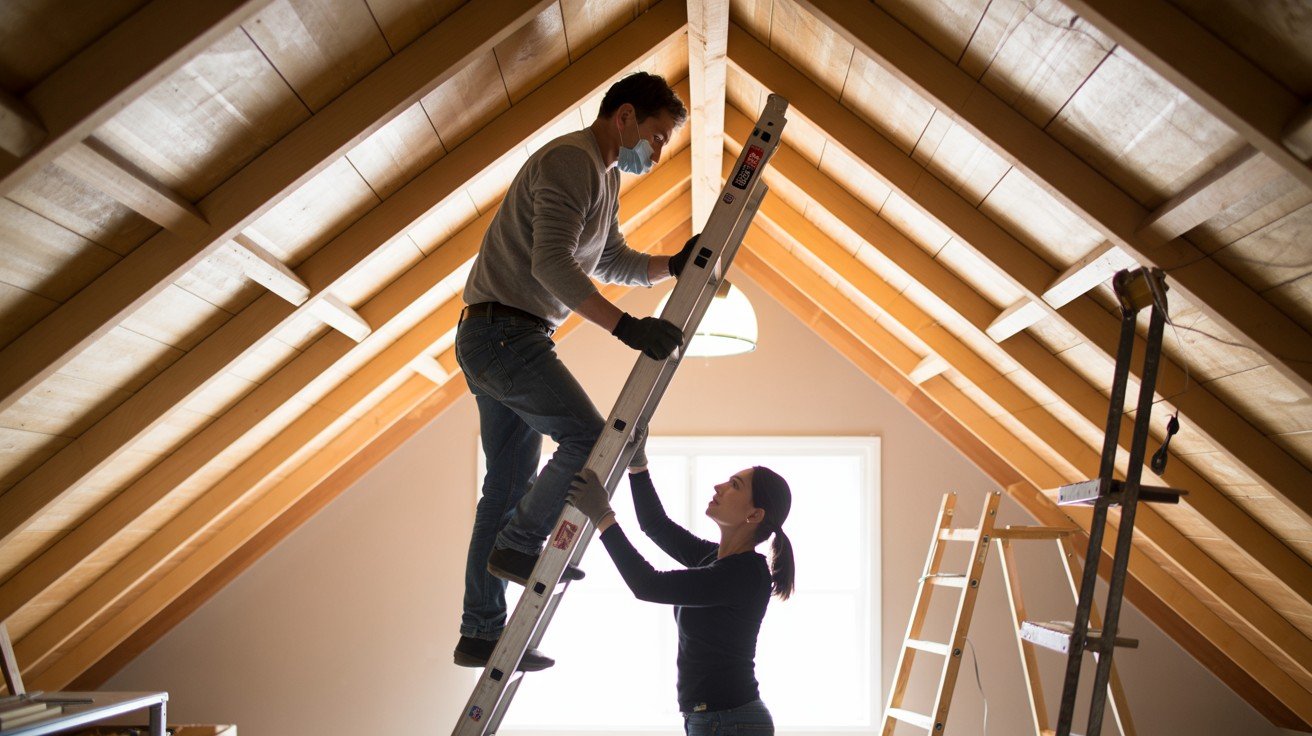
Enter your attic using proper ladder equipment and have someone assist you for safety.
If your attic doesn’t have flooring, lay down plywood sheets across ceiling joists to create stable walking surfaces and prevent accidentally stepping through drywall.
Work during daylight hours when possible and use adequate lighting to see clearly in dark attic spaces.
Step 2: Locate the Soffit Vents
Find the rafter spaces that line up with your exterior soffit vents by looking for light coming through the openings or checking from outside your house.
Once you identify these locations, carefully clear away any insulation material to expose the top plate where your exterior wall meets the roof structure.
Step 3: Remove Insulation Blocking Airflow
Gently move any blown-in or batt insulation away from the soffit area to create a clear workspace for baffle installation.
Handle the insulation carefully without compacting it, as compressed insulation loses its thermal effectiveness.
Set the removed insulation aside temporarily where it won’t interfere with your work.
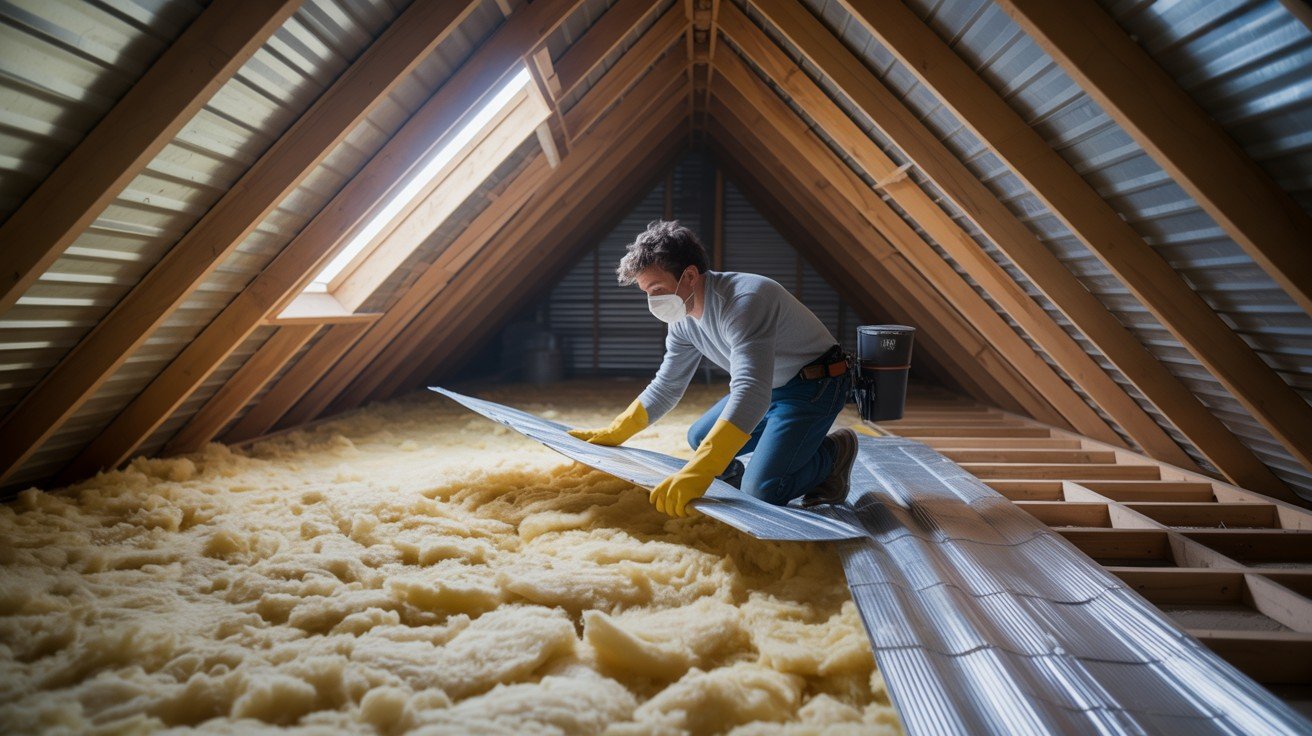
Step 4: Position and Install the Baffles
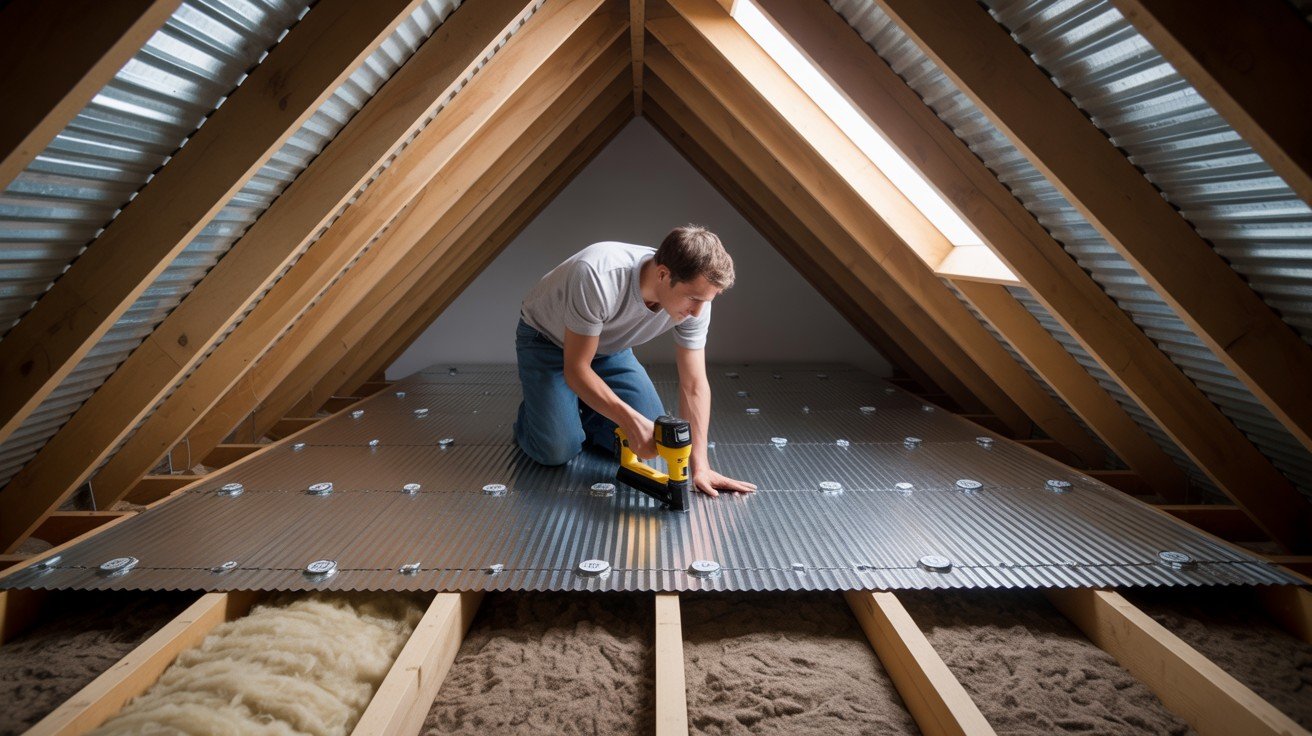
Slide each baffle into the rafter bay, positioning the bottom edge to align with the exterior wall’s top plate where the soffit vent begins.
The baffle should fit snugly between rafters without forcing or bending. Secure the baffle by stapling it to the roof deck or rafters every 6-8 inches along the edges to ensure it stays in place.
Step 5: Seal Around Baffle Edges (Optional)
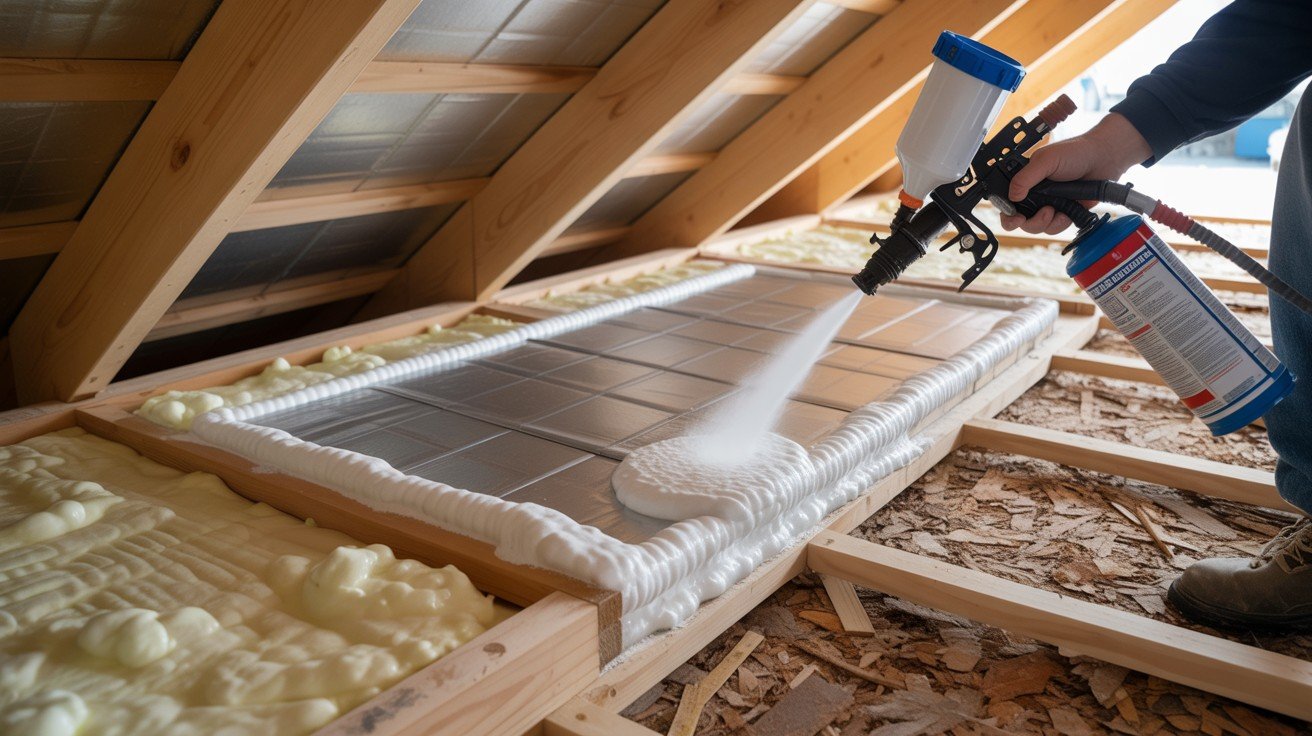
Apply spray foam sealant around the baffle edges where they meet the rafters to create complete air barriers and prevent insulation from migrating into the ventilation channel.
This optional step helps maintain long-term airflow effectiveness by keeping the ventilation path clear of any insulation intrusion over time.
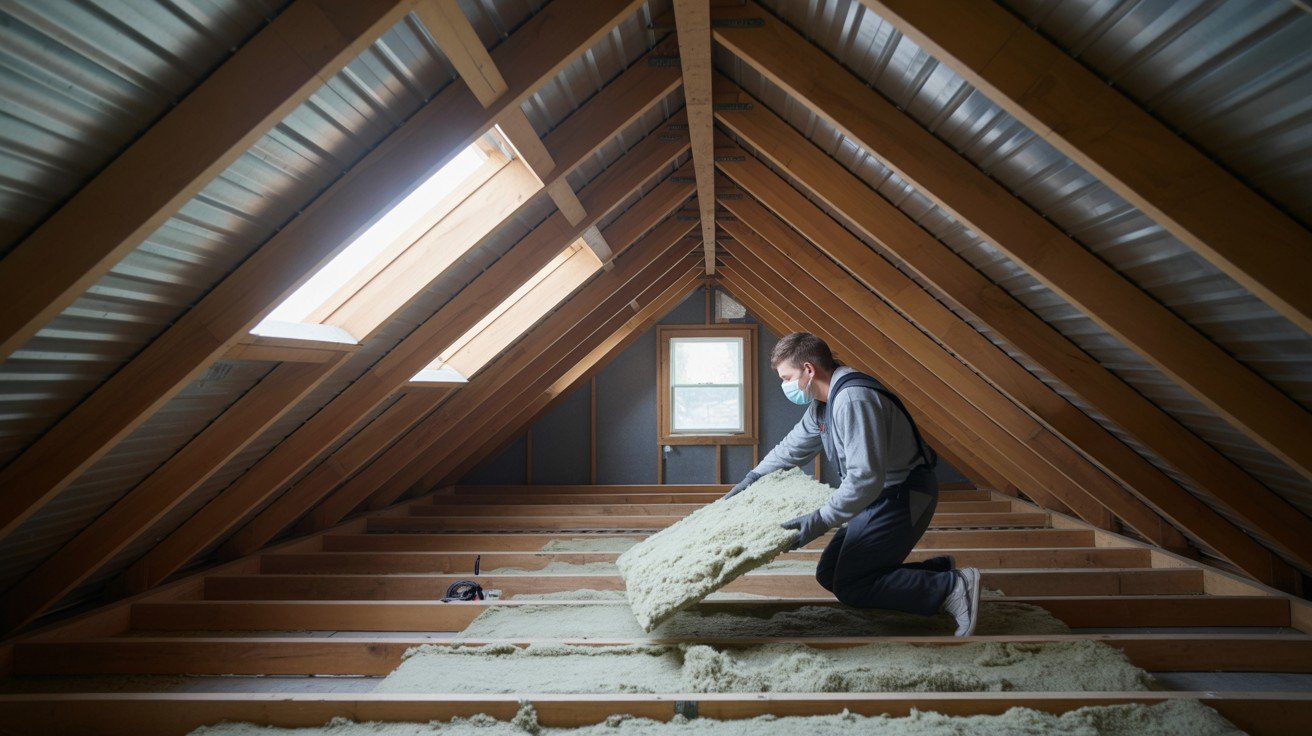
Step 6: Reposition the Insulation
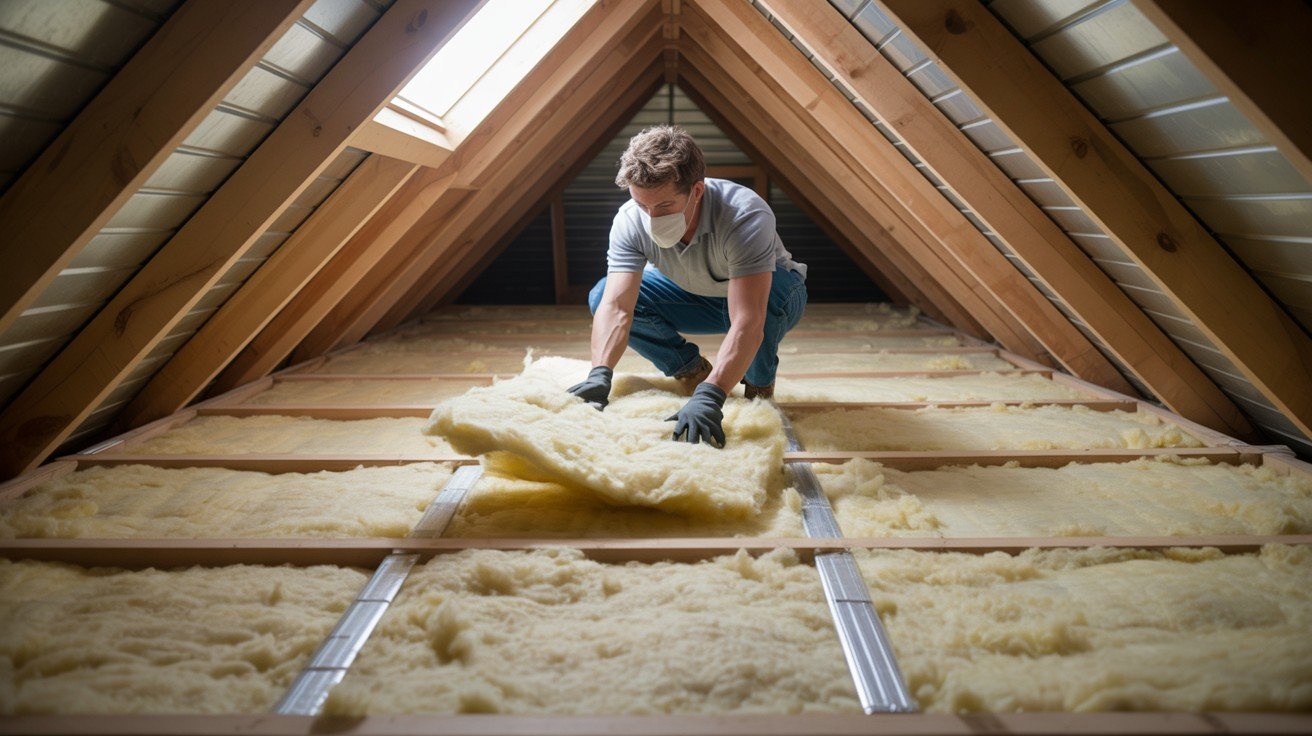
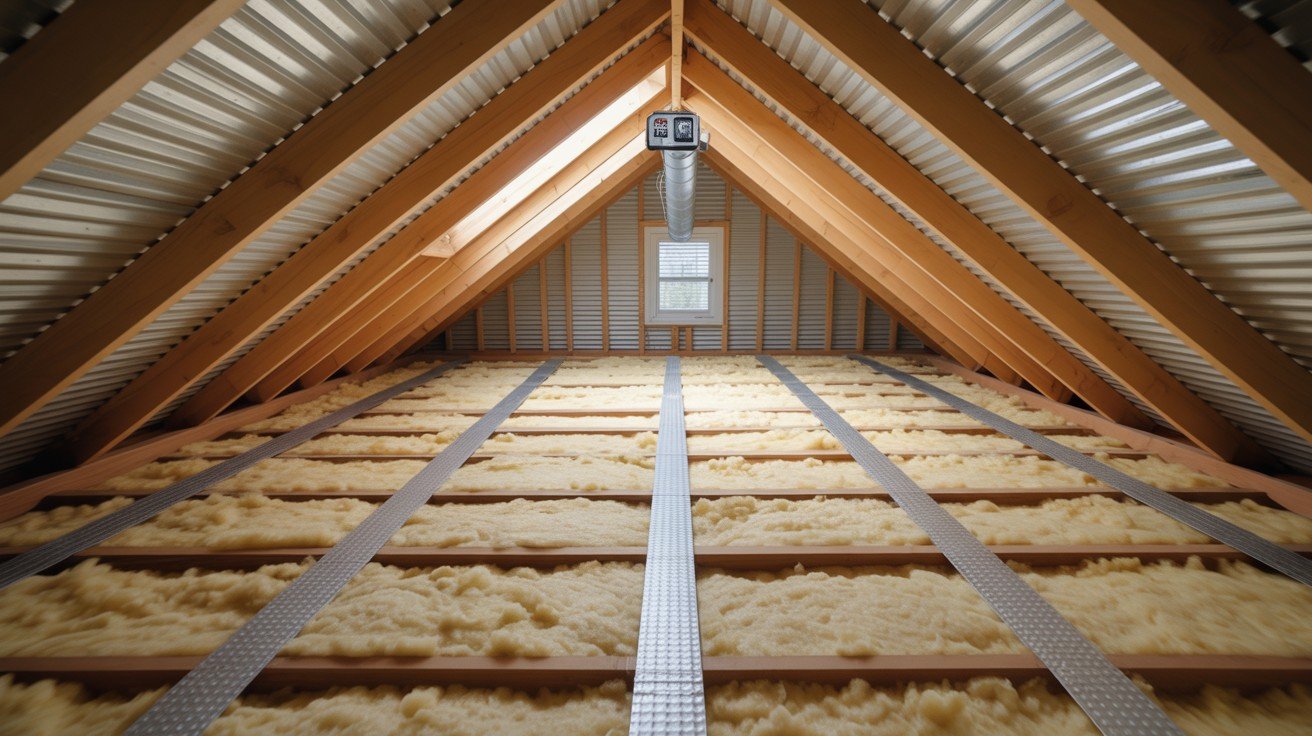
Carefully push the insulation back into place around the installed baffles, ensuring you maintain proper coverage throughout the attic while keeping the ventilation channel completely clear.
Double-check that insulation doesn’t block the airflow path and that air can move freely from the soffit vents through the baffles toward your ridge vents.
Common Mistakes to Avoid
Always clear insulation from the installation area before inserting baffles. Forcing baffles through existing insulation can damage the material and create ineffective ventilation channels that don’t provide proper airflow.
Prevent loose insulation from migrating back into the ventilation channel after installation. Even small amounts of loose material can significantly reduce airflow effectiveness and defeat the purpose of your baffle installation.
Address air leaks around penetrations and gaps before adding ventilation. Over-ventilating without proper air sealing can worsen energy efficiency by creating uncontrolled air movement that bypasses insulation.
Avoid powered exhaust fans unless you have adequate intake ventilation and proper sealing. Improperly designed fan systems can create negative pressure that pulls conditioned air from living spaces into the attic, increasing energy costs.
Tips for Better Attic Ventilation
- Combine soffit baffles with ridge vents for ideal passive airflow – Create a complete ventilation system where cool air enters through soffit vents and warm air exits through ridge vents, establishing natural air circulation that works continuously without mechanical assistance.
- Install insulation dams if using blown-in insulation – Use physical barriers or retaining walls to prevent loose insulation from settling into soffit areas over time, maintaining clear airflow paths and preserving ventilation effectiveness.
- Monitor attic temperature and humidity with smart sensors – Track attic conditions year-round to identify ventilation problems early, allowing you to address issues before they cause moisture damage, ice dams, or energy efficiency problems.
Conclusion
Proper baffle installation ensures a dry, energy-efficient attic by maintaining essential airflow that prevents moisture buildup, ice dams, and temperature extremes.
When installed correctly, baffles create the foundation for effective attic ventilation that protects your home from costly damage while reducing energy bills throughout the year.
Quality baffle installation helps preserve insulation performance by preventing air blockages that reduce thermal effectiveness, while also extending roof longevity through proper moisture control and temperature regulation.
These benefits make baffle installation a valuable investment in your home’s long-term health and efficiency.
Consider professional help if your attic access is challenging, the layout is complex, or you’re uncomfortable working in confined spaces.
Professional installers have the experience and tools to handle difficult situations safely while ensuring your ventilation system performs optimally for years to come.
Frequently Asked Questions
How many attic baffles do I need for my home?
Install one baffle in each rafter bay that has a corresponding soffit vent, typically every 16 or 24 inches depending on your rafter spacing. Most homes need between 8-16 baffles total, but the exact number depends on your roof size and soffit vent configuration.
Can I install attic baffles over existing insulation?
You must remove insulation from the soffit area before installing baffles to ensure proper fit and airflow. After baffle installation, you can carefully reposition the insulation around the baffles while keeping the ventilation channel clear.
What size baffles should I buy for my attic?
Choose baffles that match your rafter spacing: 14.5 inches wide for 16-inch on-center rafters or 22.5 inches for 24-inch spacing. Most baffles are about 4 feet long and can be trimmed to fit your specific rafter depth requirements.
Do I need baffles if I don’t have soffit vents?
Baffles are only necessary where soffit vents exist to maintain airflow from the eaves to ridge vents. If you don’t have soffit vents, focus on adding proper intake ventilation first, then install baffles to protect those new vents.
How do I know if my attic baffles are working properly?
Check that insulation hasn’t shifted back into the airflow channel and that you can see daylight through the soffit opening from inside the attic. Properly functioning baffles maintain clear air pathways and help regulate attic temperature and moisture levels year-round.