
Your indoor bathroom doesn’t deserve the chaos of wet swimsuits and sandy feet. That’s where outdoor pool bathrooms come in.
I’ve seen too many homeowners struggle with soaked floors and ruined interiors. The solution? A dedicated outdoor space that handles the mess while looking great.
These aren’t just utilitarian boxes. Modern outdoor pool bathrooms blend smart design with real-world function. They keep your indoor spaces clean while adding value to your property.
The best part? You don’t need a massive budget or complex construction. Many of these ideas work as DIY projects or simple additions to existing structures.
You’ll find 13 practical ideas here. Each one tackles common poolside problems while maintaining style. From quick rinse-off spots to full changing areas, these concepts work for different budgets and spaces.
Let’s look at solutions that work.
13 Outdoor Pool Bathroom Ideas
Keep your pool days hassle-free with these 13 outdoor bathroom ideas that mix smart design with stylish touches for any backyard.
1. Add a Poolside Shower Stall for Quick Rinse-Offs

Your indoor bathroom will thank you for this one.
A poolside shower stall handles the immediate mess. Chlorine, sunscreen, and sand wash away before anyone steps inside your home.
Build it with outdoor-safe materials. Stone tiles work great. Teak wood adds warmth. Both handle water exposure without rotting or staining.
Keep the design simple. A basic three-wall setup with a drain does the job. Add a privacy screen if needed.
The key is placement. Position it close to the pool but far enough to avoid splashing. This creates a natural flow from swimming to showering to indoor relaxation.
2. Use Waterproof Materials for Walls and Floors
Outdoor bathrooms face weather extremes. Your material choices make or break the project.
Cement board works as a tile backing. It won’t warp like regular drywall. Marine-grade wood resists rot and insects. PVC panels clean easily and never need painting.
For floors, think beyond basic concrete. Porcelain tiles handle freeze-thaw cycles. Natural stone adds character but needs sealing. Composite decking materials resist moisture while feeling warm underfoot.
Don’t forget drainage. Slope floors toward drains. Install proper vapor barriers. These details prevent long-term damage.
Quality materials cost more upfront. But they save money over time by avoiding repairs and replacements.
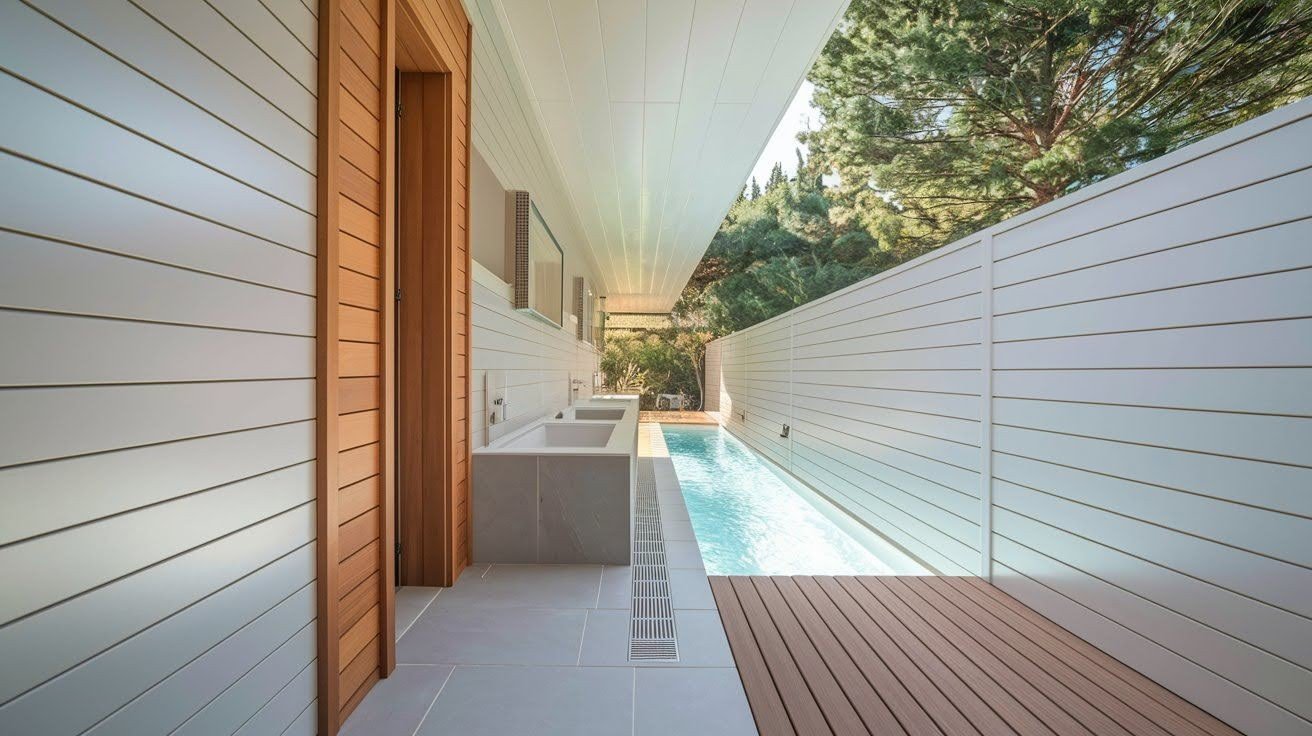
3. Choose a Simple Open-Air Design
Less is often more with outdoor bathrooms.
Open-air designs work perfectly in warm climates. They feel spacious and connect with nature. Maintenance stays minimal without complex roofing systems.
Privacy matters, though. Use tall plants as natural screens. Lattice panels add visual interest while blocking views. Solid fences work for complete privacy.
Consider wind patterns. Position walls to block prevailing winds. This keeps the space comfortable even on breezy days.
The beauty lies in simplicity. A few walls, basic fixtures, and good drainage create a functional space. You avoid the complexity of fully enclosed structures while getting the benefits.
4. Install a Compact Changing Bench with Storage
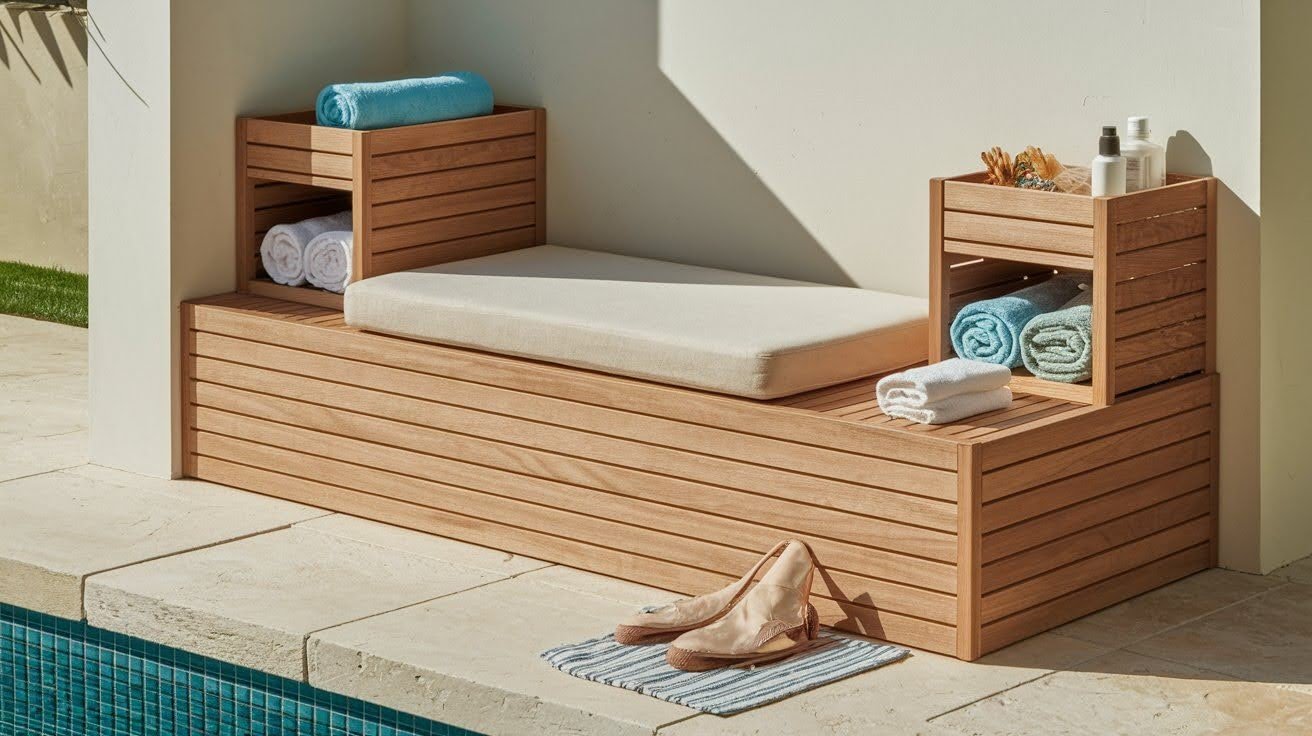
Smart storage solves multiple problems at once.
A changing bench with built-in storage keeps essentials organized. Towels, sunscreen, and extra swimwear stay dry and accessible.
Build it with waterproof materials. Marine-grade plywood with proper sealing works well. Add cushions for comfort – just choose quick-dry foam and waterproof covers.
Size it right. A 48-inch bench seats two people comfortably. Make it 18 inches deep for stable seating. Storage underneath should be at least 12 inches tall.
Include ventilation in storage areas. Wet items need airflow to dry properly. Simple holes or slats prevent mold and mildew.
5. Go for a Rustic Pool Bathroom Look
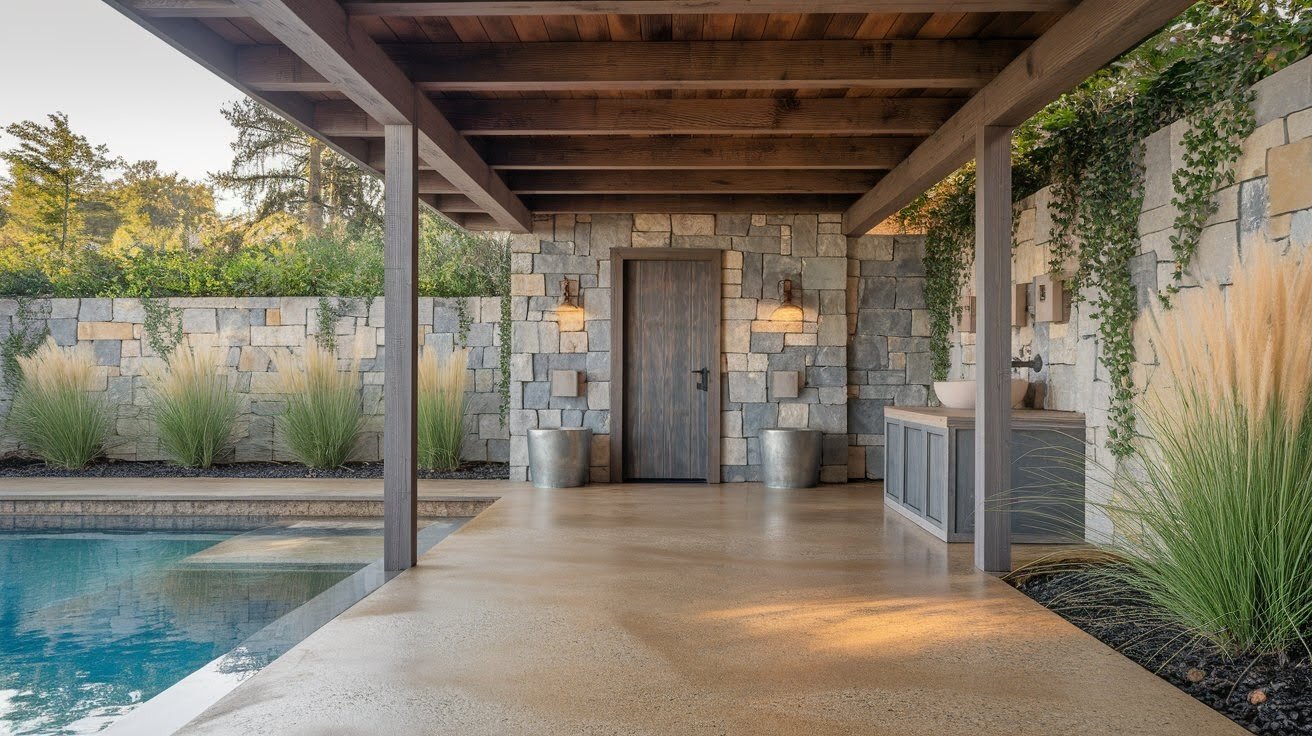
Natural materials blend seamlessly with outdoor settings.
Stone walls feel timeless and sturdy. Reclaimed wood adds character and warmth. Galvanized metal fixtures resist corrosion while maintaining an industrial edge.
Mix textures thoughtfully. Smooth river rocks contrast with rough timber. Polished concrete floors balance natural wood accents.
Keep colors earth-toned. Browns, grays, and greens complement most landscaping. These colors hide dirt better than bright whites.
Add plants for softness. Ornamental grasses in planters. Climbing vines on walls. Living elements complete the natural look.
The goal is harmony with your outdoor space. The bathroom should feel like a natural extension of your backyard, not an afterthought.
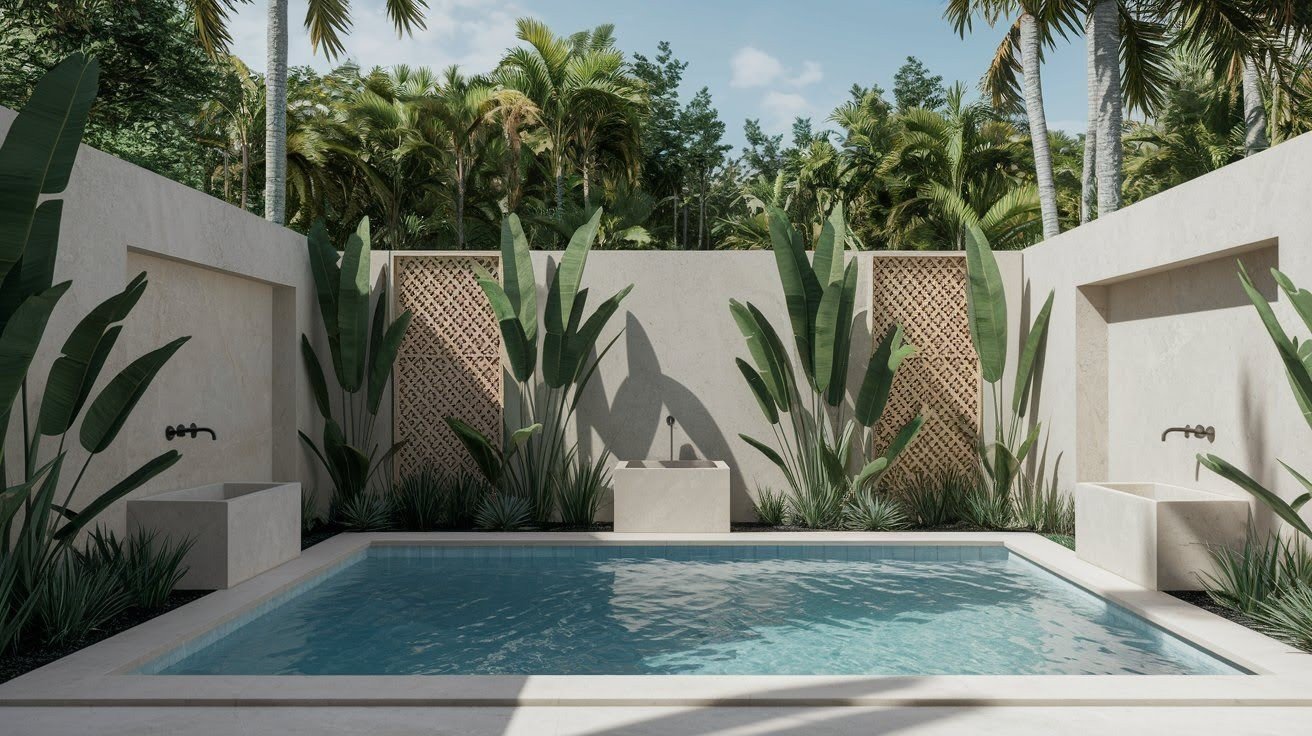
6. Create a Spa-Like Vibe with Neutral Colors
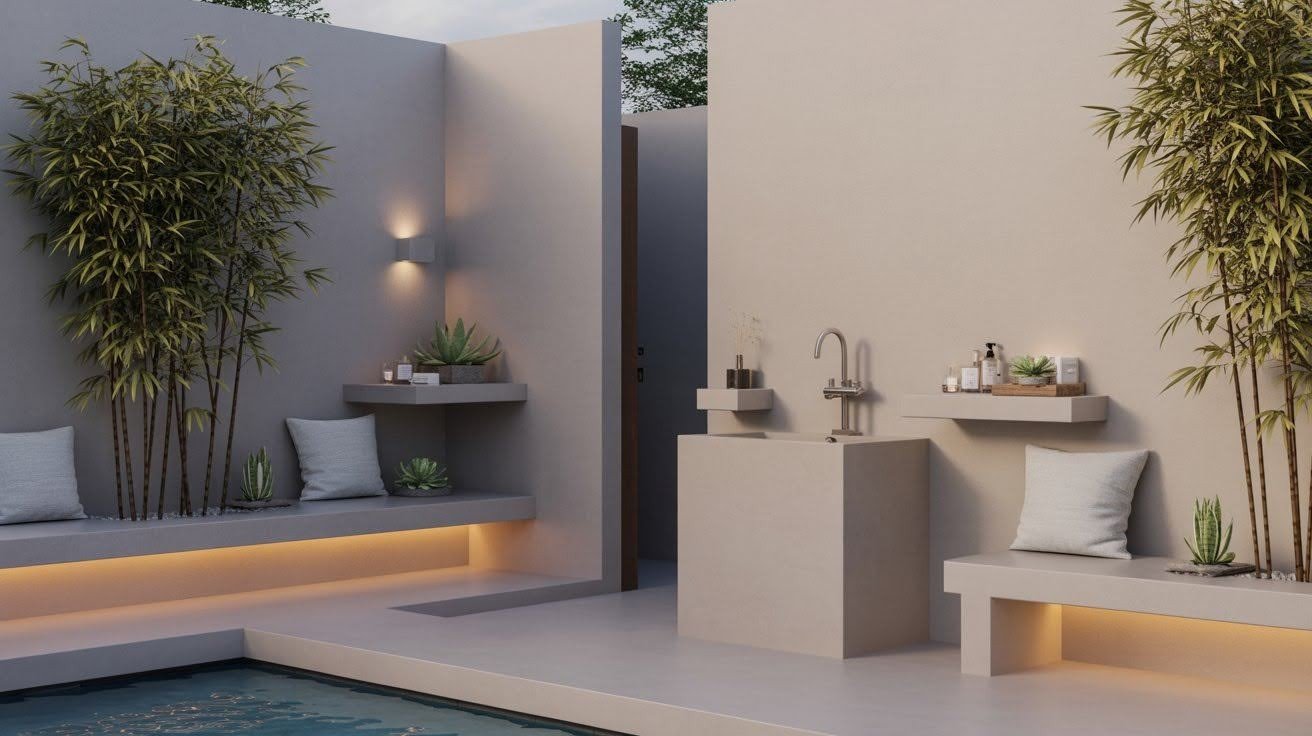
Calm colors create a relaxing atmosphere.
Soft grays, warm beiges, and creamy whites work beautifully outdoors. They don’t compete with natural surroundings. Instead, they create a peaceful backdrop.
Choose sleek fixtures in matching tones. Brushed nickel or matte black hardware looks sophisticated. Avoid shiny chrome – it shows water spots too easily.
Add greenery strategically. Bamboo plants in corners. Small succulents on shelves. Living plants soften hard surfaces while improving air quality.
Lighting matters too. Warm LED strips under benches. Soft sconces on walls. Avoid harsh overhead lighting that kills the spa mood.
Keep accessories minimal. A few high-quality pieces look better than lots of cheap items. Focus on function over decoration.
7. Use Outdoor-Friendly Lighting Fixtures
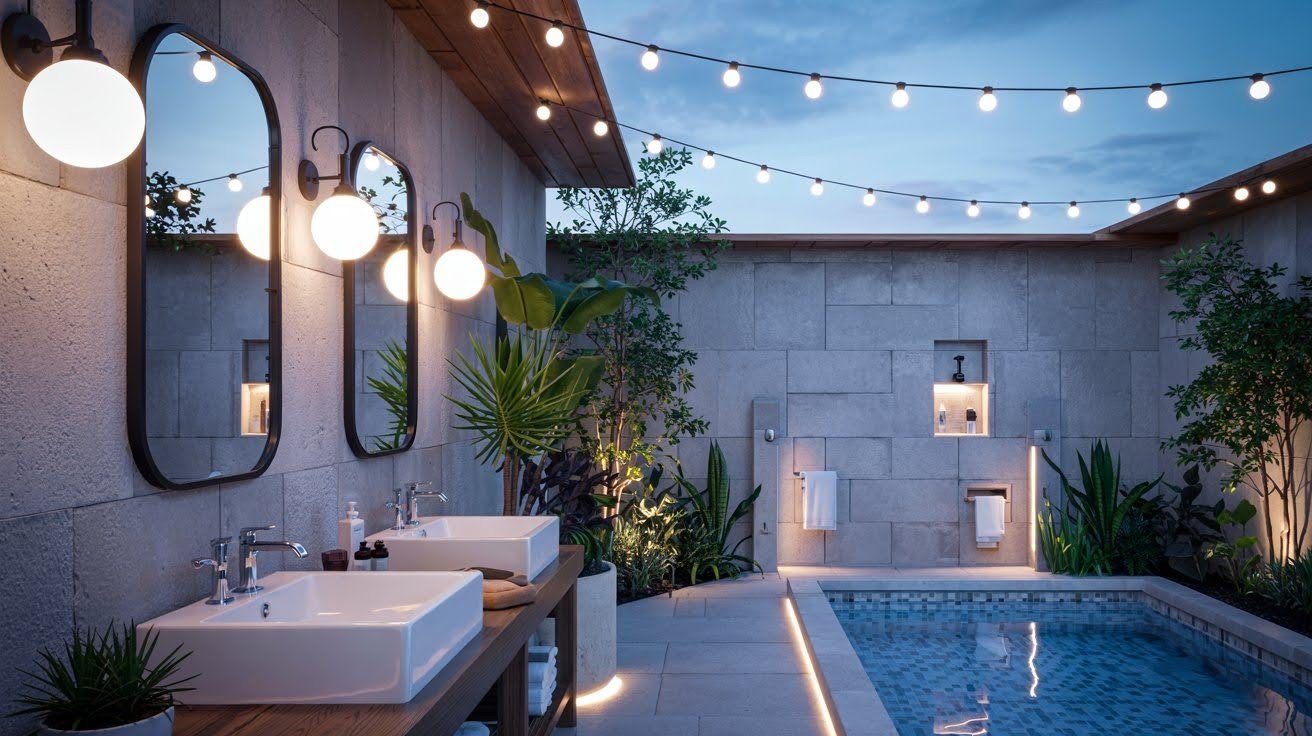
Good lighting extends usability into evening hours.
Motion sensors save energy and add convenience. Waterproof ratings matter – look for IP65 or higher. This ensures fixtures handle direct water exposure.
Wall sconces provide task lighting without taking up floor space. Hang them at eye level for best illumination. Position them away from direct shower spray.
String lights add ambiance. Use LED versions for energy efficiency. Solar options eliminate wiring needs but may not provide enough light for tasks.
Consider timer controls. Lights can turn on automatically at sunset. This creates a welcoming atmosphere without manual switching.
Safety comes first. All electrical work should meet local codes. Ground fault protection is essential near water sources.
8. Install Hooks and Open Shelving
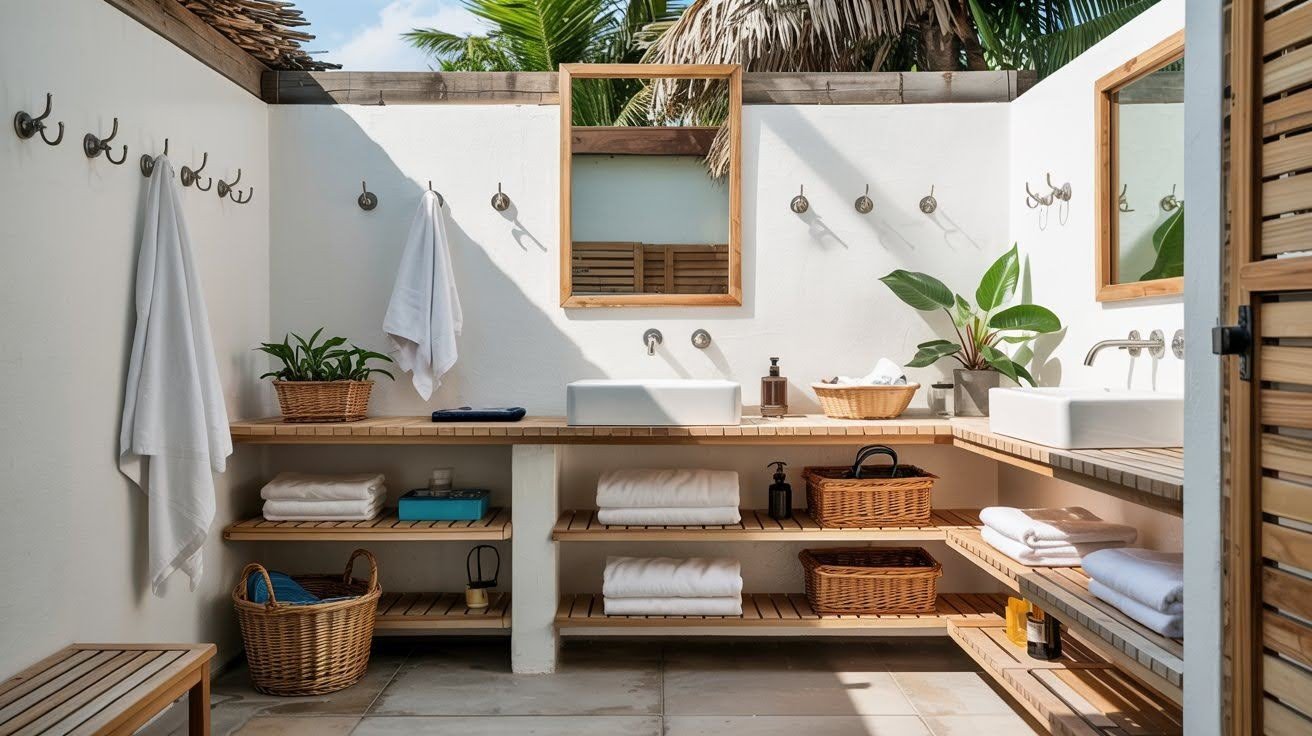
Clutter ruins even the best-designed spaces.
Wall hooks handle wet towels and swimwear. Stainless steel or powder-coated options resist rust. Space them 12 inches apart for easy access.
Open shelving keeps supplies visible and accessible. Use marine-grade materials that won’t warp. Slat designs allow water to drain quickly.
Position storage thoughtfully. High shelves for items you don’t need often. Lower hooks for daily-use towels. Keep frequently used items within easy reach.
Avoid closed cabinets in most climates. They trap moisture and encourage mold. Open storage promotes air circulation and faster drying.
Add a few baskets for small items. Waterproof options keep toiletries organized while looking neat.
9. Add a Skylight or Vent for Natural Airflow
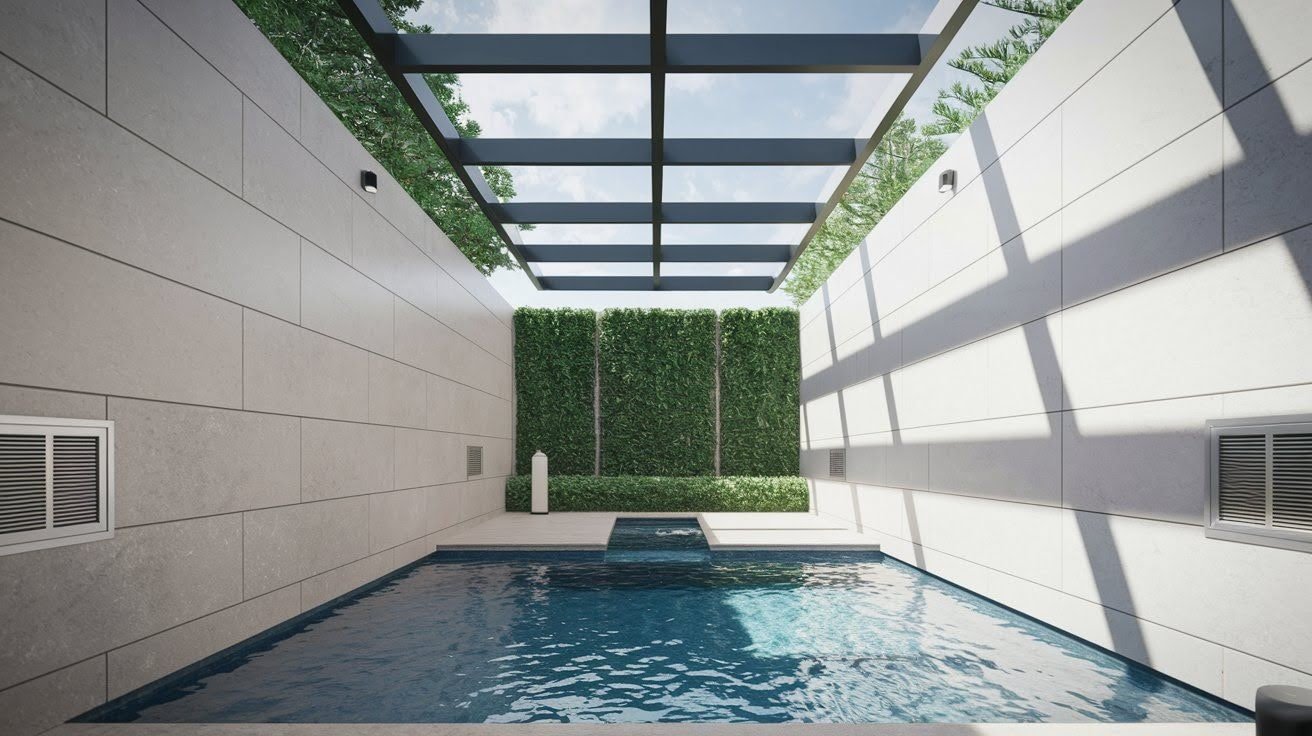
Ventilation prevents moisture problems.
Skylights bring in natural light while allowing hot air to escape. Choose impact-resistant versions for durability. Add screens to keep insects out.
Exhaust fans work when natural ventilation isn’t enough. Solar-powered models eliminate wiring needs. Position them high on walls for maximum effectiveness.
Cross-ventilation works best. Intake vents are low on one wall. Exhaust high on the opposite wall. This creates natural air movement that keeps spaces fresh.
Consider prevailing winds. Position vents to work with natural airflow patterns. This reduces energy needs while improving comfort.
Good ventilation also prevents mold and mildew. These problems are expensive to fix and unhealthy to live with.
10. Try a Modern Minimalist Design
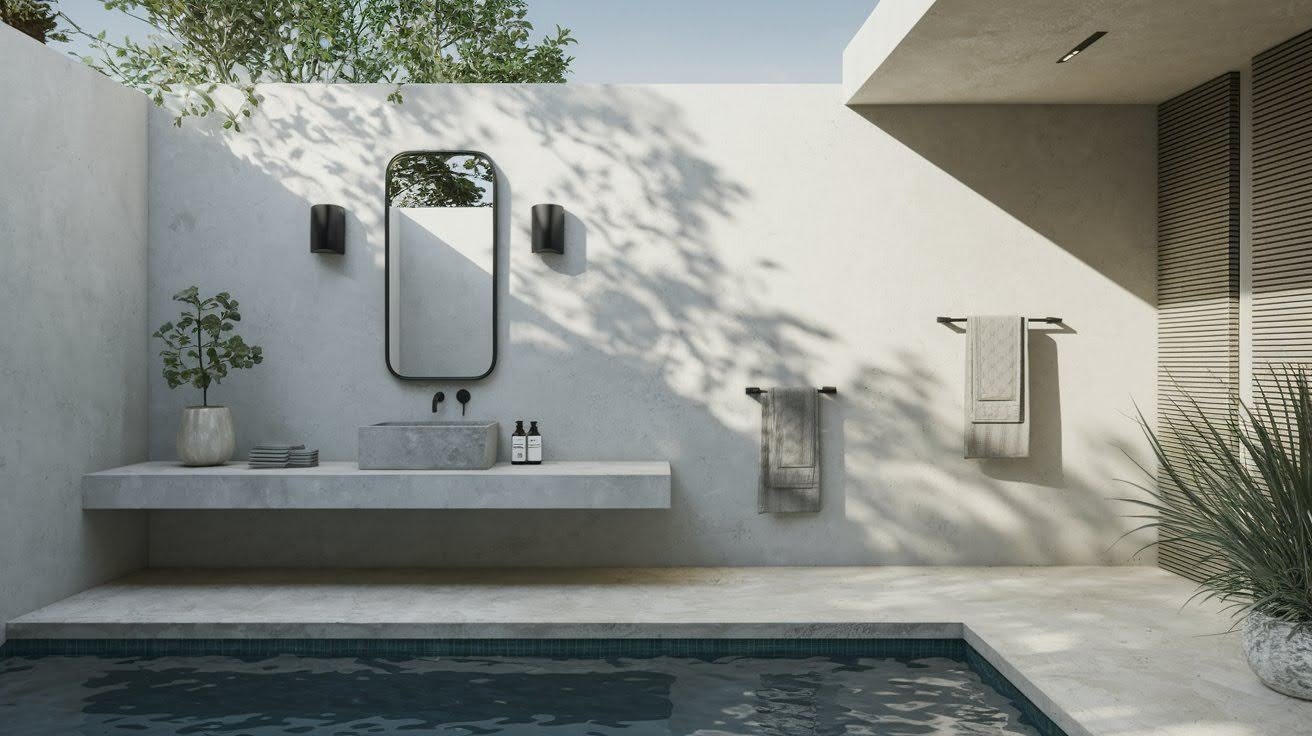
Clean lines and simple forms look timeless.
Floating sinks save floor space while looking sleek. Wall-mounted fixtures make cleaning easier. Choose rectangular shapes over ornate curves.
Concrete finishes work well outdoors. They’re durable and customizable. Add integral color for visual interest without paint maintenance.
Matte black fixtures create a striking contrast. They hide water spots better than shiny finishes. Use them sparingly for maximum impact.
Keep accessories to a minimum. One or two high-quality pieces beat dozens of cheap items. Focus on function over decoration.
Hidden storage maintains clean lines. Built-in niches in walls. Recessed medicine cabinets. These features add function without visual clutter.
11. Incorporate a Foldable or Pocket Door
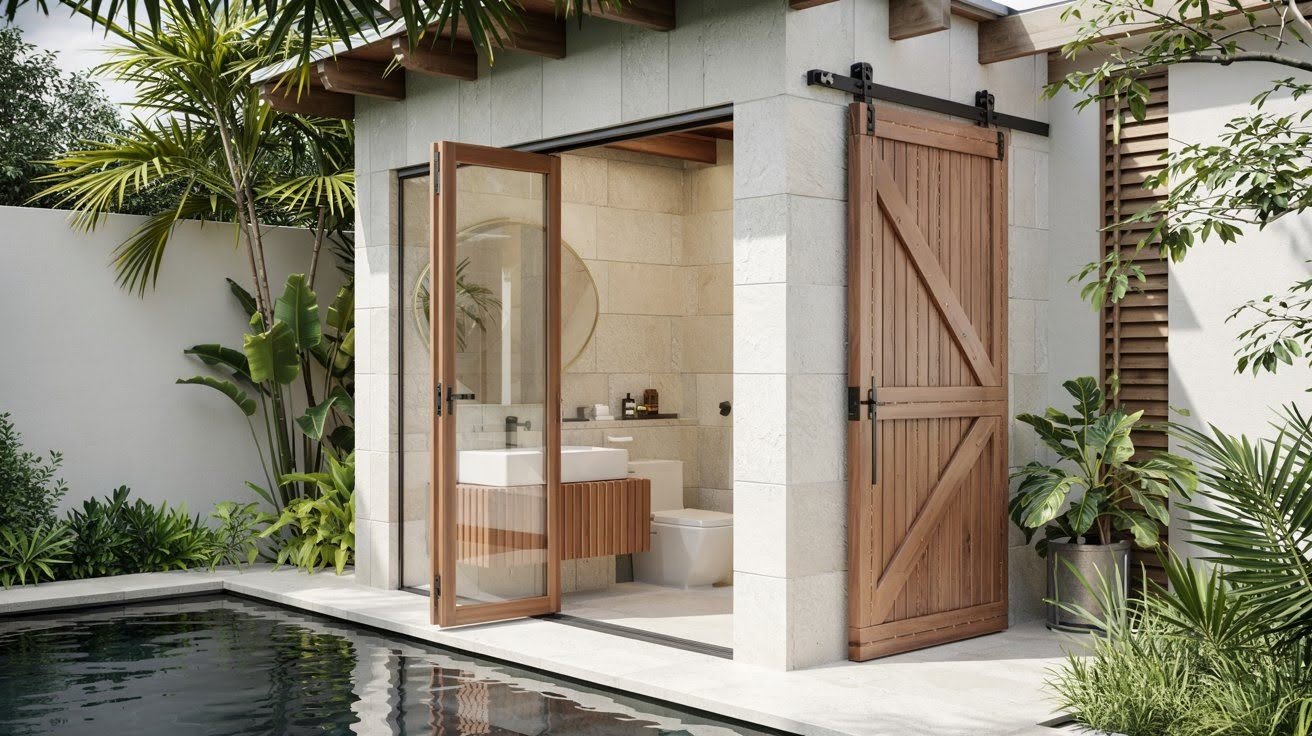
Space efficiency matters in outdoor bathrooms.
Foldable doors save 50% of swing space. They’re perfect for tight areas or small layouts. Choose weatherproof materials that won’t warp.
Pocket doors disappear completely when open. They create seamless indoor-outdoor flow. Installation requires careful planning, but the results are worth it.
Consider barn-style sliding doors. They add rustic charm while saving space. Use stainless steel hardware for durability.
Privacy glass options work well. They let in light while blocking views. Frosted or textured glass adds visual interest.
Weather sealing is crucial. Gaps around doors let in rain and insects. Use marine-grade weatherstripping for best results.
12. Go Bold with Fun Tiles or Statement Walls
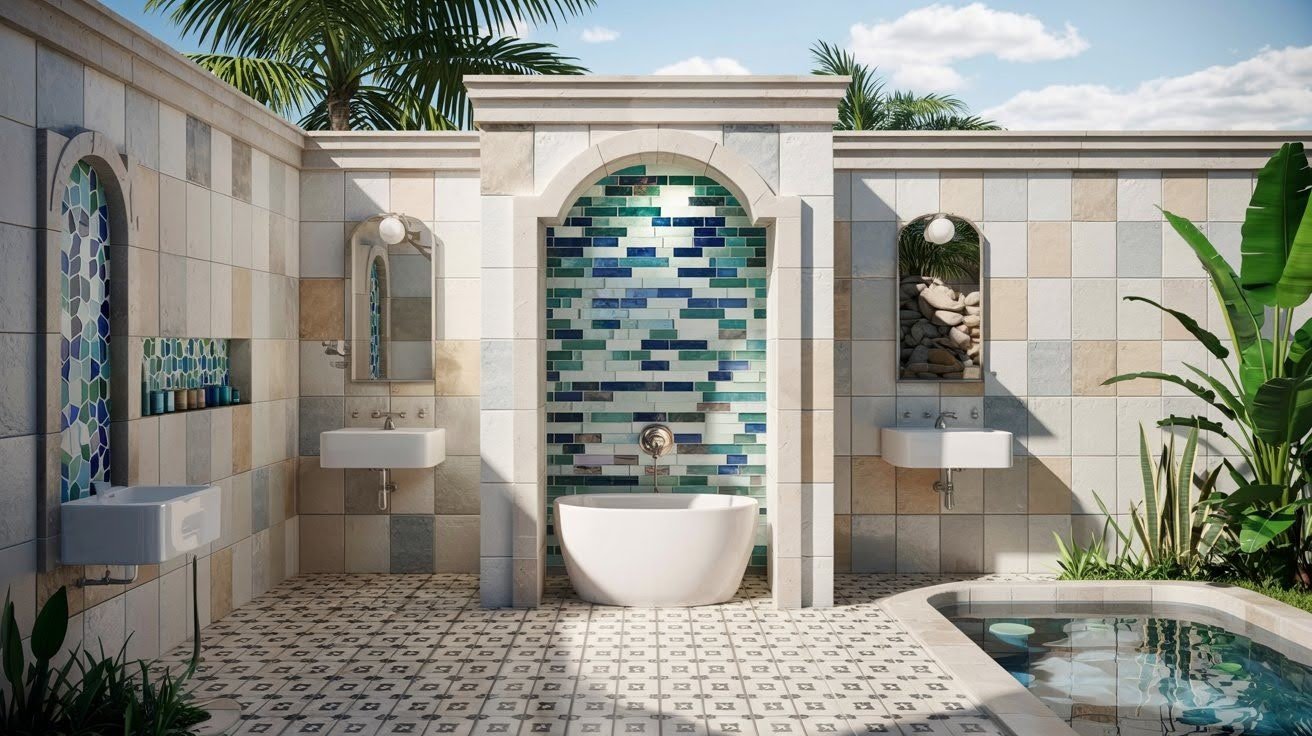
Personality makes spaces memorable.
Patterned floor tiles add visual interest. Geometric designs work well with modern styles. Stick to slip-resistant options for safety.
Colorful backsplashes create focal points. Mosaic tiles in blues and greens echo water themes. Keep bold colors on accent walls only.
Mix tile sizes for texture. Large format tiles on walls. Smaller mosaics for details. This creates depth without overwhelming the space.
Consider local themes. Seashells for coastal areas. Desert stones for arid climates. These connections feel natural and appropriate.
Balance is key. Bold elements need neutral backgrounds. Too many patterns create chaos rather than style.
13. Make It Kid-Friendly with Slip-Resistant Flooring

Safety matters more than style when kids are involved.
Textured tiles provide grip even when wet. Rubberized options feel warmer underfoot. Both prevent slips and falls.
Lower hooks and towel bars help kids reach essentials. Install them 36 inches high instead of adult height. This promotes independence.
Rounded corners on fixtures prevent injuries. Avoid sharp edges on benches and counters. Kids move fast and don’t always watch where they’re going.
Bright colors help kids navigate spaces. Use them on grab bars and important features. This adds safety while creating a fun atmosphere.
Consider temperature control. Hot surfaces can burn feet. Choose materials that stay cool or add shade structures.
Bonus Tips
Here are additional ideas to improve your outdoor pool bathroom,
- Install a foot wash station near the entrance to remove sand and debris
- Add a small heater for cooler climates to extend seasonal use
- Include a waterproof speaker system for background music
- Use motion-activated night lights for safe nighttime navigation
- Install a small water heater for warm rinse water
- Add a retractable clothesline for drying swimwear
- Include a small first aid kit in a waterproof container
- Consider a ceiling fan for air circulation in enclosed designs
Conclusion
Outdoor pool bathrooms solve real problems while adding value to your property. The best designs balance practical needs with visual appeal.
Start with your biggest pain point. Are there wet floors indoors? Focus on a good rinse station. Need more storage? Build in smart solutions. Want better privacy? Add screens or walls.
Remember that simple often works better than complex. A few quality materials and thoughtful design beat expensive fixtures in a poorly planned space.
Your outdoor bathroom should feel like a natural extension of your pool area. It should handle the mess while looking great. Most importantly, it should make your pool time more enjoyable.
The right design transforms poolside chaos into organized relaxation. Your indoor spaces stay clean. Your outdoor living improves. That’s a win-win worth investing in.
Frequently Asked Questions
How much does an outdoor pool bathroom typically cost?
Costs range from $5,000 for basic open-air designs to $20,000+ for fully enclosed structures with plumbing. Simple shower stalls start around $2,000. Labor costs vary by region and complexity.
Do I need permits for an outdoor pool bathroom?
Most areas require permits for structures with plumbing or electrical work. Check local building codes before starting. Simple shower stalls may not need permits. Contact your local building department for specific requirements.
What’s the best flooring for outdoor pool bathrooms?
Textured porcelain tiles offer the best combination of slip resistance, durability, and style. Avoid smooth surfaces that become slippery when wet. Natural stone is another good option with proper sealing.
Can outdoor pool bathrooms be used year-round?
In warm climates, yes. Cooler areas may need seasonal closing or heating systems. Proper drainage prevents freeze damage in winter. Consider adding radiant floor heating for cold-weather use.
How do I prevent mold and mildew in outdoor bathrooms?
Good ventilation is key. Use exhaust fans, skylights, or cross-ventilation. Choose mold-resistant materials and clean regularly with appropriate products. Regular maintenance prevents costly repairs later.


